(EN) Controls
MINIFEX FEX800 Controls
8 MINIFEX FEX800 9 Quick Start Guide
(2)
(1)
(8)
(3) (4) (5) (6) (7) (9) (10)
(11) (12) (14)(13)
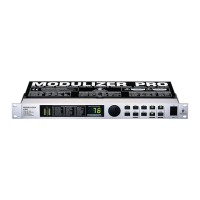
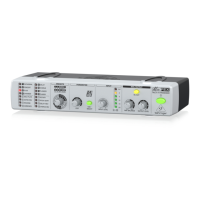
(1) The two LED displays show the eect preset currently selected.
One LED is assigned to each preset.
(2) Use the PRESETS control to select one of the 16 eect presets.
(3) The EDIT control allows you to edit one eect parameter.
Thecenter position corresponds to the default setting
programmed for the preset.
(4) The TAP/SELECT button performs two functions:
• TAP (tempo entry): Hit the button several times in
the tempo of the music piece to adapt the delay time of
presets 9 and 15 or the modulation speed of presets 10-12.
The button starts ashing in the corresponding tempo.
• SELECT (additional eect parameter):
Pressthisbutton to choose between two dierent
eect characteristics when using presets 1-8,
13-14,16. Whenthe button lights up this means that
the corresponding parameter of the selected preset
hasbeenactivated.
(5) Use the INPUT LEVEL control to adjust the input signal level.
Please be sure to set a level that is suciently high but does not
overload the unit.
(6) The L + R LED display is for monitoring the input level.
Itcomprises 6 LEDs. When the CLIP LED lights up, this indicates
that digital distortion may occur at the input of the FEX800.
Inthis case, the input signal level must bereduced.
(7) Use the MIX BALANCE control to adjust the ratio of original
vs.eect signal. Turn the control fully to the right to hear only
the processed eect signal. Turn it fully to the left to hear only
the unprocessed input signal.
(8) The IN/OUT button enables/disables the eect signal.
Thebutton lights up when the input signal is being processed
by the FEX800. In order to hear the processed signal you have
toset a suitable ratio of eect vs. direct signal using the
MIXBALANCE control (7).
(9) Use the OUTPUT LEVEL control to adjust the output level.
(10) The � switch turns your MINIFEX FEX800 on and o. The switch
lights up when the unit is switched on.
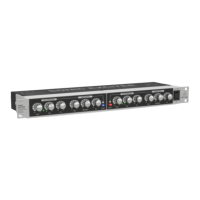
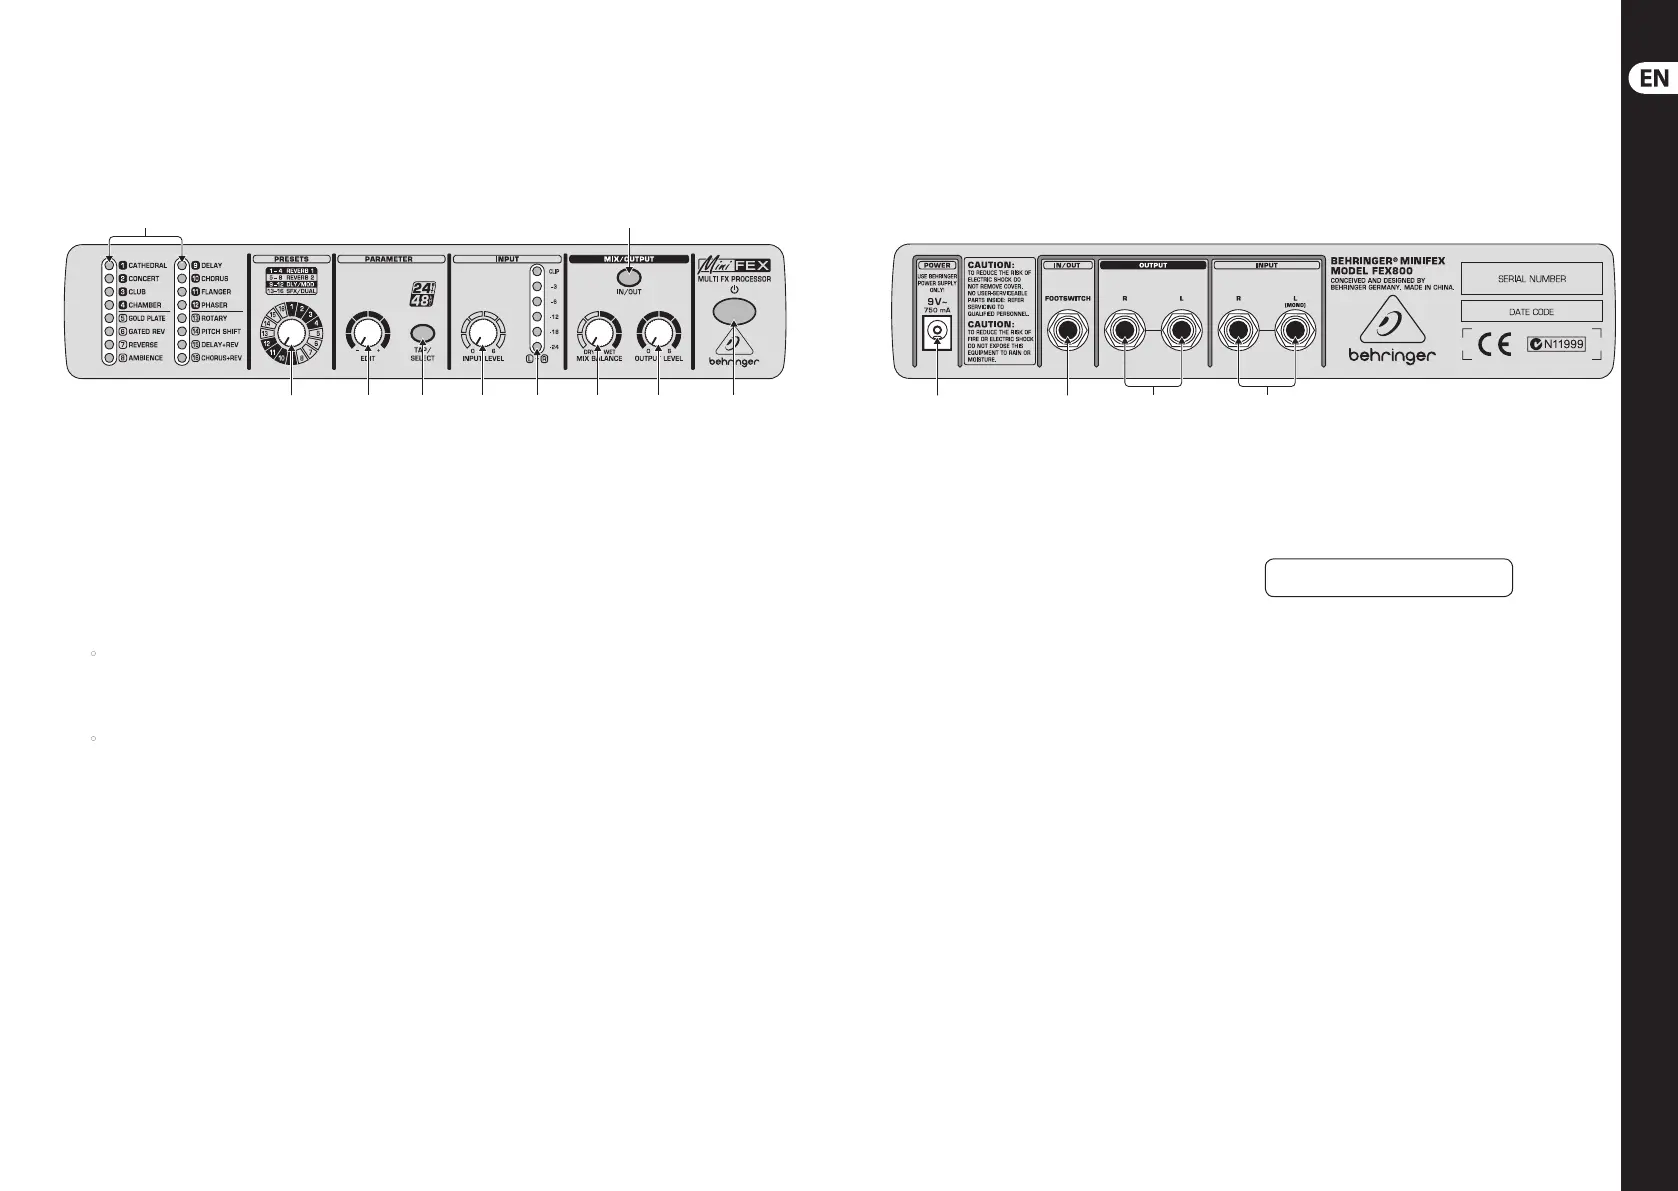
(11) The FEX800 is connected to the mains using a 2-pole
POWERconnector jack. A matching mains adaptor is
includedwith the unit.
(12) A single footswitch can be connected to the IN/OUT connector.
Thisfootswitch allows you to remotely control the IN/OUT
button (8) on the front panel and switch the eect signal
onando.
(13) The two OUTPUT connectors are on ¼" connectors and provide
a balanced left/right signal.
(14) The two INPUT connectors are on ¼" connectors and can be
used for unbalanced signals. A single mono signal should be
connected to the L jack.
Check Out behringer.com for Full Manual
Front panel control elements of the FEX800 Rear panel connectors of the FEX800
 Loading...