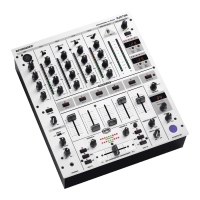
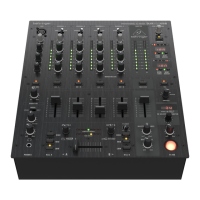
18 19PRO MIXER DJX900USB/DJX750 Quick Start Guide
PRO MIXER DJX900USB/DJX750 Getting started
(EN) Make all the appropriate power,
audio, speaker and USB (DJX900USB)
connections to the mixer.
(ES) Realice todas las conexiones adecuadas
(alimentación, audio, altavoces y USB en el caso del
DJX900USB) en el mezclador.
(FR) Réalisez toutes les connexions au secteur, audio,
USB(DJX900USB) et aux enceintes.
(DE) Stellen sie alle geeigneten Strom-, Audio-,
Lautsprecher- und USB-Verbindungen (DJX900USB)
zum Mischpult her.
(PT) Conecte todas as ligações apropriadas de
energia, Áudio, alto-falante e USB(DJX900USB)
aomixer.
(EN) With the MASTER fader and BOOTH
knob all the way down, turn your
mixeron.
(ES) Con el fader MASTER y el mando BOOTH al
mínimo, encienda el mezclador.
(FR) Placez le Fader MASTER et le bouton BOOTH au
minimum et placez le mélangeur sous tension.
(DE) Schalten Sie ihr Mischpult ein, dabei sollten
der MASTER Fader und der BOOTH Regler auf
Minimumstehen.
(PT) Com o botão giratório BOOTH e o fader MASTER
totalmente para baixo, ligue o mixer.
(EN) Turn on your other equipment and
begin playing audio into the mixer.
(ES) Encienda el resto de dispositivos de
su sistema y comience a hacer pasar alguna señal
audio al mezclador.
(FR) Placez les autres équipements sous tension et
appliquez les signaux audio d'entrée du mélangeur.
(DE) Schalten Sie Ihre restliche Ausrüstung ein und
geben sie ein Audiosignal in die Eingänge.
(PT) Ligue o seu outro equipamento e comece a
reproduzir o Áudio no mixer.
(EN) Raise the MASTER fader and
MONITOR LEVEL knob to desired level.
(ES) Suba el fader MASTER y el mando
MONITOR LEVEL hasta el nivel que quiera.
(FR) Montez le Fader général MASTER et le bouton
MONITOR LEVEL en fonction du niveau d'écoute que
vous souhaitez obtenir.
(DE) Erhöhen Sie den MASTER Fader und den BOOTH
Regler bis zur gewünschten Lautstärke.
(PT) Eleve o botão giratório MONITOR LEVEL e o fader
MASTER no níveldesejado.
(EN) Raise the GAIN knob on each channel
that is receiving a signal so that the
yellow CHANNEL VU METER LEDs light.
Ifthe red CLIP LED lights, lower the GAIN knob.
(ES) Suba el mando GAIN de cada canal que reciba
señal hasta que se iluminen los pilotos amarillos del
MEDIDOR VU DE CANAL. Si se ilumina el piloto rojo
CLIP, disminuya el ajuste el mando GAIN.
(FR) Montez le bouton de GAIN des voies que vous
utilisez de sorte que la Led jaune de l'afFicheur de
niveau devoie s'allume. Si la Led rouge CLIP s'allume,
baissez le GAIN.
(DE) Erhöhen Sie die Eingangslautstärke jedes Kanals,
der ein Signal empfängt mittels des GAIN Knopfes,
bis die gelben KANAL VU-METER LEDs au euchten.
Leuchten die roten CLIP LEDs auf, reduzieren Sie die
Eingangslautstärke mit dem GAIN Knopf.
(PT) Eleve o botão giratório GAIN em cada canal que
esteja recebendo um sinal para que a luz amarela do
LED DO CHANNEL VU METER acenda, se o LED CLIP
acender, abaixe o botão giratório GAIN.
(EN) Step 3: Getting
started
(ES) Paso 3: Puesta en
marcha
(FR) Etape 3 : Mise en
oeuvre
(DE) Schritt 3: Erste
Schritte
(PT) Passo 3: Primeiros
Passos
(EN) Use the ASSIGN A and B knobs to
assign a channel to each side of
theCROSSFADER.
(ES) Use los mandos ASSIGN A y B para asignar un
canal a cada lado del CROSSFADER.
(FR) Utilisez les boutons ASSIGN A et B pour a ecter
une voie à chaque côté du CROSSFADER.
(DE) Verwenden Sie die ASSIGN A und B Drehknöpfe,
um einen Kanal für jede Seite des CROSSFADERS
zubestimmen.
(PT) Utilize os botões giratórios ASSIGNAe B para
designar um canal paracada lado do CROSSFADER.
(EN) Adjust the relative level of each
channel by raising the CHANNEL faders.
(ES) Ajuste el nivel relativo de cada canal
subiendo los distintos faders CHANNEL.
(FR) Réglez le niveau relatif de chaque voie en
montant les Faders de VOIES.
(DE) Stimmen Sie den relativen Pegel jedes Kanals
mit den CHANNEL Fadern ab.
(PT) Ajuste o nível relativo de cada canal elevando os
faders do CHANNEL.
(EN) To preview a channel before adding
it to the main mix, press that channel’s
CUE button. It will become audible in the
headphones without being heard through the
mainspeakers.
(ES) Para hacer una prueba o escucha previa de un
canal antes de añadirlo a la mezcla principal, pulse el
botón CUE de dicho canal. En ese momento pasará a
ser audible a través de los auriculares sin ser enviado
a los altavoces
principales.
(FR) Pour e ectuer une pré-écoute sur une
voie avant de l'ajouter dans le mixage général,
appuyezsur la touche CUE de la voie. Son signal est
alors disponible à l'écoute dans le casque, sansl'avoir
dans le mixage général de sortie.
(DE) Um einen Kanal vorzuhören, drücken Sie
den CUE-Knopf des Kanals. Er wird in den
Kopfhören hörbar sein, nicht jedoch über
dieHauptlautsprecher.
(PT) Para pré-visualizar um canal antes de o adicionar
à mistura principal, pressione o botão CUE do canal.
Estese tornará audível nos fones de ouvido sem ser
ouvido nos alto-falantes principais.
(EN) The tempos (BPM) of the audio
sources selected by ASSIGN knobs A and
B appear in the Beat Counter display.
Pressthe SYNC LOCK button to avoid having the
displayed tempo jump rapidly. You may also press
the BEAT ASSIST button in rhythm with the music to
manually enter the tempo (i.e., “tap tempo”).
(ES) Los tempos (BPM) de las fuentes audio elegidas
con los mandos ASSIGN A y B serán mostrados en
la pantalla del contador de Beats. Pulse el botón
SYNC LOCK para evitar que el tempo mostrado salte
muy rápidamente. También puede pulsar el botón
BEAT ASSIST de forma rítmica con la música para
introducir manualmente el tempo (lo que se suele
llamar "marcación" o “tap tempo”).
(FR) Le tempo (BPM) des sources audio sélectionnées
par les boutons ASSIGN A et B s'a che dans la
zone du compteur Beat Counter. Appuyez sur la
touche SYNC LOCK pour éviter les sauts rapides
de l'a chage du tempo. Vous pouvez également
appuyer sur la touche BEAT ASSIST en rythme avec
la musique pour saisir manuellement le tempo
(fonction appelée “Tap tempo”).
(DE) Die Geschwindigkeiten (BPM) der Audioquellen,
die mit Hilfe der ASSIGN Drehknöpfe A und B
ausgewählt wurden, erscheinen im Beat Counter
Display. Drücken Sie den SYNC LOCK Knopf,
um zu verhindern, dass sich die angezeigte
Geschwindigkeit schnell auf- und abbewegt.
Siekönnen auch den BEAT ASSIST Knopf im
Rhythmus der Musik drücken, um das Tempo
manuell einzugeben (z.B. “Tap-Tempo”).
(PT) Os tempos (BPM) das fontes de áudio
seleccionadas pelos botões giratórios ASSING A e B
aparecem na tela do Beat Counter. Pressione o botão
SYNC LOCK para evitar que o tempo exibido apareça
rapidamente. Poderáainda pressionar o botão BEAT
ASSIST ao ritmo da música
para introduzir o tempo
manualmente (porex: “tap tempo”).
(EN) Once each source has its
respective tempo locked, the TEMPO
DIFFERENCE LEDs will inform you if
the tempos match. The meter will light in the
direction of the source that is faster. When the
green LED lights, the tempos match.
(ES) Una vez que haya sincronizado cada fuente
con su tempo respectivo, los pilotos TEMPO
DIFFERENCE LED le informarán si los tempos
coinciden o no. Elmedidor se iluminará en
la dirección de la fuente que sea más rápida.
Cuando el piloto verde se ilumine, eso indicará
que los tempos coinciden.
(FR) Une fois que le tempo de chaque source
est verrouillé, les Leds TEMPO DIFFERENCE vous
indiquent si les tempos sont synchronisés.
L'a chageva dans la direction de la source
la plus rapide. Lorsque les tempos sont
synchronisés, laLed vertes'allume.
(DE) Sobald für jede Quelle ein jeweiliges
Tempo festgesetzt ist, werden Sie die
TEMPO DIFFERENCE LEDs informieren, ob
die Geschwindigkeiten zueinander passen.
DieAnzeigen leuchten in Richtung der Quelle,
dieschneller ist. Leuchtendie grünen LEDs,
passen die Tempi zueinander.
(PT) Assim que cada fonte tiver o seu respectivo
tempo bloqueado, os LEDS TEMPO DIFFERENCE
irão informá-lo se os tempos coincidem.
Omedidor irá acender-se na direção da fonte que
for mais rápida. Quando o LED verde acender,
ostempos coincidem.
(EN) Even when the tempos match,
thebeats may not be perfectly synced
up between the sources. The TIME
OFFSET LEDs will light in the direction of the
source whose audio is out of sync. When the
green LED lights, theaudio is in sync.
(ES) Incluso aunque los tempo coincidan,
esposible que el ritmo y los tiempos musicales
no estén perfectamente sincronizados entre
las fuentes. Lospilotos TIME OFFSET se
iluminarán en la dirección de la fuente cuyo
audio esté desincronizado. Cuandoel piloto
verde se ilumine, eso indicará que el audio está
perfectamentesincronizado.
 Loading...