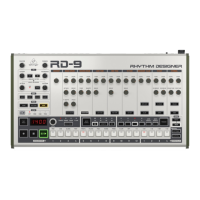
10 RHYTHM DESIGNER RD-8 User Manual
How to copy a pattern:
1. Press COPY.
2. Next select the source song with the pattern you wish to copy.
3. Then press PATTERN.
4. Next select the pattern you wish to copy from the source song via the
step keys.
5. Press COPY.
6. Select destination pattern to copy to via step keys, this copies the source into
this pattern in the current song.
7. Press COPY to execute the operation.
How to quick copy a pattern to other pattern locations:
1. In PATTERN mode, hold copy while pressing the step key you wish to copy
too.
How to copy pages in step mode, copy page 1 (1-16), page 2 (17-32),
page 3 (33-48) or page 4 (49-64) to other pages:
1. In STEP mode, press LENGTH to enter pattern length setting.
2. Select a page using the arrows and press COPY.
3. Select the page you wish to copy to with the arrows then press SAVE.
How to erase a pattern:
1. Press ERASE.
2. The SONG and PATTERN buttons will ash. Press PATTERN.
3. Select the pattern you wish to delete via one of the 16 step keys.
4. Press the now ashing ERASE button to execute the delete process. This is a
permanent process and can’t be undone.
How to dump a pattern:
The DUMP control works in the same way as the SAVE control. Instead of saving,
the DUMP control will output the selection as a SysEx message. This action sends
the pattern/song data as SysEx. This information can be saved and loaded by a
third-party program or sent to another RD-8.
Auto Fill
The Auto Fill function is used to insert ll rhythms into the live play mode of
the RD-8. Fills are created in the same way a pattern is created and stored.
The dierence between Auto Fill and normal pattern playback is that once an
Auto Fill has nished playing, the function will return you to the previously
played pattern unless you have selected a dierent pattern while the Auto Fill
function is active. If a dierent pattern is selected, the new pattern will play after
the Auto Fill pattern has ended.
The Synthapp is an easy way to save song and pattern data. Patterns and Songs
can be imported and exported quickly.
How to use Auto Fill
Once you have programmed the Auto Fill patterns use them by pressing the
AUTO FILL button and selecting one of the 4 ashing Auto Fill step keys.
Tip: 4 or 8 steps are recommended for drum lls, but any size can be used up to
64 steps.
Pattern length
Pattern length can be changed from 1 to 64 steps on a pattern by pattern
basis. This adjustable length can be used to create dierent time signatures.
For example, selecting a pattern length of 12 steps with a step size using 1/16th
will create a 3/4 (waltz style) time signature.
To change the number of steps in a pattern:
1. Press the STEP and RECORD buttons.
2. Press LENGTH.
3. Use the <</>> keys either side of the LENGTH button to choose either 16,
32, 48 or 64 range as the starting point.
4. Press <</>> keys to change to the desired pattern length. For example,
if length 64 is selected, choosing step key 12 will make the pattern 60
steps long.
If you are recording a pattern with more than 16 steps, press the Autoscroll
button in Step Record to alternate between blocks. For example, when recording
a 24 step pattern you will alternate between block one (LED above 16 is lit) with
16 steps and block two (LED above 32 is let) with 8 steps
Pattern
Range
Step
Number
Pattern
Length
Pattern
Range
Step
Number
Pattern
Length
16 1 1 48 1 33
16 2 2 48 2 34
16 3 3 48 3 35
16 4 4 48 4 36
16 5 5 48 5 37
16 6 6 48 6 38
16 7 7 48 7 39
16 8 8 48 8 40
16 9 9 48 9 41
16 10 10 48 10 42
16 11 11 48 11 43
16 12 12 48 12 44
16 13 13 48 13 45
16 14 14 48 14 46
16 15 15 48 15 47
16 16 16 48 16 48
32 1 17 64 1 49
32 2 18 64 2 50
32 3 19 64 3 51
32 4 20 64 4 52
32 5 21 64 5 53
32 6 22 64 6 54
32 7 23 64 7 55
32 8 24 64 8 56
32 9 25 64 9 57
32 10 26 64 10 58
32 11 27 64 11 59
32 12 28 64 12 60
32 13 29 64 13 61
32 14 30 64 14 62
32 15 31 64 15 63
32 16 32 64 16 64