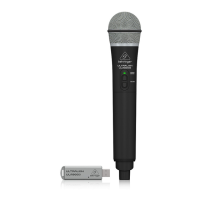
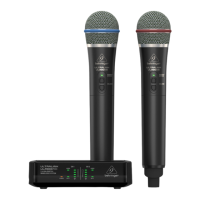
ULM300M Controls
(1)
(3)
(2)
(1) POWER/STATUS LED will light
green when the microphone is
powered on. The LED will ash
when Mute mode is engaged,
and will turn o when the mic is
powered down. The LED will ash
red when the batteries are low
and need to be replaced.
(2) VOLUME UP/DOWN buttons
perf
orm several functions:
• Power – Hold the UP button to turn
the microphone on. While in Mute
mode, hold the DOWN button again
to power the mic o .
Note – if the microphone is left in Mute
mode for 10 minutes, the power will
automatically turn o .
(3) Changing the batteries – With
the mic
rophone powered o ,
unscrew the lower half of the
microphone body to expose the
battery slots. Observing correct
polarity, insert the new batteries
and replace the covering, then
turn the power on again.
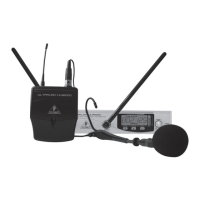
(4) POWER LED lights when the unit
is powered on.
(5) AUDIO LEDs light whenev
er
an
audio signal is received from
the associated microphone.
(6) Connection Meters display
the signal strength of the
wireless connection for
each channel.
(7) BATT(ery) LEDs light green to
indicate a healthy battery, and
light red when the batteries need
to be replaced. They will also
light red when their associate
d
mic
is turned o .
(8) OUTPUTS send the audio signal
via balanced XLR or unbalanced
¼" TS cable.
(9) DC IN socket accepts the
connection of the included
power adapter.
(10) ON/OFF switch powers the unit
on and o .
(8)(8)
(4) (6)
(7)
(5)
(9) (10)
(EN) Step 2: Controls
11Quick Start Guide
10 ULM300M