20
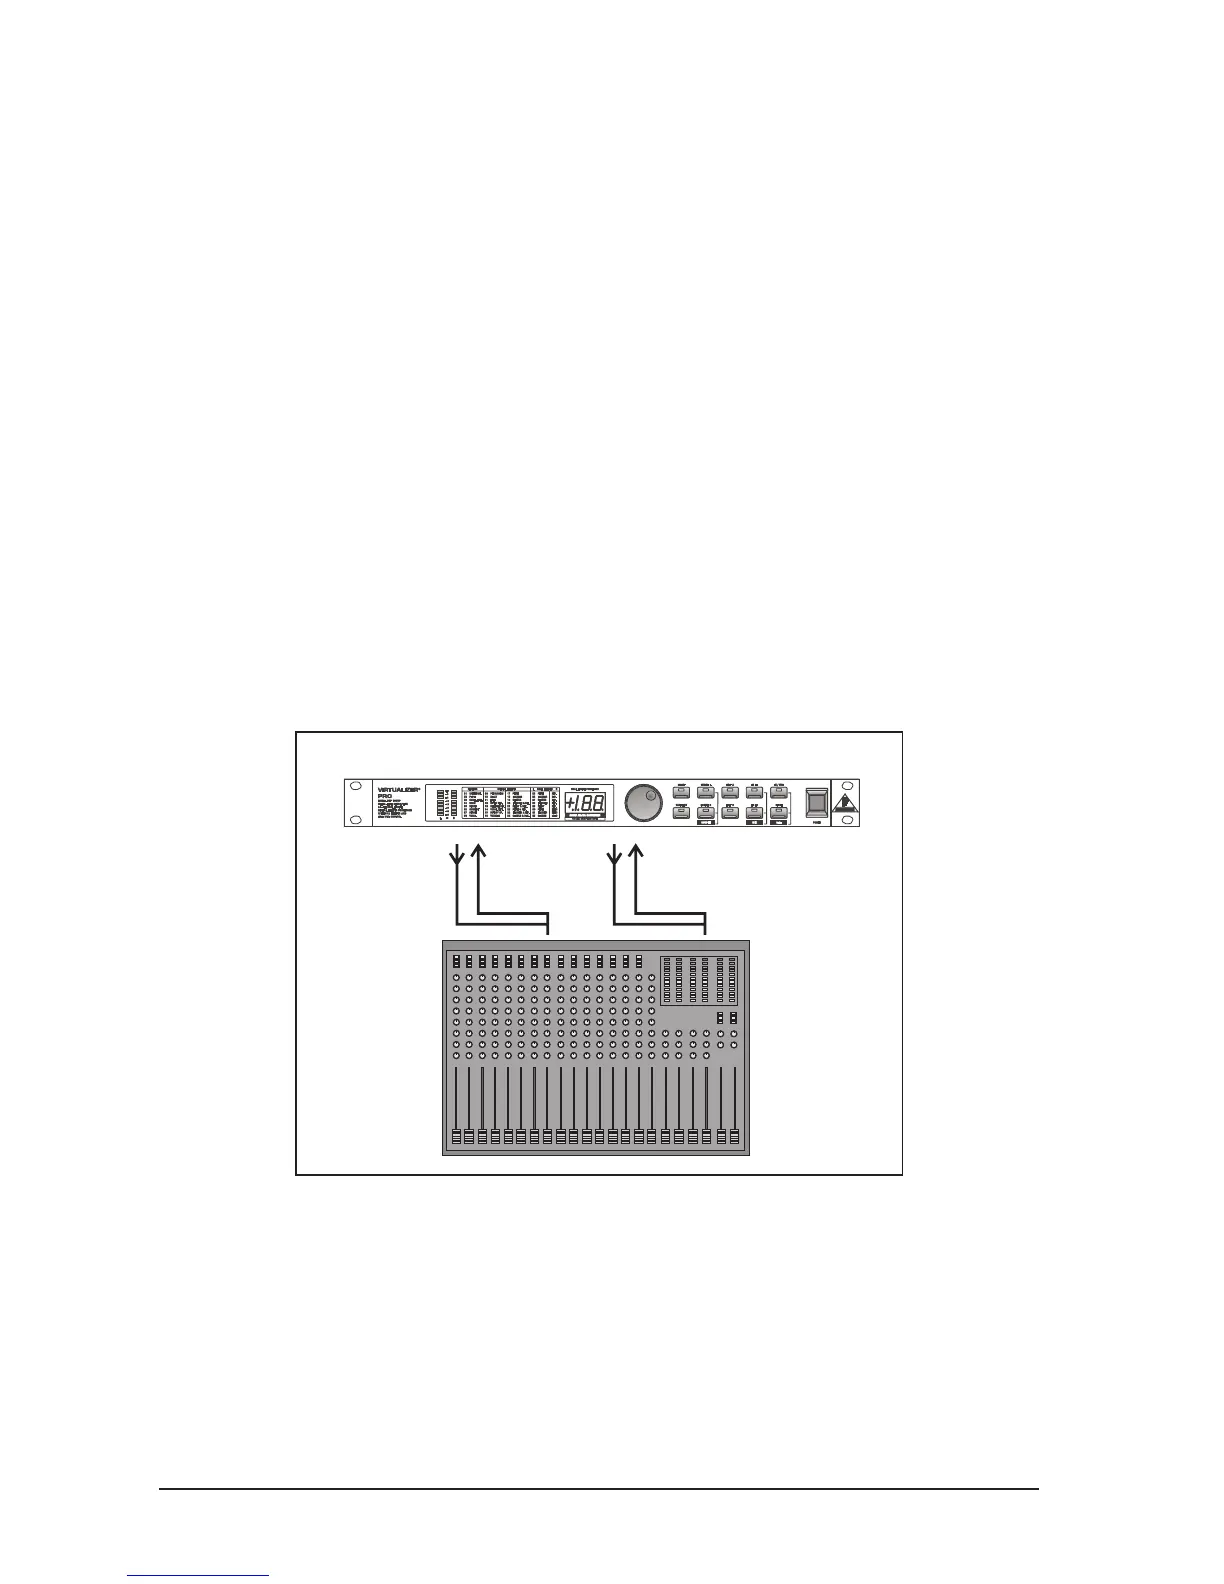
Connect the two Input phone jacks with the Aux Send outputs of the mixing console, and the Output jacks of
the VIRTUALIZERPRO with the Aux Return inputs of the console. If you want to use the BEHRINGER
VIRTUALIZERPRO in mono or dual mode, connect one audio channel (left or right) to one aux bus.
+ Turn down the volume on your amplifier to protect your equipment against damage. All devices
you wish to interconnect should remain switched off until they are wired correctly.
Lets suppose you wish to use the VIRTUALIZERPRO in a live application, interfaced with the F.O.H. mixer,
to enhance the guitar sound with a subtle chorus effect.
s
Connect the VIRTUALIZERPRO to the aux bus of your mixing console (fig. 3.1). Connect the units to the
mains and adjust the operating level(s) if necessary. Switch on the VIRTUALIZERPRO and set the levels
appropriately (see 3.1). Press the Mix combination to make sure that the unit is set to Mix External mode.
Press the EFFECT key and use the jog wheel to select and thus activate the chorus effect (#19). Slowly
turn up the aux bus level until the effect portion added to the guitar signal suits your needs. Subsequently,
you can make all necessary fine-adjustments. We assume that you wish to edit the modulation frequency
of the chorus effect: press the VARIATION key and set the modulation frequency with the jog wheel. To set
the modulation delay, press the EDITA key. The modulation depth of the chorus effect can be set by
pressing the EDITB key. Having edited all parameters as desired, you can save the changes to the
original (or any other) preset.
3.3 Using the VIRTUALIZERPRO in the insert path
Basically, you can also insert the VIRTUALIZERPRO in a channel or subgroup of your mixing console. Use
a dedicated insert cable. Inserting the VIRTUALIZERPRO in a single channel will be useful only if you wish to
process a specific signal (e.g. vocals) with the VIRTUALIZERPRO, or if any other insert facilities of your
mixing console are already in use.
Channel
Insert
Subgroup
Insert
Fig. 3.2: Wiring the VIRTUALIZERPRO in the insert path
With certain special effects, for example the Vocoder effect, it is even more useful to insert the
VIRTUALIZERPRO in a specific channel rather than connecting it to the aux bus. Proceed as follows: the
signal from which you are going to generate the vocoder sound is routed to the left audio channel (e.g.
keyboard sound), while the right audio channel can be used to control and modify this sound. Use a dedi-
cated insert cable to connect the left audio channel with a channel insert on your mixing console (fig. 3.2).
Connect the signal source to be processed with the vocoder effect (e.g. keyboard) to the normal channel
input (XLR/jack). Connect the right audio channel of the VIRTUALIZERPRO with a controller (e.g. a micro-
phone channel direct out). Talk into the microphone to control the keyboard sound with your voice, i.e.
anything you sing or talk into the microphone is reproduced together with the keyboard sound.
3. APPLICATIONS