4) Now peg each of the loops at the bottom of the canvas walls right next to the
corresponding peg in the groundsheet using the medium sized pegs. The closer
you put them the better the seal you’ll get at the end.
TIPS
• Don’t put the pegs through the rubber flap on the bottom of the wall as it
will rip in wind
• Using the groundsheet as a template ensures the tent will be the right
shape when it goes up.
• Always keep the canvas on the groundsheet and off the ground as it helps
to stop it getting dirty.
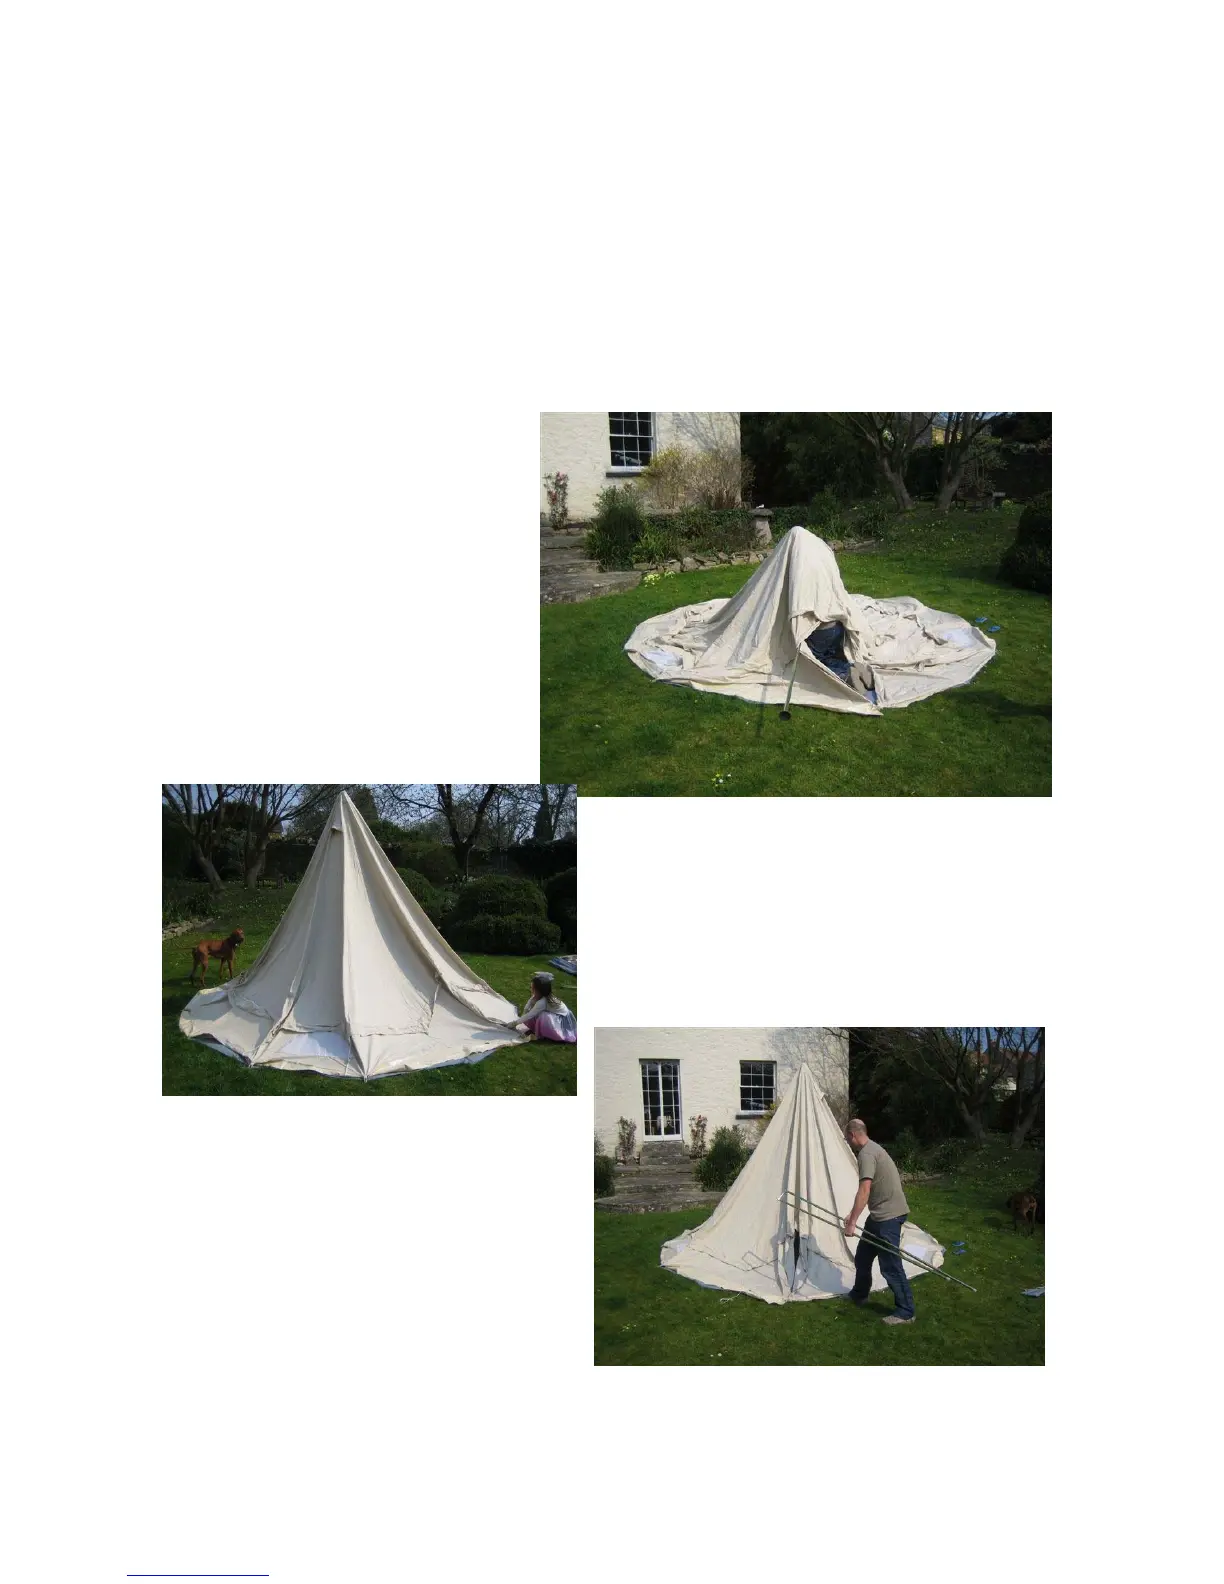
5) Get out the poles and extend
them. Unzip the door and take
the main pole with rubber
stoppers at each en inside the
tent. Find the top/centre of
the tent and match it with end of
the pole. Then pull the
pole in and up so you raise the
roof of the tent. This will be easy
as there is very little tension at
this point.
6) Stand next to the pole and adjust
the bottom to make it as upright as
possible. The pole will stay upright as
there is just enough tension to hold it
vertical.
7) Next take the remainder of the
poles and assemble the A frame but leave
one of the top sections unclipped as
this will make it much easier to get
it through the door(see picture) and
into the tent.
Once inside open the A frame fully
and put the metal spike, which is on
the top of the A frame,
through the matching hole in the
canvas above the door. Now edge the
A frame forward until the legs are just
off the ground sheet and then push them
slightly back against the edge to stop them slipping.
 Loading...