Installation Instructions with baffle fitted
• Do not connect the appliance until properly fixed to the wall and the instructions have read carefully.
• The minimum distances must be observed.
• For installation of the appliance, care must be taken not to damage concealed cables.
• Please be careful while drilling the holes.
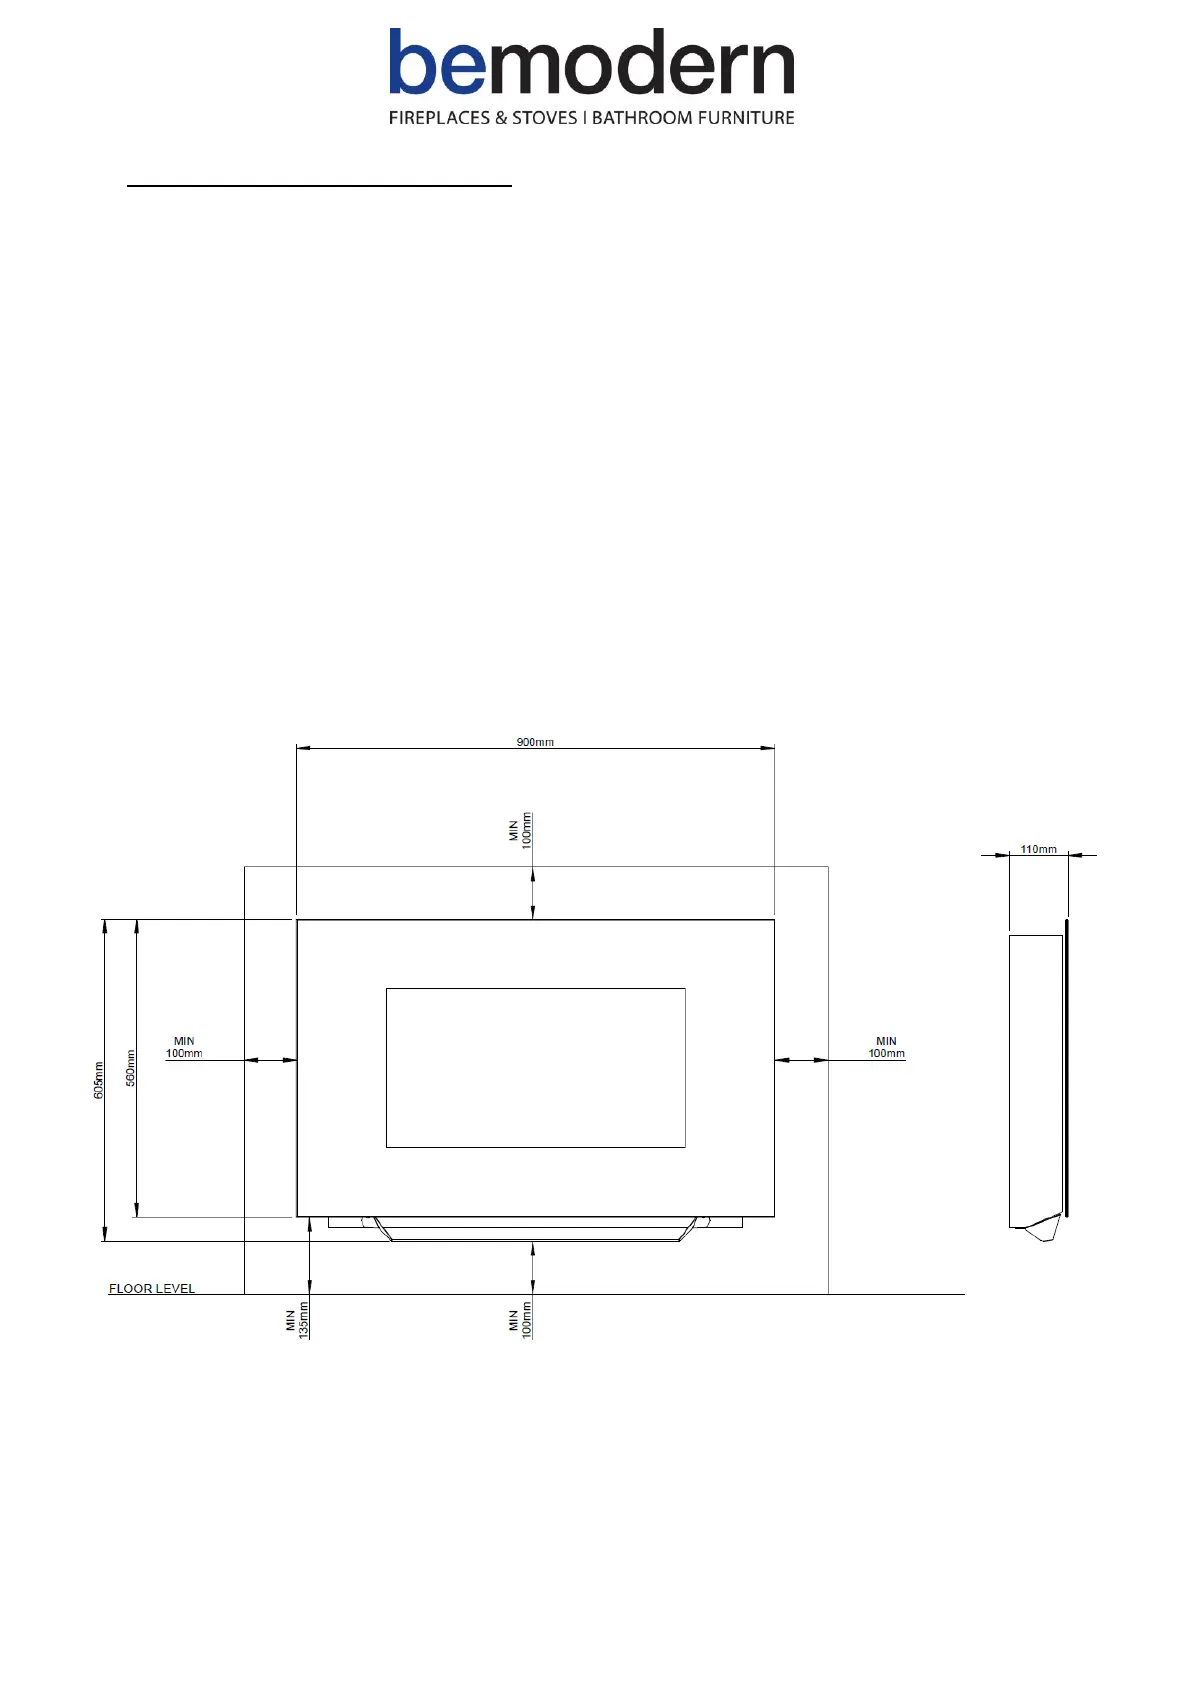
• This appliance is designed to be permanently fixed to a wall at a minimum height of 100mm as below (Fig.1).
The wall bracket must be fitted horizontally and the cable routed to the bottom right of the heater.
• Keep top of heater at a minimum 100mm away from ceiling or other objects for optimum ventilation-see Fig.1.
• Keep left and right side of heater at a minimum 100mm away from wall or other objects for optimum
ventilation-see Fig.1.
• For optimum viewing, mark the top four screw fixing positions on wall in accordance with the recommend fixing
dimensions - see Fig.2. Drill holes with a 6mm drill bit.
• Fix the wall bracket using the wall plugs and screws provided.
• Carefully lift the heater up ensuring that the top rear ledge of heater engages with the wall bracket (see Fig.2
in circle) and is sitting centrally.
• Mark the bottom two hole positions and then remove the heater- see Fig 3.
• Drill wall and fit wall plugs.
• Refit the heater to the wall fixing bracket, use the screws provided to permanently fix the heater in place.
• Unpack the white stones or crystals from the bag and place them along the light unit in the desired position.
Alternatively place the log fuel bed along the light unit.
Place the front glass over the front of the appliance aligning the slots in the brackets at each side of the glass
panel with the lugs on the sides of the heater - see Fig.4.
 Loading...