1/4-20
cross dowel
1/4-20 x 2"
round head bolt
Page 5
Assembly Instructions
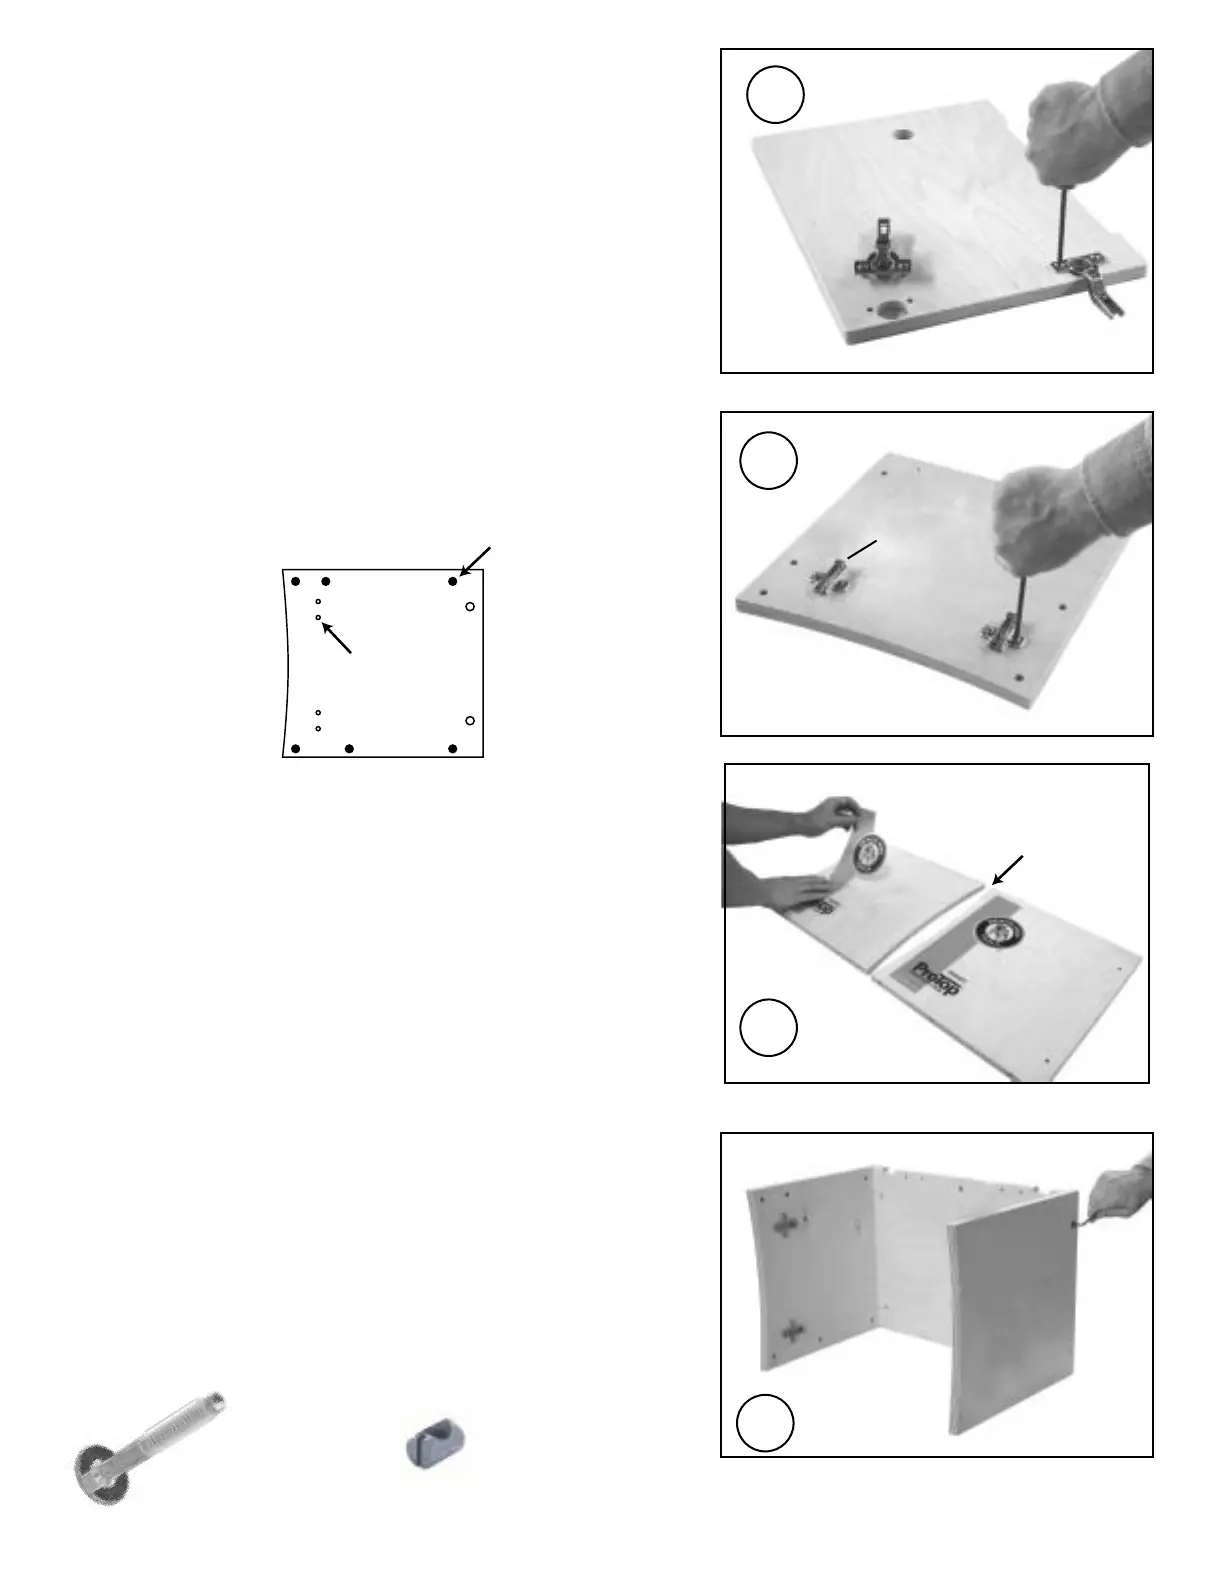
1. Attach the (2) hinges to the door.
Press the hinge "cups" into the large bore in the door. With a
Phillips screwdriver tighten the integral hinge cams clockwise
approximately 1/4 turn. Do not over tighten the cams.
3. Attach side panels to the back panel.
The back panel has two notches that identify the top of the panel,
as shown. The left panel has the hinges. Align the two holes in
side panels with the corresponding holes in the back panel. Use
1/4-20 x 2" round head bolts and 1/4-20 cross dowels. The cross
dowels go in the back panel. Tighten with the included 5/32" hex
wrench. Repeat this step for the right panel. Do not fully tighten the
bolts at this time.
Note: Check that the cross dowel holes are free of debris
prior to inserting the cross dowels.
1
3
2a. Attach the (2) hinge mounting plates to the left side panel.
Carefully study the orientation in Fig. 2. The hinge mounting plates
resemble a cross. Locate the top of the cross nearest the curved
front edge of the left side panel, as shown. On the bottom of the
cross you will find the hinge release lever. All cross dowel holes
are located inside the cabinet.
2a
hinge
plate holes
cross dowel
holes
hinge release
lever here!
2b. Attach the (2) decals to the side panels.
The decals go on the outside of the left and right side panels. The
right side panel decal is positioned near the front curved edge, as
shown. In this photo the person is installing the decal on the left
side panel, about two inches from the back edge. If you find it
easier, attach the decals AFTER your router table is fully
assembled.
right panel
front is curved
on both panels
front edge is curved
on both side panels
left panel
top
LEFT
SIDE PANEL
TOP
CURVED
FRONT EDGE
CROSS DOWEL HOLES ARE
LOCATED INSIDE THE CABINET!
2b
 Loading...