3
5. Plug the 4-pin Deutsch connector into the patch cable.
See Figure 9.
RESTORING THE SMARTIRE
®
TIRE
PRESSURE MONITORING SYSTEM (TPMS)
BY BENDIX CVS CONFIGURATION
1. Connect to the Bendix
®
ACom
®
PRO
™
diagnostic
software.
2. Browse to the Axle Setup screen and congure the
number of axles and tires as per the vehicle conguration.
• If it was possible to back up the previous TPMS
settings, start the same TPMS Backup and Restore
application, but this time, press the Load Settings
button and select the previously saved backup le.
• If it was not possible to back up the previous TPMS
settings, then each tire ID will need to be learned.
Click on a Tire Icon in the ACom PRO diagnostic
software and press the Learn button. Navigate to
the tire to be learned and use the Bendix
®
LF Hand
Tool to activate the sensor. The sensor should be
learned into the ECU. Repeat these steps for all
other tire locations. The other parameters, such as
Cold Ination Pressure (CIP) and warning levels,
will have to be modied to suit the application if the
default values provided are not appropriate.
MOUNTING THE NEW ELECTRONIC CONTROL
UNIT (ECU)
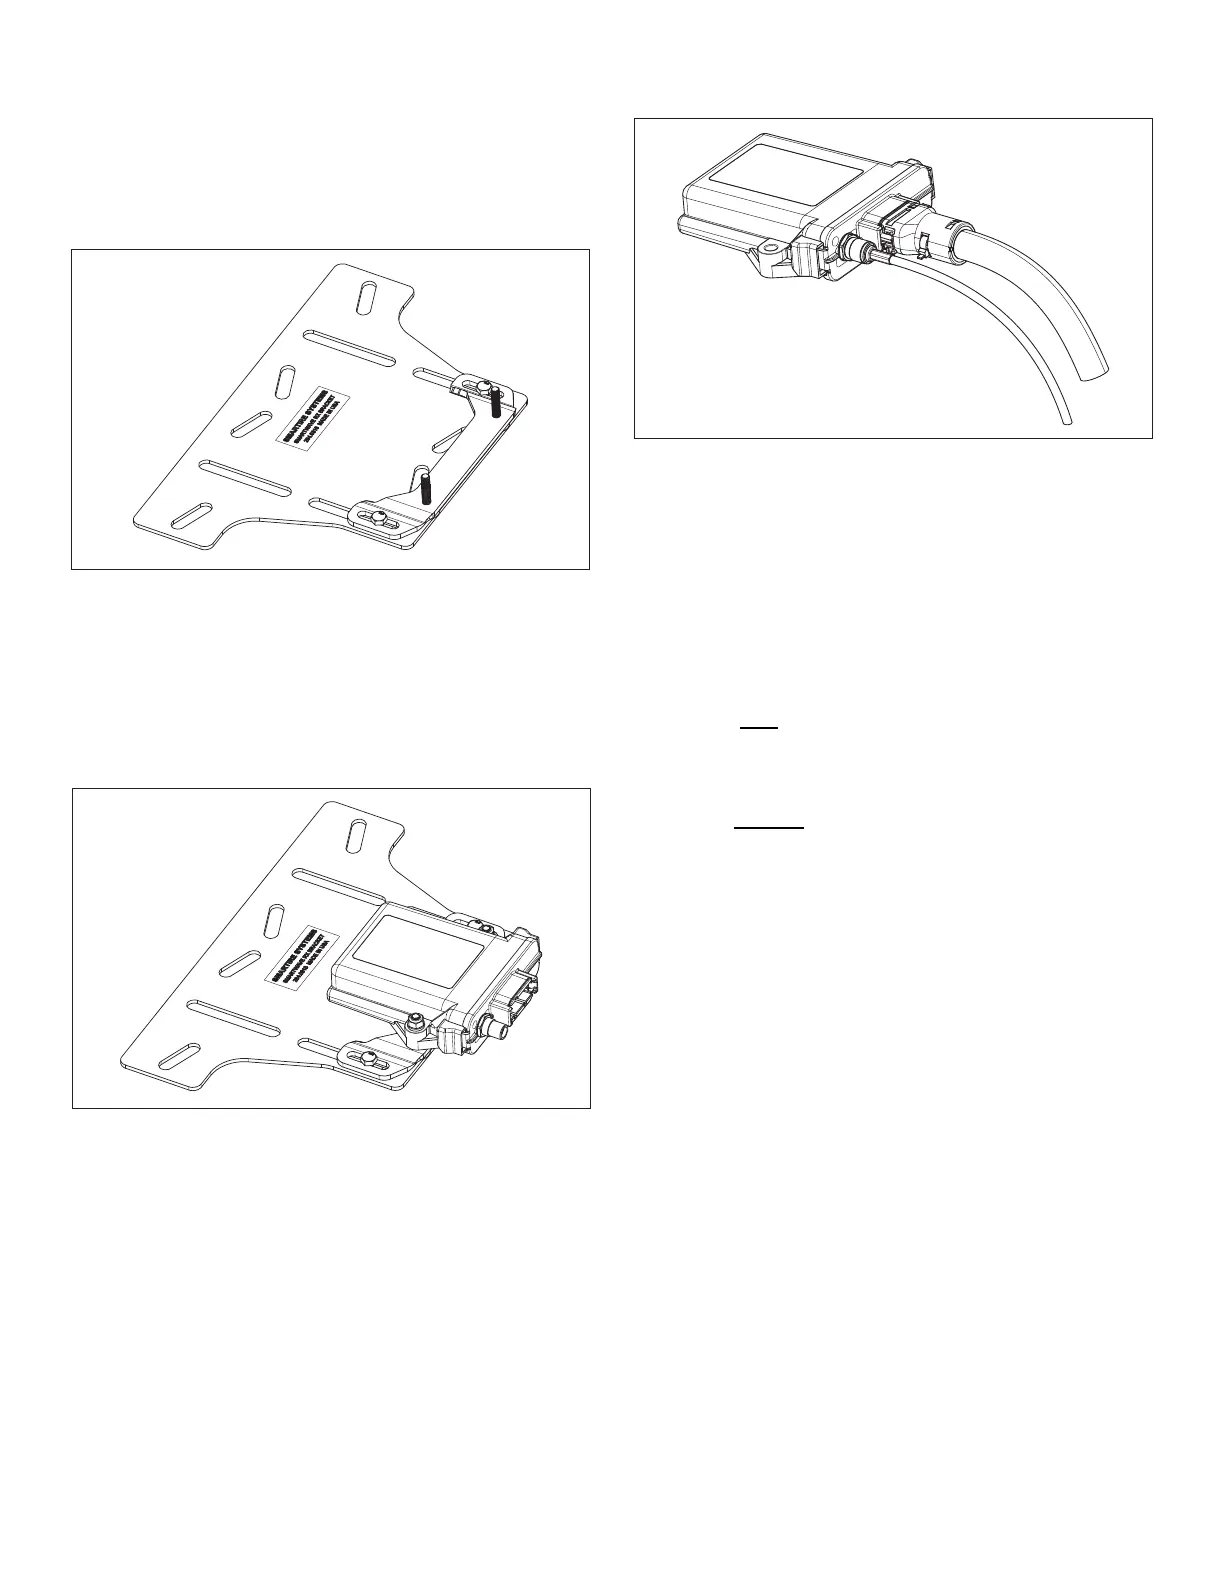
1. Mount the provided adapter bracket in the location where
the original ECU was mounted. The studs should be in
the forward location where the original harness entered
the ECU. Leave the attaching bolts loose. See Figure 7.
2. Mount the new ECU onto the studs of the bracket and
secure the ECU with the supplied washers and nuts.
Slide the bracket on the original plate to optimize the
ECU location. Ensure the ECU is not in contact with
any other components on the vehicle. Then, tighten the
bolts between the adapter plate and the original bracket.
See Figure 8.
3. Reattach the existing antenna connector lead to the
new ECU.
4. Plug the provided patch cable into the front of the new
ECU.
Figure 7 - Adapter Bracket
Figure 8 - Mounting the New ECU on the Bracket
Figure 9 - Connecting the Patch Cable to the New ECU
 Loading...