Laying the foundation plate - Fixing to the floor
x the plate directly to the
systems, normally on the market, steel pressure plu
A) or anchorage with expansion straps (
B) to be inserted using a mallet
he plate as a reference, make 4 holes measurin
10 mm in diameter and fix the plate.
Make sure that the threaded bar projects by at least 25mm as indicated in
rack already installed, possible water sta
o ix the plate in a raised position with respect to the
4 nuts and the relative washers under the plate as indicated in
his case, the pins must pro
heck that the floor is well-levelled and suitable for fixing via plugs.
well-fixed, perfectly levelled and parallel to the leaf
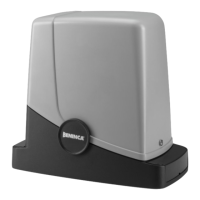
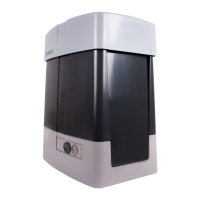
x the motor reducer to the plate, with re
1 - Remove the two screw-cover sumps
ear motor on the plate, makin
sure that the threaded bars enter the holes
the 4 washers R and the 4 bolts D.
- The slots F allow to regulate the distance o
the motor with respect to the lea
Fixing the rack
The rack, appropriately fixed to the leaf, transforms the rotary movement of the
ear
into the linear movement o
ixing the rack, it is necessary to release the gear motor, proceed as
Turn the circular cover by 180°, in a way to view the trian
ular pin.
2 - Insert the release ke
FRD.3 and turn it clockwise until a certain resistance is
3 - The gear is now released and
the measurements indicated in fi
ures 3a and 3b, mark the first drillin
point. Block the rack temporarily, usin
the rack using the screw and the washer as indicated
in
 Loading...