I. HAIR DRYER AND WALL ARM ASSEMBLY
Place the steel ring above the ball bearings on the neck of the wall
arm (diagram 1).
Insert hair dryer head into the neck (diagram 2).
Lubricate the four small ball bearings and insert into the four small
round sockets (diagram 3).
Pull down the steel ring to cover the ball bearings and fasten with
the small screw above the ring (diagram 4).
**DO NOT INSTALL ARM TO THE WALL FIRST AND ATTACH
DRYER AS IT MIGHT CAUSE ARM ADJUSTMENT MALFUNCTION**
3
4
II. ADJUSTING THE NECK
Diagram 5
Diagram 6
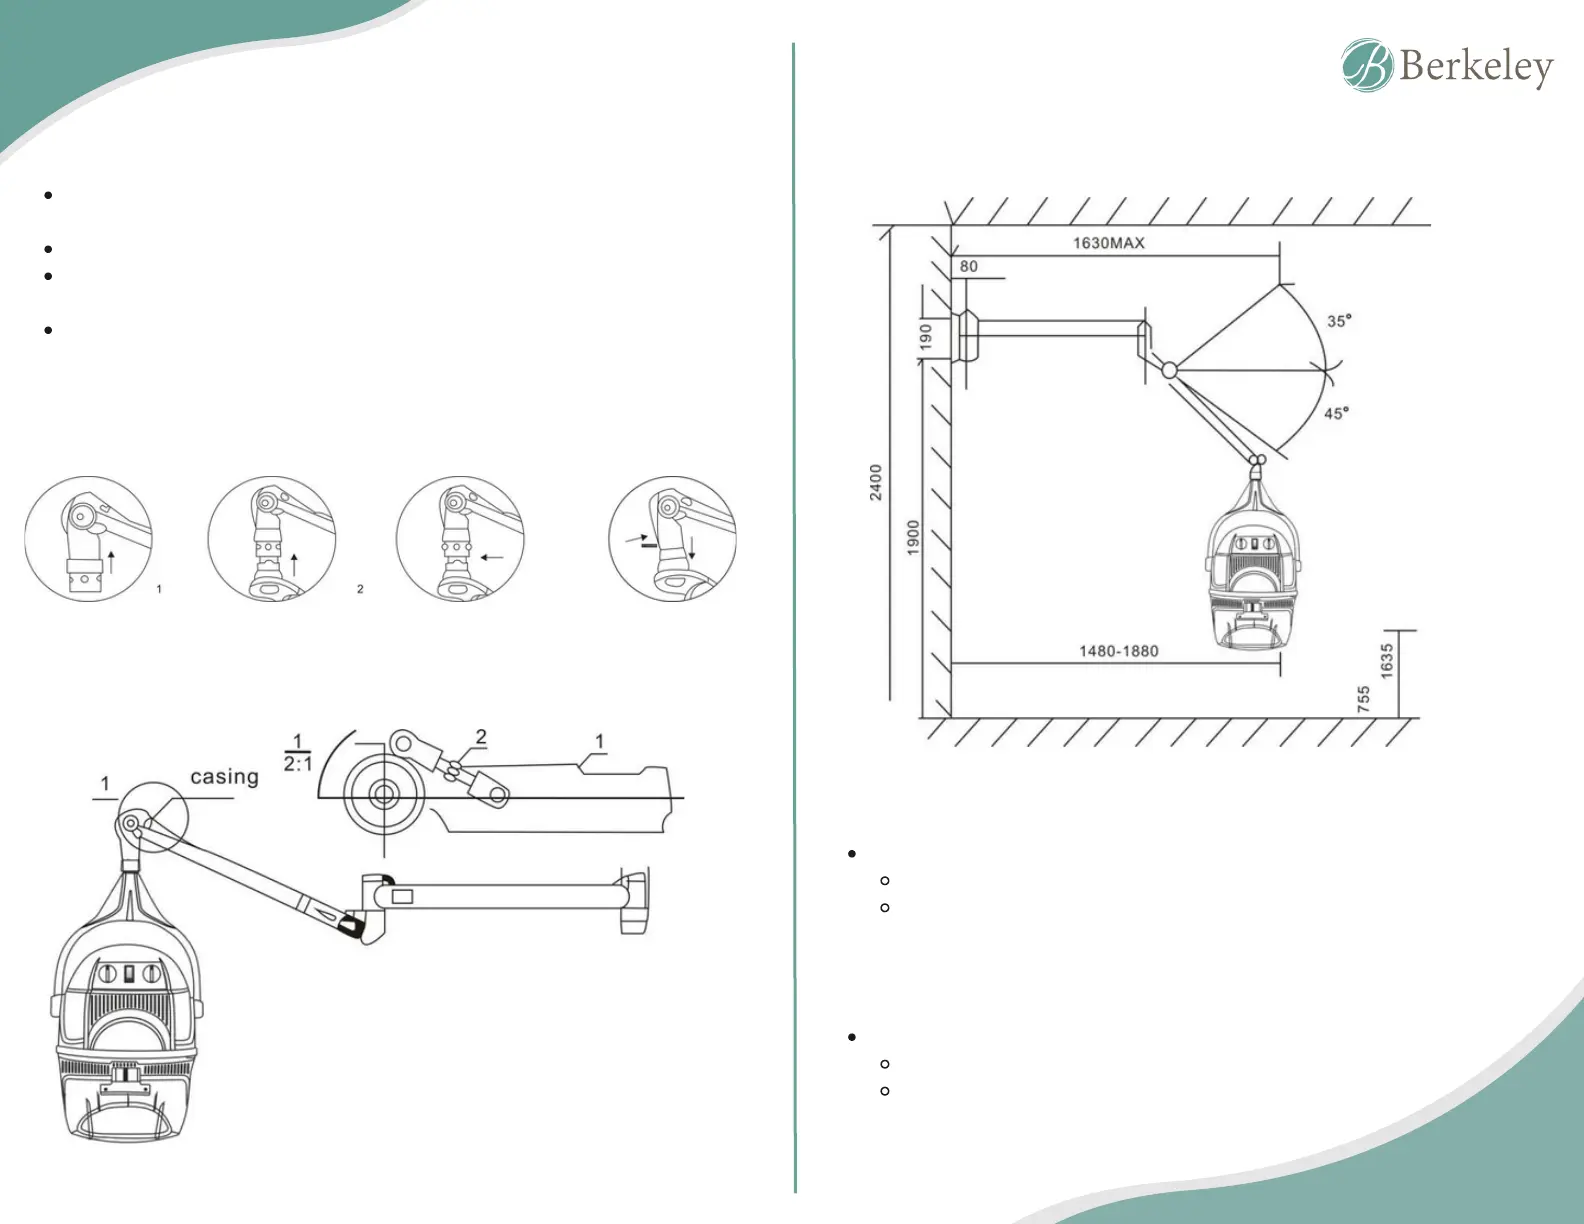
III. NECK’S FITTING MEASUREMENTS
IV. BOUNCE ADJUSTMENT
If the hair dryer gets stuck, adjust the neck’s bounce (diagram 5).
To adjust the bounce, twist off casing screw.
Adjust screw with screwdriver in the neck adjustment slots until
satisfied with location.
V. BALANCE ADJUSTMENT
If hair dryer is not horizontal, an adjustment is recommended
To adjust the balance, twist off the casing screw.
Adjust screw with needle nose pliers until the dryer is
horizontal.