Page 5 of 10
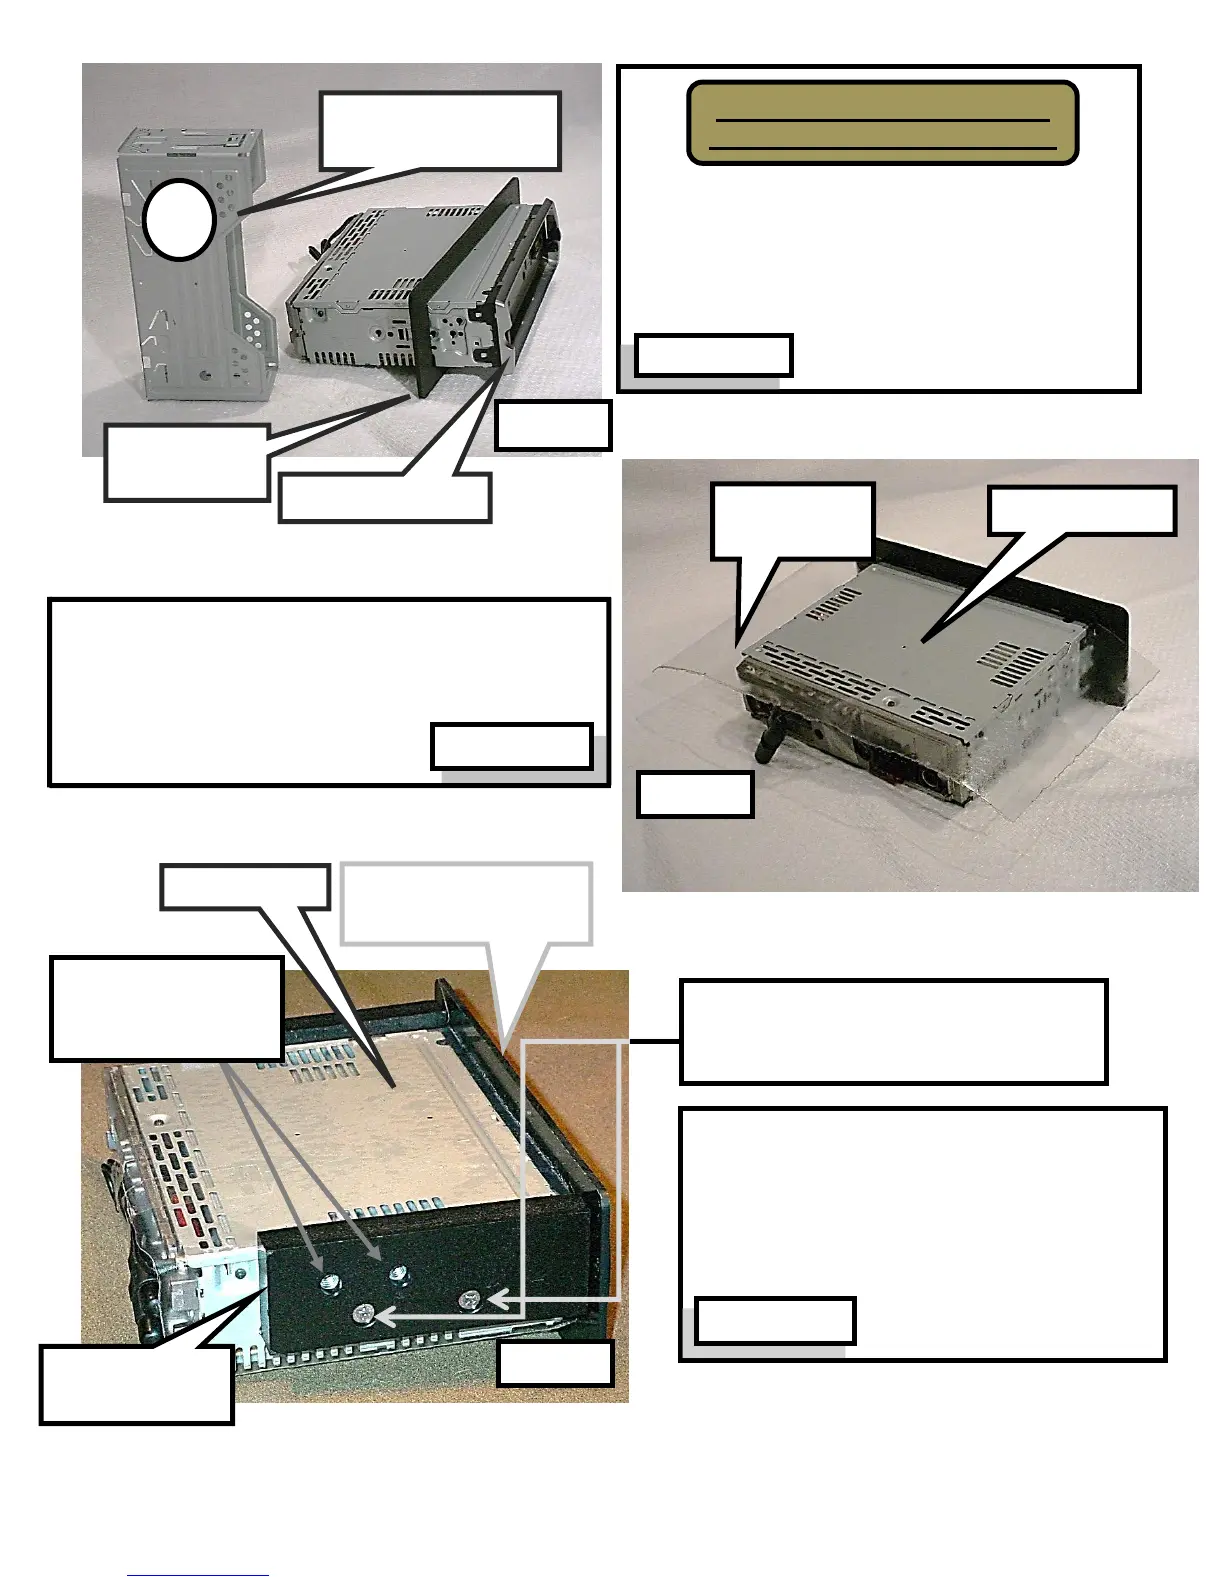
Black bezel plate is shown after it is slid
onto radio from rear and before it is butted
against radio trim ring. Textured side of
bezel plate is installed facing front of radio.
Orientate radio so top is in the up-position.
Position adhesive vinyl on radio top against black
bezel plate. Wrap vinyl sheet on top and down
sides of radio. Trim loose ends that extend below
sides and back of radio.
Attach mounting blocks (left & right) to
radio with supplied Phillip screws. Blocks
should protrude above top of radio. Block
ends should butt against black bezel
plate (small gap is ok).
Phillip screws (2 each side) are
inserted in counter-sunk holes to
secure mounting blocks to radio
Blind nuts for
mounting radio to
fairing brackets
Radio front &
Black bezel plate
Remove radio face from radio
Remove and discard radio cage
Radio Cage -
Remove & discard