E4-WM5-Y432A00 –
EINBAU- UND BEDIENUNGSANLEITUNG
MOUNTING INSTRUCTION AND MANUAL
erstellt am: 14.08.13 E4-WM5-Y432A00_1 Seite 2 von 16 geändert am:
Vor dem Umbau sind folgende Maßnahmen
unbedin
t durchzuführen:
Before installation please observe
the followin
points:
- Lesen Sie die Hinweise auf den folgenden
Seiten aufmerksam durch.
Alle Fahrwerkselemente werden gemäß den
Vorgaben und Richtlinien der
Fahrzeughersteller aus- und eingebaut, sofern
in unserer Einbauanleitung keine davon
abweichenden Maßnahmen beschrieben
werden.
Read all information in this manual carefully.
All suspension components are fitted and
removed acc. to the manufacturer’s
specifications for installing and removal, if
not otherwise required in these instructions.
-
-
Voraussetzung für den Betrieb des BILSTEIN
iRC Systems ist ein bereits vorhandenes BIL-
STEIN ridecontrol-Fahrwerk. Alle Hinweise zur
Installation und zum Einbau des BILSTEIN
ridecontrol-Fahrwerks entnehmen Sie bitte der
mitgelieferten Einbauanleitung Ihres BILSTEIN
ridecontrol-Fahrwerks.
The BILSTEIN iRC system can only be
operated together with the BILSTEIN
ridecontrol suspension. All instructions for
the installation of the BILSTEIN ridecontrol
suspension please find inside the mounting
instruction delivered together with the
BILSTEIN ridecontrol suspension.
-
- Kontrollieren Sie vor Beginn der Umbauarbei-
ten das Produkt auf Vollständigkeit!
Lieferumfang
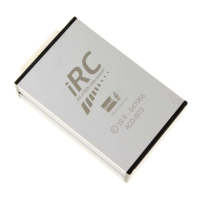
- BILSTEIN iRC Steuergerät
- Kabelbinder
- Befestigungsmaterial
- Bedienungsanleitung
Check the product for all components before
starting installation!
Scope of Delivery
BILSTEIN iRC controler –
tie straps –
fixing material –
manual -
-
-
Entfernen Sie den negativen Batteriepol. Remove the negative battery pole. -
Nach dem Umbau sind folgende Maßnah-
men unbedin
t durchzuführen:
After installation please observe
the followin
points:
-
Den negativen Batteriepol wieder anschließen. Connect the negative battery pole. -
 Loading...