EasyManua.ls Logo

BINBOK HS03-1 - User Manual

BINBOK HS03-1
11 pages
Print Icon
To Next Page IconTo Next Page
Loading...
WelcomeGuide
Wirelesscontroller
HS03-1
Specifications
1.TransmissionMedia:Bluetooth2.1
2.CarrierWave:2.402-2.480GHz
3.Protocol:Bluetooth2.1
4.LED:8LEDLights&8Multi-ColorLEDlights
5.Battery:OneLithiumpolymerbattery3.7V400/mAH
6.Batterylife:2-3hoursafterfullycharged
7.operatingvoltage:3.7V-4.2V
8.chargingvoltage:5V
9.Operatingtemperature:-10℃~50℃
10.storagetemperature:-20℃~70℃
11.Dimensions(approx):7*20*41mm
12.weight(approx):149g
Connection

A.ConventionalConnection
1.Attachingthecontrollerstotheconsolewillconnectthem
automatically.
2.TheJoy-Concontrollerswillremainpairedwhenyoudetach
themfromtheconsole,andyou'llbeabletousethemwirelessly.
ButtonLayout
TurboFunction
Note:TheTbuttonontheleftcontrollercanonlytheassignthe
buttonsthatareontheleftcontroller.SamegoesfortheTbutton
ontherightcontroller.
TurboMode
A:HolddowntheTbuttonandthenpressthebuttonthatyou
wanttosetforthe1sttimetoturnonthenormalturbofunction.
(Controllerwillvibrate.)
B:HolddowntheTbuttonandthenpressthebuttonthatyou
wanttosetforthe2ndtimetoturnontheautomaticturbo
function.(Controllerwillvibrate.)
BBluetoothReconnecting
PresstheHomebuttonortheCapturebuttontoreconnectyour
controllersbacktotheconsole,4LEDindicatorsonthesidewill
starttoflashinaregularpatternasanindicationofreconnecting.
TurnOff
HolddowntheTbuttonandthenpressthebuttonthatyou
havesetforthe3rdtimetoturnoffitsturbofunction.(Controller
willvibrate.)
*HoldtheTbuttonfor5secondstocanceltheTurbofunctionof
allbuttons.
TurboSpeedAdjustment
*Atotalof3turbospeedscanbeadjustedcyclically.
HolddowntheTbuttonandpressthe‒buttonforController(L).
(Controllerwillvibrate.)
HolddowntheTbuttonandpressthe+buttonforController(R).
(Controllerwillvibrate.)
Buttonscanbeset
LeftcontrollerL/ZLbuttonandControlPad(Up/Down/Left/
Right).
RightcontrollerR/ZRbuttonandA/B/X/Ybutton.
VibrationLevelAdjustment
PresstheTbuttonandpushtheJoy-stickupordowntoadjust
thevibrationlevelofeachcontroller.
(Controllerwillvibratewhenadjustingbetweeneachvibration
level.)
[2] [3] [4]
[1]
[6] [7] [8]
1.-button 2.Leftstick
3.Directionalpad 4.Turbobutton
5.Screenshotbutton 6.+button
7.Xbutton 8.Abutton
9.Ybutton 10.Bbutton
11.Rightstick 12.Homebutton
13.Turbobutton 14.Lbutton
15.ZLbutton 16.SLbutton
17.Pairingbutton 18.SRbutton
19.Type-Cinterface 20.ZRbutton
21.Rbutton 22.SRbutton
23.Pairingbutton 24.SLbutton
25.Type-Cinterface
1
2
*Thereare5levelsofVibration100%75%50%30%0%.
(Defaultlevelis50%)
LEDRingSetting

A:NormalMode
HoldtheTbuttonandpressthejoystickoncetoturnthelight
intonormalmodethelightwillkeeponthiscolorandrepeat
thisproceduretochangecolor.Controllerwillvibratewhenset
successfully)
1-8colors:1.Red2.Orange3.Yellow4.Green5.Cyan6.Blue
7.Purple8.Rainbow
BrightnessAdjustment
Press&holdtheTbuttonandjoysticktochangethebrightness,
thenreleasethejoysticktofixthebrightness.Controllerwill
vibratewhensetsuccessfully)
B:BreathingLightMode
HoldtheTbuttonandpressthejoysticktwicetoturnthelight
intobreathinglightmode,thefollowingthreemodeswillbe
cycled.
Controllerwillvibratewhensetsuccessfully)
Mode1:1-7colorautocycling.
Mode2Rainbowlight.
Mode3:Lightoff.
GyroCalibration

1.First,pressandholdthePairingButtontoturnoffthe
controller.
2.Forcontroller(L),presstheL,UPandtheCapturebutton
togethertoenterthecalibrationmode.
Forcontroller(R),presstheR,XandtheHomebuttontogetherto
enterthecalibrationmode.
3.Whenenteringthecalibrationmode,LEDlightswillflash
alternately.Thenalignthecontrollerswiththerailsoneitherside
oftheconsole,andslidethemdownBUTDONOTslidethemto
thebottomoftherail.(Ifyouhearaclickyouneedtopressthe
releasebuttonandslidethemupalittle.)
4.Thenpressthe-buttonforcontroller(L)and+buttonforthe
control(R)tostartthecalibrating.Controllerswillbereconnected
backtotheconsolewhencalibrationisover.
2
1
ChargingInstructions

1.WhenthecontrollersareintheUSBchargingstate,LEDlightswill
flashslowly,ifconnectedtotheconsole,thelightswillstayon
whenitisfullycharged;Ifnot,thelightwillbeoff.
2.Whenthepairingindicationconflictswiththecharginglow
powerindicator,thepairingindicatesaconcern.
Warning

1.Donotexposethecontrollertohightemperature,highhumidity
ordirectsunshine.
2.Donotallowliquidorsmallparticlestoenterthecontroller.
3.Donotputanyheavyobjectonthecontroller.
4.Donotdisassemblethecontroller.
5.Donottwistorpullthecabletoostrongly.
6.Donotthrow,drop,orapplystrongshocktothecontroller.
[5]
DriverPackage

WesupportdownloadingthedriverpackagethroughaUSB
connectiontothecomputertofixsomeproblemsthatmaybe
encounteredinuse.Ifthedriverpackagedoesnotwork,please
contactusbyemail(support@binbok.com).
Driverpackagedownloadwebsite:www.binbok.com
NoteNoneedtodownloaddriverifitcanbeusednormally,
otherwisenewproblemsmayoccurduetoversionconflicts)
UseMethod
1.Turnoffyourcontrollers.
2.PressdownandholdtheLeft(Right)stickthenconnectthemto
yourcomputerandrelease.
3.RuntheDriverpackage.
4.ClicktheUpdateFirmwareonyourcomputer.
LowVoltageAlarm

1.Ifthelithiumbatteryvoltageislowerthan3.45V±0.1V,the
currentchanneltightflashesquicklyandindicatelowvoltage.
2.Ifthelithiumbatteryvoltageislowerthan3.35V±0.1V,itwill
automaticallysleep.
9
10
11
12
5
14 15 20 21
7
6
1
2
3
4
16
17
18
19
22
23
24
25
SL
SR
13
8
SL
SR
3
4
ResetButtonFunction

Whentherearesomeunsolvablefaultsinthecontroller,youcan
trytopressandholdtheresetbuttononthebackofthe
controllerformorethan5seconds.Atthistime,thecontrolleris
poweredoffandreset,andyouneedtoreconnectaccordingto
themethodofconnectingthecontrollerforthefirsttime.
BinbokGame
BusinessContact:contact@binbok.com
@BINBOKOffcial
US:support@binbok.com
EUR:support.eur@binbok.com
OfficialHomepage:binbok.com
Registeronthiswebtoactivateaftersales.
Question and Answer IconNeed help?

Do you have a question about the BINBOK HS03-1 and is the answer not in the manual?

Summary

Button Layout

Specifications

Connection

Conventional Connection

Explains how controllers attach and connect to the console automatically.

Turbo Function

Turbo Mode

Describes how to activate normal and automatic turbo functions by pressing the T button.

Turn Off Turbo

Instructions on how to turn off the turbo function for a specific button or all buttons.

Turbo Speed Adjustment

Explains how to adjust turbo speed using the T button and +/- buttons.

Buttons can be set

Vibration Level Adjustment

LED Ring Setting

Normal Mode

How to set the LED ring to a static color or cycle through colors using the T button.

Brightness Adjustment

Method to adjust the LED ring brightness by pressing and holding the T button and joystick.

Breathing Light Mode

How to cycle through breathing light modes, including color cycling and light off.

Gyro Calibration

Reset Button Function

Driver Package

Use Method

Steps for downloading and updating controller firmware using a USB connection and driver package.

Charging Instructions

Warning

Overview

This document serves as a Welcome Guide for a wireless controller, identified by the model number HS03-1. It provides comprehensive instructions on the controller's layout, connection methods, special functions, and maintenance, ensuring users can effectively operate and troubleshoot the device.

The controller is designed for wireless connectivity, offering a flexible gaming experience. It features a conventional connection method where attaching the controllers to a console automatically pairs them. Once detached, the controllers remain paired, allowing for wireless use. For Bluetooth reconnection, users can press either the Home button or the Capture button, which will cause four LED indicators on the side to flash in a regular pattern, signaling the reconnection process.

A key feature of this controller is its Turbo Function, which enhances gameplay by allowing for rapid input of specific buttons. The T button on the left controller can only assign turbo functionality to buttons located on the left controller, and similarly, the T button on the right controller is restricted to buttons on the right. There are two modes for the Turbo Function:

  • Normal Turbo Function: Activated by holding down the T button and then pressing the desired button for the first time. The controller will vibrate to confirm activation.
  • Automatic Turbo Function: Activated by holding down the T button and then pressing the desired button for the second time. The controller will vibrate to confirm this mode. To turn off the turbo function for a specific button, users must hold down the T button and press that button for the third time. The controller will vibrate upon deactivation. Alternatively, holding the T button for 5 seconds will cancel the Turbo function for all buttons.

The controller also offers Turbo Speed Adjustment, allowing users to cycle through three different turbo speeds. This is achieved by holding down the T button and pressing the minus (-) button for the left controller or the plus (+) button for the right controller. The controller will vibrate to indicate the speed adjustment. The buttons that can be set for turbo functionality include the L/ZL button and the Control Pad (Up/Down/Left/Right) for the left controller, and the R/ZR button and A/B/X/Y buttons for the right controller.

Vibration Level Adjustment is another customizable feature. By pressing the T button and pushing the Joy-stick up or down, users can adjust the vibration level of each controller. The controller will vibrate when adjusting between each of the five available vibration levels: 100%, 75%, 50%, 30%, and 0%, with 50% being the default.

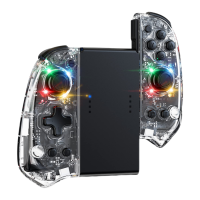
The controller incorporates an LED Ring Setting, providing visual feedback and customization options.

  • Normal Mode: To activate, hold the T button and press the joystick once. The LED light will remain on a specific color. Repeating this procedure changes the color. The controller vibrates upon successful setting. There are eight available colors: Red, Orange, Yellow, Green, Cyan, Blue, Purple, and Rainbow. Brightness adjustment in this mode is done by pressing and holding the T button and the joystick, then releasing the joystick to fix the brightness. The controller vibrates when the brightness is successfully set.
  • Breathing Light Mode: To activate, hold the T button and press the joystick twice. This mode cycles through three distinct light patterns: 1-7 color auto cycling, Rainbow light, and Light off. The controller vibrates when this mode is successfully set.

Gyro Calibration is essential for maintaining accurate motion control. The process involves several steps:

  1. First, press and hold the Pairing Button to turn off the controller.
  2. For the left controller, press the L, UP, and Capture buttons simultaneously to enter calibration mode. For the right controller, press the R, X, and Home buttons simultaneously.
  3. Upon entering calibration mode, LED lights will flash alternately. Users must then align the controllers with the rails on either side of the console and slide them down, but not to the very bottom of the rail. If a click is heard, the release button should be pressed, and the controller slid up slightly.
  4. Finally, press the minus (-) button for the left controller and the plus (+) button for the right controller to start calibration. The controllers will reconnect to the console once calibration is complete.

For troubleshooting, the controller includes a Reset Button Function. If the controller experiences unsolvable faults, users can press and hold the reset button on the back of the controller for more than 5 seconds. This action powers off and resets the controller, requiring reconnection using the initial connection method.

Maintenance features include a Driver Package for fixing potential software issues. Users can download the driver package via a USB connection to a computer from www.binbok.com. If the driver package does not resolve the issue, support can be contacted via email at support@binbok.com. It is advised not to download the driver if the controller functions normally, to avoid potential version conflicts. The update process involves turning off the controllers, pressing and holding the Left (Right) stick while connecting to the computer, releasing the stick, running the Driver package, and clicking "Update Firmware."

The controller also features a Low Voltage Alarm to alert users about battery status. If the lithium battery voltage drops below 3.45V±0.1V, the current channel light will flash quickly, indicating low voltage. If the voltage further drops below 3.35V±0.1V, the controller will automatically enter sleep mode to conserve power.

Charging instructions specify that when the controllers are in USB charging state, LED lights will flash slowly. If connected to the console, the lights will stay on when fully charged; otherwise, the light will turn off. If the pairing indication conflicts with the charging low power indicator, it suggests a potential issue with pairing.

Important warnings are provided to ensure the longevity and safe use of the controller. Users are advised not to expose the controller to high temperatures, high humidity, or direct sunlight. Liquids or small particles should not be allowed to enter the controller. Heavy objects should not be placed on the controller, and it should not be disassembled. Twisting or pulling the cable too strongly is discouraged, as is throwing, dropping, or applying strong shock to the controller.

For further support and information, Binbok Game can be found on social media (@BINBOKOfficial). The official homepage is binbok.com, where users can register to activate aftersales services. Customer support is available via email: support@binbok.com for US customers and support.eur@binbok.com for European customers. Business inquiries can be directed to contact@binbok.com.

BINBOK HS03-1 Specifications

General IconGeneral
TypeWireless Controller
Button LayoutStandard Nintendo Switch Layout
Motion Control6-Axis Gyro Sensor
Playtime8-10 hours
Charging Time2-3 hours
CompatibilityNintendo Switch, PC
ConnectionBluetooth
BatteryBuilt-in Rechargeable Lithium Battery
VibrationDual vibration motors
FeaturesTurbo Function