5
Optical Tube Assembly
We are now ready to assemble the tube section of
the telescope. First unpack the parts required and
set aside.
1. Take Tube Assembly out of box and stand
upright with sitting on the ground.
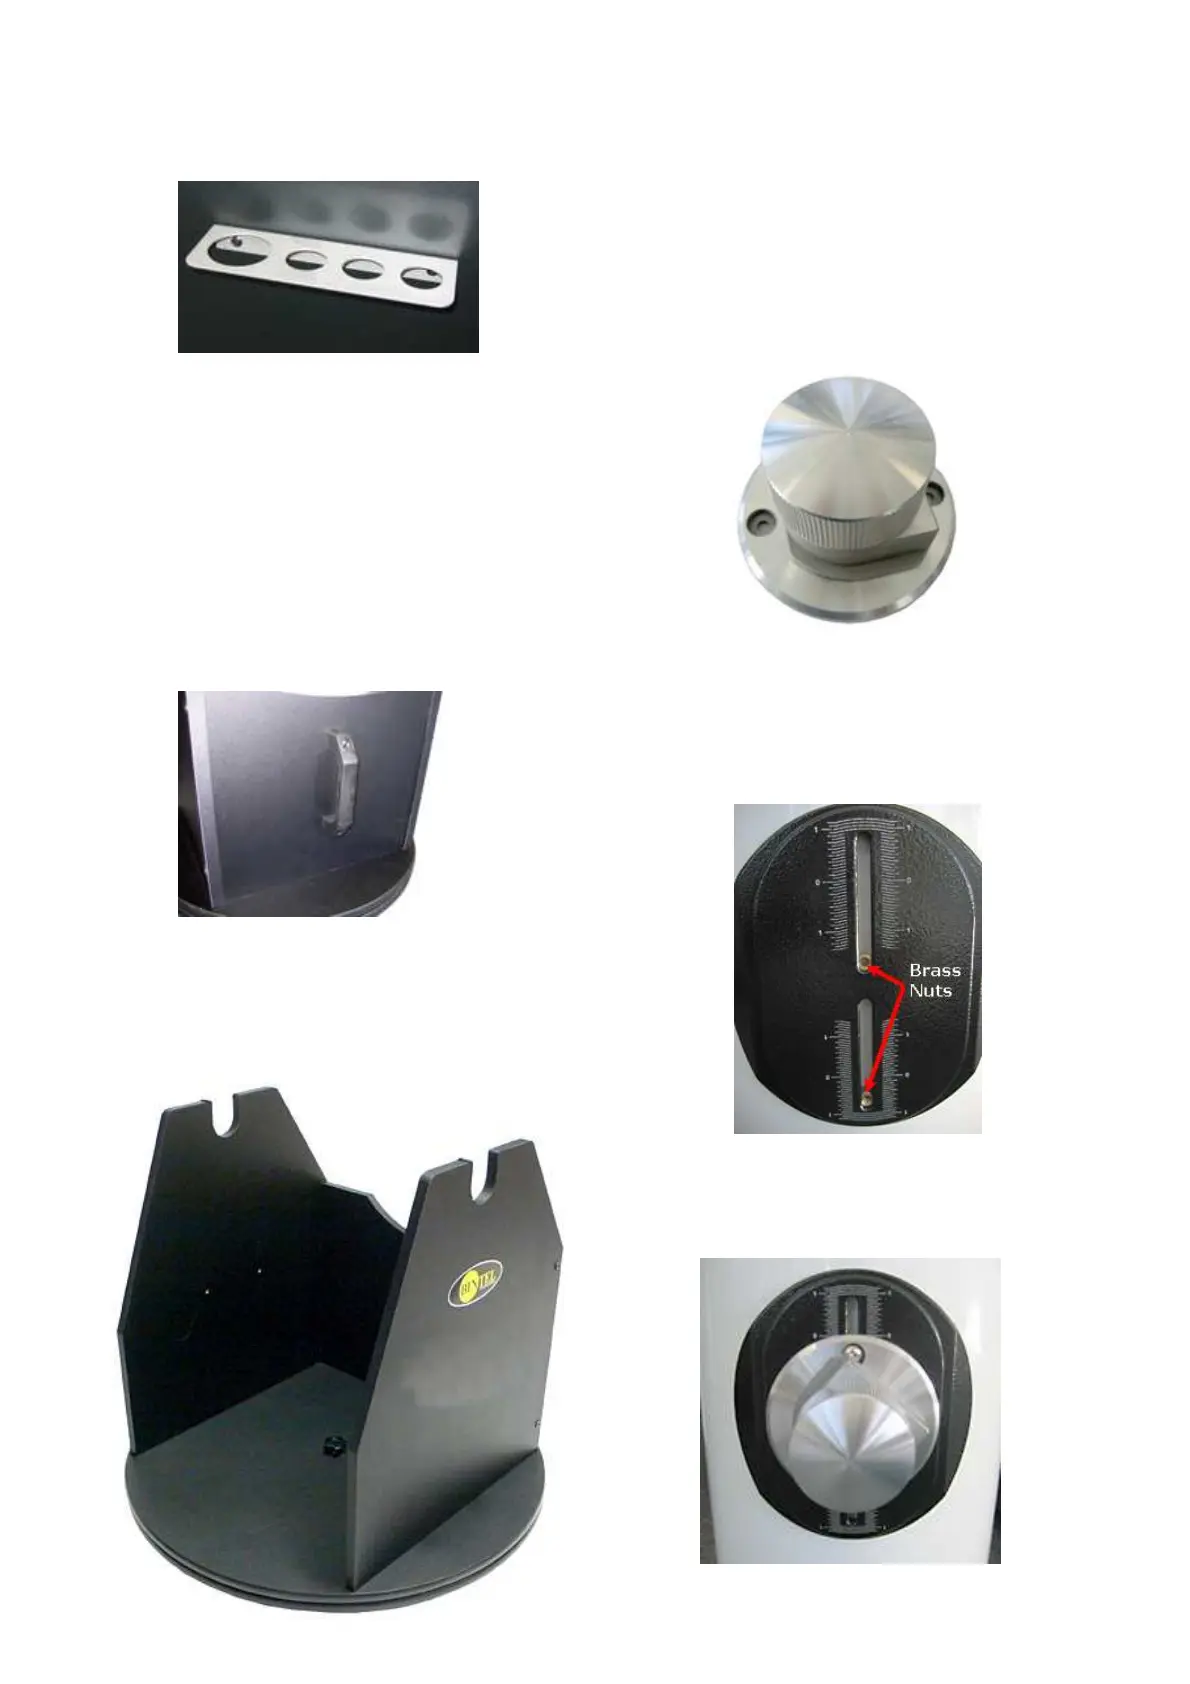
2. The Side Bearing Kit must be installed.
This comes in two brown boxes inside the
Accessories Box. (see image at right)
Altitude Bearing
with built -in Break-
ing Sys- tem
3. With the telescope standing in the upright
position. The side bearing housing is visible and it
contains both a Scale and Two (2) Small Brass Nuts
with Phillips Head Screws protruding from them.
Altitude Bearing
Housing with Brass
Nuts
4. Re- move Phil-
lips Head Screws and place Altitude Bearing in posi-
tion so that the screws will screw into the Brass
Nuts.
Altitude Bearing
Fitted
5. One side panel has 2 small pre-drilled holes for
mounting the Eyepiece Rack. Attach the Eyepiece
Rack with its screws. (see image below)
6. At- tach the
handles to the Front Brace with the socket-head
screws. Insert the screws through the handle and
into the predrilled holes. Fit the nuts at the rear of
the front panel. Tighten the bolts with an Allen
wrench. Note: Be sure that the threaded inserts
are on the inside of the rocker box.
Attach the handle to the front panel with the two
black socket-head screws. Insert the screws through
the handle and into the predrilled holes.
Fit the nuts at the rear of the front panel. Tighten
the bolts with an Allen wrench. (see image below)
\
Front Handle
Your Rocker
Box should
now be complete and look like the image below.
 Loading...