HOT
3.1 3.2 3.4
2.1
2.2
1. COMPONENTES DE CAMPSTOVE 2: 1. Base para la olla. 2. Cámara de combustible. 3.
Cuerpo de la estufa. 4. Módulo de alimentación. 5. Indicador LED de intensidad del
fuego. 6. Indicador LED de velocidad del ventilador. 7 Indicador LED de la fuente de
alimentación. 8. Botón de encendido. 9. USB de carga de salida. 10. MicroUSB de carga
de entrada. 11. Patas plegables. 12. FlexLight USB removible. 13. Cable de carga
MicroUSB.
2. EN CASA: CampStove 2+ cuenta con una batería interna integrada de
3200 mAh
que viene parcialmente cargada para que usted pueda empezar a utilizarlo
inmediatamente. 1. Verifique la carga disponible de la batería presionando el botón
de encendido una vez y el indicador LED de la fuente de alimentación se iluminará. 2.
Si desea comenzar su viaje con una batería completamente cargada, conecte el cable
microUSB incluido en el puerto USB de entrada situado debajo del módulo de
alimentación y conéctelo a una fuente de alimentación. 3. Los LED de la fuente de
alimentación empezarán a parpadear en una secuencia ascendente hasta que toda la
barra sea de color verde, lo que indica que la batería está completamente cargada.
3. ENCENDIDO: "Combustible" se refiere a la biomasa sólida, por ejemplo, palos,
pellets de madera, etc. NUNCA utilizar combustibles líquidos o carbón. 1. Deslice el
módulo de alimentación en el cuerpo de la estufa. 2. Extienda todas las patas
completamente para fijar el módulo de alimentación en su lugar. 3. Coloque el
aparato en una superficie nivelada, lejos de las ramas de los árboles. Limpie todas las
ramas secas del suelo alrededor de la estufa. 4. Coloque combustible pequeño y seco
en la cámara de combustible; comprímalo levemente y asegúrese de que no bloquee
las salidas de aire. 5. Encienda el combustible, usando un fósforo o encendedor largo
y con la ayuda de los encendedores de fuego incluidos. 6. Después de diez segundos,
presione el botón de encendido 2 veces para activar el ventilador en su configuración
de ARRANQUE (esta es la velocidad más baja y ayudará a iniciar el flujo de oxígeno).
Nota: Al pulsar el botón de encendido una vez se activará el indicador de nivel de la
batería. Presiónelo dos veces para acceder al ventilador y controlar el flujo de aire.
Cada pulsación posterior activará una de cuatro velocidades del ventilador: 1
pulsación: Indicador de alimentación encendido y carga de salida activada. 2
pulsaciones: Ventilador encendido; arranque. 3 pulsaciones: Ventilador encendido,
bajo. 4 pulsaciones: Ventilador encendido, medio. 5 pulsaciones: Ventilador
encendido, alto. 6 pulsaciones: Ventilador encendido, modo fogata/arranque
4. COMBUSTIÓN: A medida que se prenda el fuego, agregue trozos más grandes de
combustible seco. En este momento, puede pulsar el botón de encendido para
aumentar el flujo de aire y crear un fuego aún más fuerte. Los LED azules ubicados en
el centro del módulo de alimentación indicarán la velocidad actual del ventilador.
Cuanto más fuerte sea el fuego, el generador termoeléctrico generará más energía.
Cuando la estufa funciona a su máxima capacidad, se la puede llenar con
combustible hasta la parte superior. NO bloquee las salidas de aire en la parte
superior de la cámara de combustible. Si coloca ramas por fuera de la cámara de
combustible, se producirá una combustión incompleta y podría producirse un riesgo
de quemaduras. Combustibles recomendados para obtener los mejores fuegos:
Pellets de madera seguros para los alimentos de BioLite (se venden por separado);
Virutas de ramas muy secas, corteza de abedul.; Ramas grandes secas. Los
combustibles densos y secos producirán un fuego más caliente y duradero (por
ejemplo, roble, arce, abeto, abedul). Nota: Evitar el uso de madera u hojas mojadas o
húmedas. Estas producirán humo y no se quemarán bien.
5. COCINADO: CampStove 2 funciona con KettlePot y BioLite Portable Grill junto con
sus ollas y sartenes existentes. 1. Coloque la olla directamente encima de la base para
la olla. La olla debe colocarse de modo que el mango de la olla esté alineado con el
soporte de la base de modo que se bloqueen las llamas y no se caliente el mango. 2.
Cuando cocine, retire la olla con cuidado para añadir más combustible seco a la
cámara de combustible según sea necesario. 3. Utilice los ajustes de velocidad del
ventilador para controlar la intensidad del fuego para sus necesidades de cocción.
Hervir, saltear y hervir a fuego lento están disponibles. 4. Si utiliza la Portable Grill de
BioLite, asegúrese de haber orientado la parrilla correctamente y NO la coloque al
revés. Esto dañará el módulo de alimentación. NOTA: para evitar daños en el módulo
de alimentación, asegúrese de que nunca esté ubicado de manera que el viento haga
que la llama le alcance. ADVERTENCIA: Tenga mucho cuidado al mover la olla o al
agregar combustible, dado que tanto la olla como su contenido están calientes.
Nunca toque las partes metálicas.
6. CARGA: 1. El indicador LED de la fuente de alimentación muestra la energía
disponible en la batería interna para compartir con los dispositivos externos. Cuando
esta barra esté completamente iluminada, el dispositivo puede proporcionar una
carga completa de teléfono, incluso sin el fuego encendido. 2. Para cargar
dispositivos como teléfonos móviles y linternas LED, conecte el cable de carga de su
dispositivo al puerto USB de carga de salida. Nota: Cuando hay varios LED de la
fuente de alimentación encendidos, es posible cargar dispositivos incluso cuando la
estufa no esté en uso. 3. Cuando el indicador LED de la fuente de alimentación solo
tiene un LED encendido, la CampStove 2 entrará en el modo de baja potencia y dejará
de ofrecer una carga de salida a menos que haya un fuego encendido. Si el fuego
está ardiendo, se cargarán dispositivos externos en ciclos, mediante la generación en
tiempo real a partir del fuego para devolverle carga a la batería. 4. Para garantizar
una carga máxima continua, mantener siempre un fuego fuerte encendido. El
indicador de potencia del fuego se correlaciona directamente con la cantidad de
energía que se produce. Mientras más luces se enciendan, mayor será la generación
de energía. ADVERTENCIA: Mantenga los dispositivos alejados de las llamas y tenga
cuidado cuando los conecte para evitar las partes metálicas calientes de la estufa.
Uso de FlexLight: 1. Para utilizar la FlexLight incluida, conéctela directamente al
puerto USB de carga de salida. 2. Pliéguela en el ángulo deseado y pulse una vez
para encenderla. 3. Para atenuarla, mantenga presionada la parte superior de la
FlexLight con el dedo para alcanzar el brillo deseado
7. APAGADO: 1. Deje que el fuego se apague hasta que quede ceniza fría. Si las brasas
están encendidas, haga un pozo en el suelo y viértalas en él, apague con agua y
cubra con tierra. 2. El módulo de alimentación se apagará automáticamente cuando
no detecta calor. Para apagar manualmente el módulo de alimentación, mantenga
pulsado el botón de encendido durante tres segundos. Después del apagado manual,
es posible que el ventilador se vuelva a encender automáticamente a fin de
mantener el módulo de alimentación protegido del calor residual. 3. Para guardar la
estufa después de que la cámara de combustible se haya enfriado: Pliegue las patas,
retire el módulo de alimentación y deslice el módulo de alimentación en la cámara
de combustible. ADVERTENCIA: Nunca vierta agua en la estufa. Recuerde apagar el
fuego completamente y enterrar las brasas; ¡las brasas encendidas pueden provocar
incendios!
8. LIMPIEZA Y MANTENIMIENTO. Quite el módulo de alimentación del cuerpo de la
estufa y límpielo con un paño húmedo con agua y jabón. NO sumerja en agua ni deje
que se humedezca demasiado. Limpie todas las cenizas del cuerpo de la estufa y
frote con un cepillo con cerdas de nailon. Seque por completo. Mantenga la
CampStove 2 en un lugar fresco, seco y bien ventilado. Evite guardarla en un lugar
con calor excesivo. Manténgala fuera del alcance de los niños.
PELIGRO: RIESGO DE MONÓXIDO DE CARBONO. Esta estufa es SOLO PARA USO EN
EXTERIORES. Nunca la utilice en carpas, vehículos, en interiores o en otros lugares en
los que no haya buena ventilación. La inhalación de monóxido de carbono puede
causar la muerte o daño cerebral. El monóxido de carbono se produce a causa de la
combustión. RIESGO DE EXPLOSIÓN/INCENDIO. Esta estufa fue diseñada solo para
quemar biomasa sólida (por ejemplo, madera, piñas, etc.). NUNCA agregue líquidos,
geles, plásticos u otros aceleradores en la estufa. La estufa se calienta cuando está en
uso y puede encender materiales inflamables que se encuentren demasiado cerca de
la llama. Mantenga los materiales inflamables a al menos 45 cm de los lados y a 120
cm de la parte superior de la estufa. Mantenga a la gasolina y otros líquidos y
vapores inflamables a una buena distancia de la estufa. Limpie la estufa
frecuentemente para evitar que se acumule grasa y se produzcan incendios debido a
esa grasa. Nunca deje la estufa sin supervisión. RIESGO DE QUEMADURAS. Las
superficies metálicas de la estufa estarán calientes cuando la estufa esté funcionando
y presentan un riesgo de quemaduras. Manipule la estufa solo a través del módulo
de alimentación. Las llamas podrían ser grandes. Nunca deje la estufa sin supervisión
mientras la esté usando o esté caliente. No mueva la estufa cuando está encendida.
Manténgala alejada del alcance de los niños. Siempre úsela en una superficie
nivelada. RIESGO DE LA BATERÍA. La batería recargable que se encuentra dentro del
módulo de alimentación podría presentar un riesgo de incendio, explosión, pérdida o
quemaduras químicas si se la manipula incorrectamente. Para evitar estos riesgos,
mantenga el módulo de alimentación seco para impedir la corrosión de la batería.
Mantenga el módulo de alimentación y la batería bien alejados de otras fuentes de
calor. No exponga la batería a golpes físicos, presión o vibración excesivos. NO intente
cambiar la batería usted mismo. Si la batería no se recarga, por favor comuníquese
con BioLite para obtener información de reparación.
INSTRUCTIONS - ENGLISH (EN)
3
4
5
6
7
1 2
3.6
6.5
1.12
1.13
7.3A
7.3B
7.3C
1.1 1.2 1.3
1.4
1.5
1.6
1.7
1.8
1.9
1.10
1.11
10 sec.
2x
2x 3x 4x 5x
1x
5.1
5.3
6.1 6.3
6.2
=
=
1x
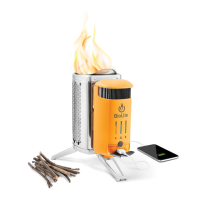
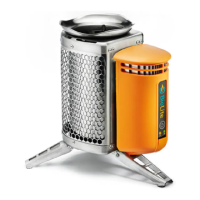
1. CAMPSTOVE 2 COMPONENTS: 1. Pot Stand. 2. Fuel Chamber. 3. Stove Body. 4.
Power Module. 5. Fire Strength LED Indicator. 6. Fan Speed LED Indicator. 7. Power
Supply LED Indicator. 8. Power Button. 9. USB Charge-Out. 10. Micro USB Charge-In.
11. Folding Legs. 12. Detachable USB FlexLight. 13. Micro-USB Charging Cord.
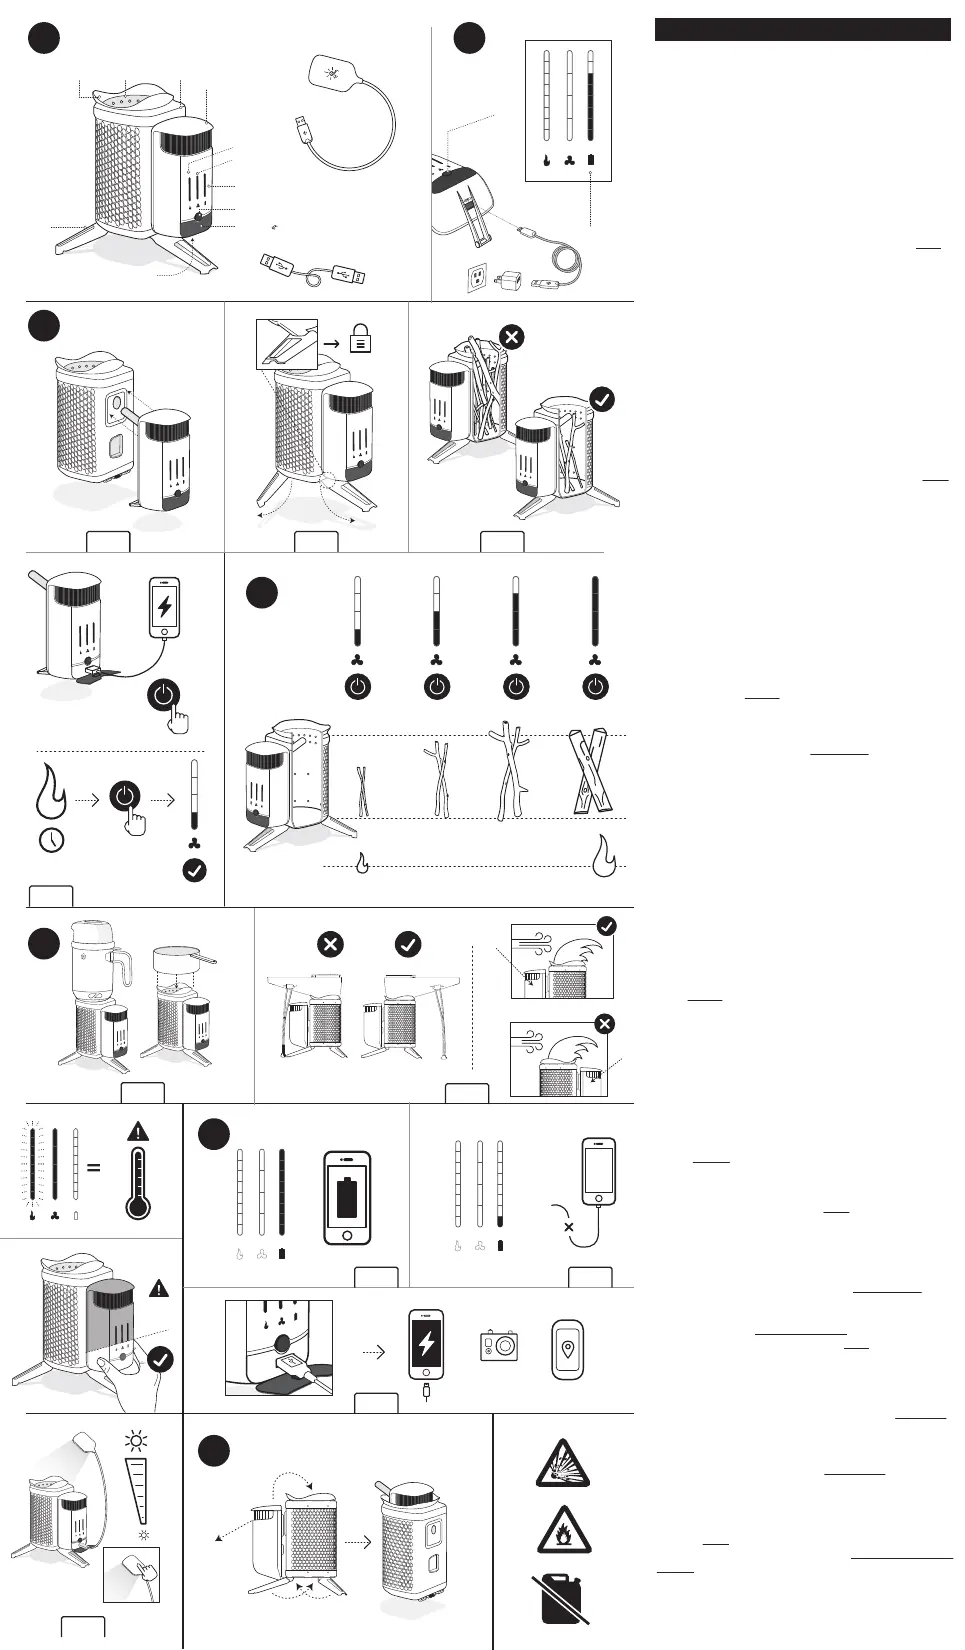
2. AT HOME: The CampStove 2+ features an on-board 3200 mAh internal battery
that comes partially charged so you can begin use immediately. 1. Check the
battery life available by pressing the power button once and the Power Supply LED
indicator will illuminate. 2. If you would like to start your trip with a fully charged
battery, plug the included micro-USB cord into the USB-in port located underneath
the Power Module and connect to a power source. 3. The Power Supply LEDs will
begin to flash upward in sequence until the entire bar is solid green, indicating the
battery is fully charged.
3. START UP: “Fuel” refers to solid biomass, e.g. sticks, wood pellets, etc. NEVER use
liquid fuels or charcoal. 1. Slide Power Module into Stove Body 2. Fully extend all
legs to lock power module into place. 3. Place on level ground away from any
overhanging branches. Clear away dry brush on the ground around the stove. 4.
Place small, dry fuel in Fuel Chamber; pack loosely and do not block air jets. 5. Light
the fuel, using a long match or lighter and with the aid of included firestarters. 6.
After ten seconds, press the Power Button 2x to activate fan on START UP setting
(this is the lowest speed and will help begin oxygen flow). Note: Pushing the Power
Button once will activate the battery level indicator. Push twice to access fan and
control airflow. Each subsequent push will take you through four fan speeds: 1x:
Power Supply Indicator ON & Charge Out Activated. 2x: Fan ON, Start Up. 3x: Fan ON,
Low. 4x: Fan ON, Medium. 5x: Fan ON, Hi. 6x: Fan ON, campfire/startup mode.
4. BURNING: As fire builds, add larger dry fuel. At this point you can push the
Power Button to increase airflow and create an even stronger fire. The blue LEDs
located in the middle of your Power Module will indicate current fan speed. The
stronger the fire, the more power will be generated by the thermoelectric
generator. At peak operation the stove can be packed to the top with fuel. DO NOT
pack beyond air jets at top of Fuel Chamber. Packing sticks beyond fuel chamber
will result in incomplete combustion and may present a burn hazard.
Recommended fuels for best fires: BioLite premium food-safe wood pellets (sold
separately); Tinder - dried twig shavings, birch bark; Kindling - dry twigs. Dry
dense fuels will burn hottest and longest (e.g. oak, maple, fir, birch). Note: Avoid
using wet or damp wood or leaves. These will smoke and burn poorly.
5. COOKING: The CampStove 2+ works with the BioLite KettlePot and Portable Grill
along with your existing pots and pans. 1. Place cookware directly on top of Pot
Stand. If cookware has a handle, align in the direction of the Power Module so
flames are blocked and handle does not overheat. 2. To refuel while cooking,
remove cookware carefully to add dry fuel as needed (for Portable Grill, simply lift
fuel intake lid with heatproof utensil). 3. If using Portable Grill, ensure that grill has
been oriented properly - do NOT place backwards. This will damage the Power
Module. NOTE: To avoid damage to the Power Module, ensure that it is never
downwind of the flame. WARNING: Exercise extreme caution when moving pot or
adding fuel as pot and its contents are hot. Never touch metal parts of the
CampStove 2 when in use. If required to move CampStove 2, only touch the lower
section of the plastic Power Module by power button area. Do NOT touch upper
portion as this may present a burn hazard. OVERHEAT MODE: CampStove 2 contains
an automatic warning mechanism when device is at risk of overheating. In this rare
case, all heat LEDs will begin to flash; stop refueling immediately and allow system
to cool down. If LED begins to flash rapidly, system will deactivate fan so fire cannot
burn as hot. When system cools sufficiently, fan access will re-engage.
6. CHARGING: 1. The Power Supply LED Indicator shows how much power is
available in the internal battery to share out to external devices. When this bar is
fully lit, it is capable of providing one full phone charge, even without the fire
running. 2. To charge devices such as mobile phones and LED lights, attach your
device’s charging cable to the USB Charge Out Port. Note: when multiple Power
Supply LEDs are lit, you may charge devices even when stove is not in use. 3. When
Power Supply LED Indicator has only one LED lit, CampStove 2+ will enter Low
Power Mode and will stop offering a charge-out unless a fire is running. If fire is
burning, it will charge external devices in cycles, using real-time generation from
the fire to return power to the battery. 4. To ensure maximum continuous charging,
always keep a strong fire going. The Fire Strength Indicator directly correlates to
the amount of power being produced. The more lights lit, the more power is being
created. WARNING: Keep devices away from flames and use caution when plugging
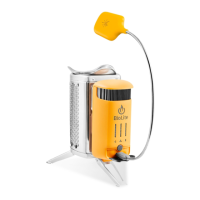
in to avoid hot metal parts of stove. FlexLight Use: 5. To use included FlexLight, plug
directly into USB Charge Out Port. Bend to desired angle and tap once to turn on. To
dim, press and hold top of FlexLight with finger to reach desired brightness.
7. SHUT DOWN: 1. Allow fire to burn down to cold ash. For live embers, pour into a
dugout hole, extinguish with water, and cover with dirt. 2. The Power Module will
automatically turn off when no heat is detected. To manually turn the Power
Module off, press and hold the Power Button for three seconds. After manual turn
off, the fan may automatically turn back on to keep the Power Module protected
from the residual heat. 3. To store the stove after the Fuel Chamber is full cooled:
Fold legs down, remove Power Module, and slide Power Module into the Fuel
Chamber. WARNING: Never pour water into the stove. Remember to extinguish fully
and bury embers – live embers can start fires!
8. CLEANING & MAINTENANCE: Remove Power Module from stove body and wipe
down with a damp cloth with soap and water. DO NOT submerge in water or allow
to get excessively wet. Clean out all ash from stove body and scrub with nylon
brush. Dry thoroughly. Keep CampStove 2+ in a cool, dry, and well-ventilated place.
Avoid storage in excessive heat. Keep out of reach of children.
DANGER: CARBON MONOXIDE HAZARD. This stove is for OUTDOOR USE ONLY. Never
for use in tents, vehicles, indoors, or other places without fresh air. Carbon
Monoxide inhalation can cause death or brain damage. Carbon Monoxide (CO) is
produced when fuel burns. EXPLOSION - FIRE HAZARD. This stove is intended to
burn solid biomass (e.g. wood, pinecones, etc) only. NEVER add liquids, gels,
plastics, or other accelerants into stove This stove is hot during use and can ignite
flammable materials too close to the flame. Keep flammable materials at least 18
inches from the sides and 48 inches from the top of the stove. Keep gasoline and
other flammable liquids and vapors well away from the stove. Clean stove
frequently to avoid grease accumulation and possible grease fires. BURN HAZARD.
Metal surfaces on stove will be hot when stove is operating and present a burn
hazard. Handle stove by Power Module only. Flames may be large. Never leave
stove unattended when hot or in use. Do not move stove while lit. Keep out of
reach of children. Always use on level ground. BATTERY HAZARD. The rechargeable
battery inside the Power Module may present a risk of fire, explosion, leakage or
chemical burn if mishandled. To prevent hazards, keep power module dry to
preclude corrosion of the battery. Keep Power Module and battery well away from
other heat sources. Do not expose the battery to excessive physical shock, pressure,
or vibration. DO NOT attempt to change the battery yourself. If the battery does not
recharge, please contact BioLite for repair information. CALIFORNIA PROPOSITION 65
WARNING: Burning wood stove fuels such as natural firewood results in the
emission of carbon monoxide, soot and other combustion by-products which are
known by the State of California to cause cancer, birth defects, or reproductive
harm.
 Loading...