 Loading...
Do you have a question about the Biostar A520MH and is the answer not in the manual?
| Processor socket | - |
|---|---|
| Processor manufacturer | AMD |
| Compatible processor series | AMD Ryzen™ 3 |
| Component for | PC |
| Motherboard chipset | AMD A520 |
| Audio output channels | 7.1 channels |
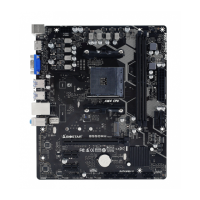
| Motherboard form factor | micro ATX |
| Memory slots type | DIMM |
| Number of memory slots | 2 |
| Supported memory types | DDR4-SDRAM |
| Maximum internal memory | - GB |
| Supported memory clock speeds | 1866, 2133, 2400, 2667, 2933, 3200, 3600, 3800, 4000, 4400, 4600, 4800 MHz |
| Wi-Fi | No |
| Ethernet LAN | Yes |
| LAN controller | Realtek RTL8111H |
| USB 2.0 ports quantity | USB 2.0 ports have a data transmission speed of 480 Mbps, and are backwards compatible with USB 1.1 ports. You can connect all kinds of peripheral devices to them. |
| USB 3.2 Gen 1 (3.1 Gen 1) Type-A ports quantity | 4 |
| USB 3.2 Gen 1 (3.1 Gen 1) Type-C ports quantity | 0 |
| Harmonized System (HS) code | 84733020 |
| Depth | 208 mm |
|---|---|
| Width | 244 mm |