6
4.2 Mounting the shaft seal
• Oil the sliding ring, O-rings and
shaft with clean refrig eration oil.
However, do not oil the flat gas ket
or flange surface!
Mounting the rotating unit
• Slide the rotat ing unit on to the
shaft with a light turn ing mo tion.
The drive pin must there by lock
in into the respective slot.
• Slide the rotat ing unit until it sits
against the shoul der on the shaft.
Mounting the stationary unit
• Lightly oil the sliding face of the
stationary unit .
• Push the stationary unit into the
seal ing cover .
• Push com plete sta tion ary unit with
flat gas ket over the shaft. The gap
between the crank case flange and
the sealing cover should be approx.
5 mm (contact to the re laxed
spring).
4.2 Monter la garniture d'étanchéitê
• Enduire la bague de glis sement, les
joints annulaires et l'arbre avec de
l'huile pro pre pour com pres seur frigori -
fique. Mais ne pas endui re d'huile le
joint plat et la surface de la bride!
Monter l'unité tournante
• Glisser l'unité tour nan te sur l'arbre
dans un léger mou ve ment rota tif. La
goupille d'entraînement doit enclen-
cher dans la rai nu re prévue.
• Pous ser l'unité tour nan te jusqu'à l'arrêt
contre le col let de l'arbre.
Monter l'unité statique
• Enduire légèrement d'huile la surface
de glissement de l'unité statique .
• Glisser l'unité statique dans le cou ver -
cle de fermeture .
• Glisser l'unité sta ti que com plè te avec
le joint plat sur l'arbre. L'écart entre le
flas que du car ter et le cou ver cle
devrait être de l'ordre de 5 mm envi ron
(contact au res sort relâché).
4.2 Wellenabdichtung einbauen
• Gleitring, O-Ringe und Welle mit
sau berem Kälte ma schi nen öl ein -
ölen. Flachdichtung und Flansch -
fläche jedoch nicht einölen!
Rotierende Einheit einbauen
• Rotierende Einheit unter leich-
tem Drehen auf die Welle schie-
ben. Dabei muss der Mit neh mer stift
in die dafür vorgesehene Nut
einrasten.
• Die rotierende Einheit bis auf
Anschlag gegen den Wellen bund
drücken.
Statische Einheit einbauen
• Gleitfläche der statischen Einheit
leicht einölen.
• Statische Einheit in den Ab schluss -
deckel schieben.
• Komplette statische Einheit mit
Flachdichtung auf die Welle schie-
ben. Der Abstand zwischen Ge häu -
se flansch und Ab schlussde ckel
sollte bei ca. 5 mm liegen (An lage
an die entspannte Feder).
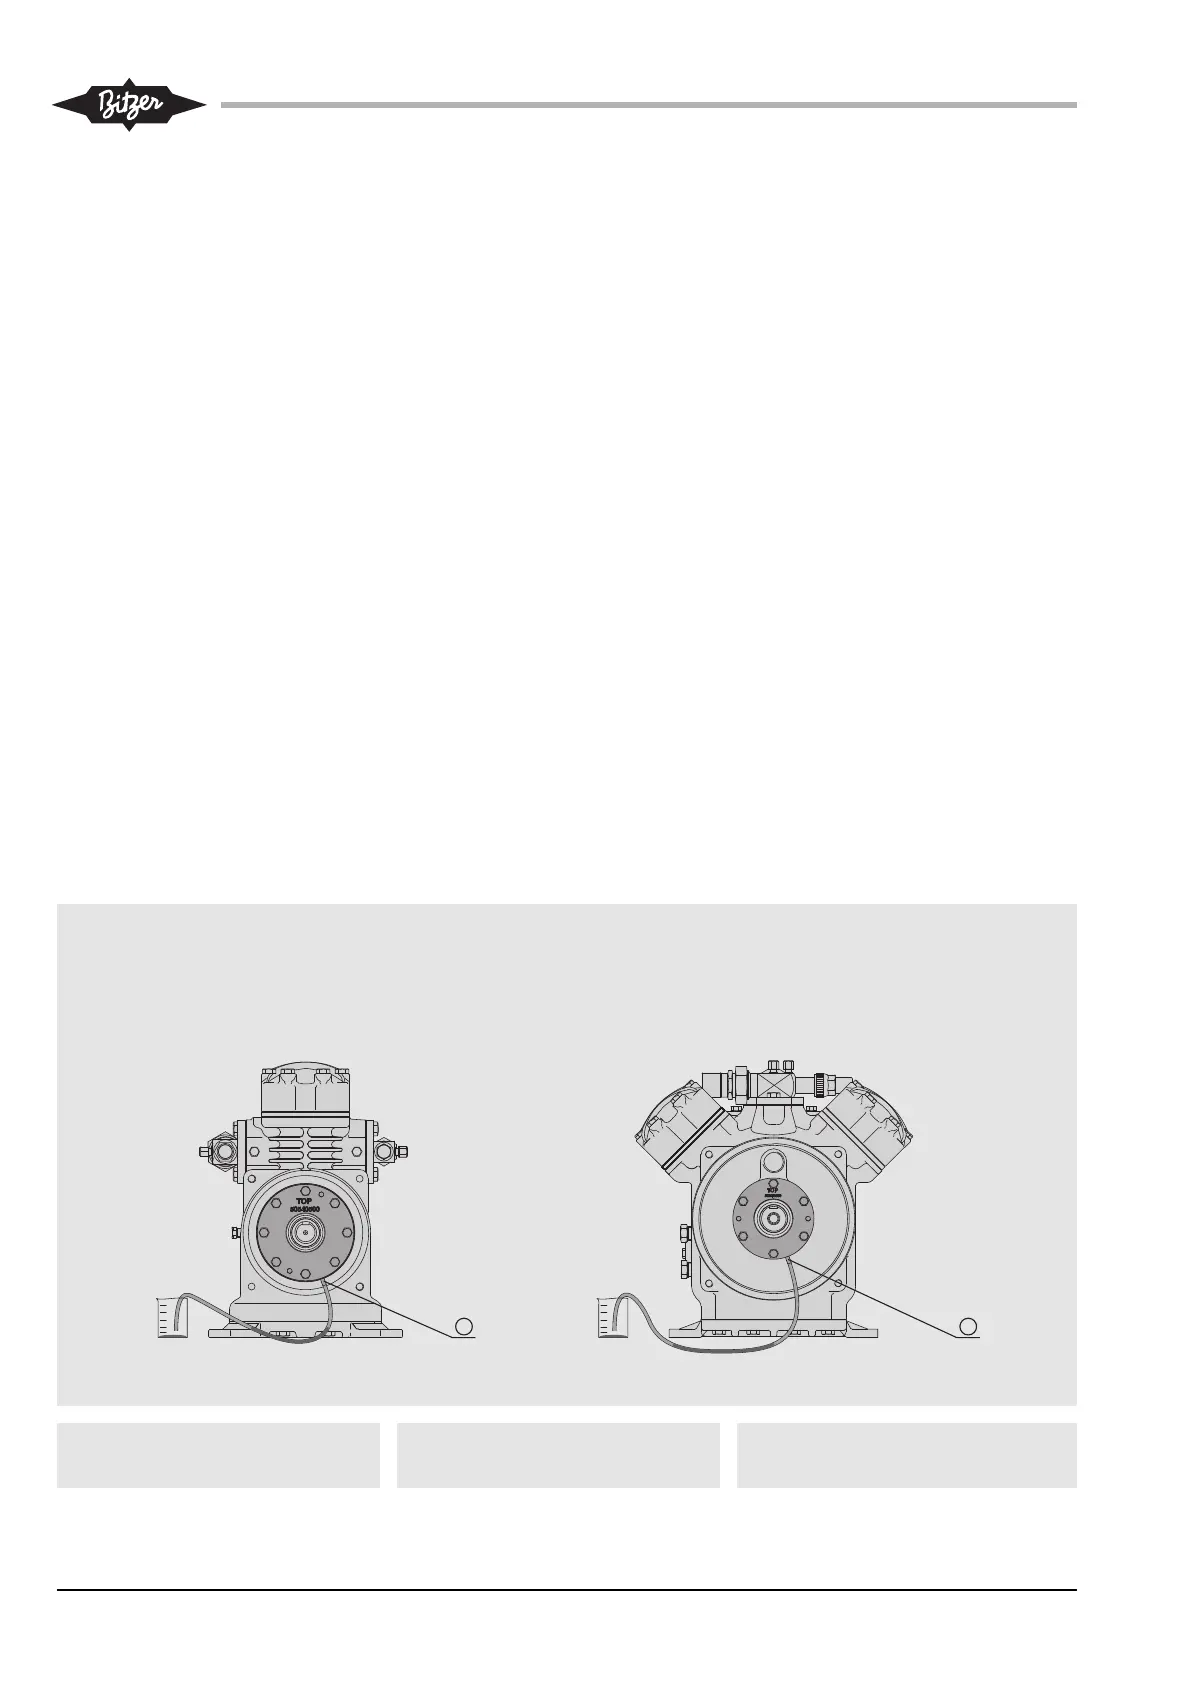
KW-510-2
Abb. 2 Abschlussdeckel mit Ölablauf-
Schlauch
Fig. 2 Sealing cover with oil drain tube Fig. 2 Couvercle de fermeture avec tuyau de
drainage d'huile
 Loading...