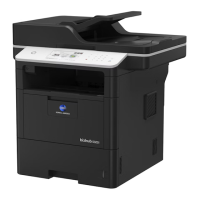
Remove the packing materials and install the imaging unit and toner cartridge assembly
Load paper in the paper tray
Connect the power cord and turn on the
machine
Select your country (if needed)
1. I
the screen
or selectin
the countr
or re
ion appears on the machine’s
ouc
screen, se
ect t
e country or reg
on
n w
c
you
ve, an
t
en press
OK
3
5
2
1
Ad
ust the paper
uides.
B
Fr
n
Di
r
th
ilica
el pack.
emove the oran
e part.
Connect the telephone line cord
If
ou do not plan to use the fax feature on this machine,
o to step
4
Select your language (if needed)
6
NOTE
Once the countr
or re
ion is set, it cannot be chan
ed
1.
n the machine’s Touchscreen, press
Sett
n
s
All Sett
n
s
In
t
al Setu
Loca
Lan
ua
e
2. Press
our lan
ua
e.
3. Pr
2. When the confirmation screen appears, press
Yes
Unpack the machine and check the components
NOTE
• The included components var
dependin
on the countr
or re
ion
• The available connection inter
aces var
dependin
on the model.
• You must purchase the correct inter
ace cable
or the inter
ace
ou want
t
.
SB cabl
We recommend usin
a U
B 2.0 cable
T
pe A
B
that is no more
than 6
eet
2 meters
lon
.
Network cabl
se a strai
ht-throu
h
ate
or
5
or
reater
twisted-pair cable
Ima
in
Unit and Toner
Cartrid
e Assembl
pre-installed
Connection cords
Installation Safet
Information
CD-ROMs
Installation
Read the Safety Information first, then read this
Installation for the correct installation procedure.
D018G7001-00
ACER-9913-00
bizhub5020i4020iQSGUS.indd1bizhub5020i4020iQSGUS.indd1 2019/03/1916:12:162019/03/1916:12:16

 Loading...