7
ENGLISH
(Original instructions)
Labels on appliance
The following symbols appear on this appliance along with the
date code.
Read all of this manual carefully before
using the appliance
S003AQ-15
Only use with charger S003AQ-15
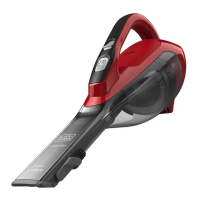
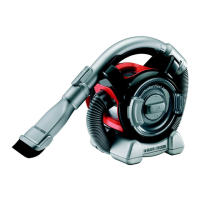
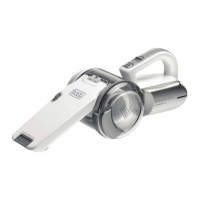
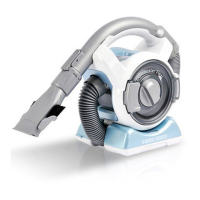
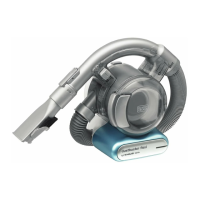
Features
This tool includes some or all of the following features.
1. On/off power switch
2. Dust chamber release button
3. Dust chamber
4. Crevice tool attachment
5. Brush attachment
6. Pet head attachment
7. Charger
8. Wall attachment
Use
Fitting the wall bracket (Fig. A)
Fit the wall bracket (8) to a suitable wall (preferably near
a power outlet) using the screws provided.
The unit can then be stored, when not in use, or during the
charging procedure, utilising the hanging attachment (8a).
Charging (Fig. B, C)
Place the charger (7) into the charging port (7a) on the
handle of the unit as shown in fi gure B.
Place the charging plug into a power outlet and switch on
as shown in fi gure C.
Accessories (Fig. D)
These models may be supplied with some of the following
accessories:
A brush tool (5) for furniture and stairs.
A crevice tool (4) for confi ned spaces.
Fitting (Fig. D)
Insert the appropriate accessory into the front of the
appliance. Make sure that the accessory is pushed fully in.
Attaching the pet head (Fig. E)
Warning! The unit needs to be switched off when the pet
head is attached or detached.
Warning! Do not use directly on pets.
Slide the dust bowl opening (3) into the opening of the
motorized pet head (6), ensuring that the connectors (6b)
engage with the recesses (3b). An audible click will be
heard.
Removing the pet head (Fig. E)
Pull the motorized pet head release tabs (6a) outward to
release them from the recesses (3a).
Pull the main unit from the pet head.
Warning! The unit needs to be switched off when the pet
head is attached or detached.
Switching on and off (Fig. F)
Push the On/off power switch (1) to turn on the unit.
Push the On/off power (1) switch to turn the unit off.
Cleaning the fi lters (Fig. G, H, I, J, K)
Press the dust chamber release button (2) as shown in
fi gure G.
Seperate the dust chamber (3) from the motor unit as
shown in fi gure G.
Lift the filter (10) out of the dust chamber (3) using the tab
provided as shown in fi gure H.
Empty the dust bowl (3) by lightly shaking over a suitable
container as shown in fi gure I.
The Filter and pre-fi lter can be separated to allow better
cleaning.
Twist the fi lter (10) in an anti-clockwise direction and lift
from the pre-fi lter (9) as shown in fi gure J.
Rinse out the dust-bowl with warm soapy water as shown
in fi gure K.
Wash the fi lters with warm soapy water as shown in fi gure
K.
Allow the fi lters to dry naturally, using heat may cause the
fi lters to distort.
Refi t the fi lter (10) into the pre-fi lter (9) and then reinsert
into the dust chamber (3). Never place the fi lters into
the dust chamber backwards.
Replace the dust chamber onto the motor unit. Make sure
the release button (2) clicks into place.
Warning! Before performing any maintenance or cleaning on
the appliance, unplug the appliance.
From time to time wipe the appliance with a damp cloth.
Do not use any abrasive or solvent-based cleaner. Do not
immerse the appliance in water.
Maintenance
Your BLACK+DECKER cordless appliance has been designed
to operate over a long period of time with a minimum of
maintenance. Continuous satisfactory operation depends
upon proper tool care and regular cleaning.
Warning! Before performing any maintenance on cordless
appliances:
Run the battery down completely if it is integral and then
switch off.
Unplug the charger before cleaning it. Your charger does
not require any maintenance apart from regular cleaning.