EasyManua.ls Logo

Black & Decker GH610 User Manual

Black & Decker GH610
38 pages
To Next Page IconTo Next Page
Page #1 background imageLoading...
Page #1 background image
1
KEY INFORMATION YOU SHOULD KNOW:
The guard must be installed before trimming or edging - if
not, the motor will overheat (page 5).
When replacing the line, use only .065 inch diameter
ROUND line (B&D Model #AF-100 is recommended) -
otherwise the tool will not function properly (page 8).
Do not bump the feed head against the ground - it will
disrupt the feed mechanism.
Always use the cord retention feature (page 7).
Model # GH610
SAVE THIS MANUAL FOR FUTURE REFERENCE.
VEA EL ESPAÑOL EN LA CONTRAPORTADA.
POUR LE FRANÇAIS, VOIR LA COUVERTURE ARRIÈRE.
INSTRUCTIVO DE OPERACIÓN, CENTROS DE SERVICIO Y
PÓLIZA DE GARANTÍA. ADVERTENCIA: LÉASE ESTE
INSTRUCTIVO ANTES DE USAR EL PRODUCTO.
TRIMMER / EDGER
INSTRUCTION MANUAL
Thank you for choosing Black & Decker! Go
to www.BlackandDecker.com/NewOwner
to register your new product.
Model Number GH610
PLEASE READ BEFORE RETURNING
THIS PRODUCT FOR ANY REASON:
If you have a question or experience a problem with your
Black & Decker purchase, go to
WWW.BLACKANDDECKER.COM/INSTANTANSWERS
for instant answers 24 hours a day.
If you canʼt find the answer or do not have access to the internet,
call 1-800-544-6986 from 8 a.m. to 5 p.m. EST Mon. - Fri
to speak with an agent.
Please have the catalog number available when you call.
Question and Answer IconNeed help?

Do you have a question about the Black & Decker GH610 and is the answer not in the manual?

Black & Decker GH610 Specifications

General IconGeneral
Power SourceCorded Electric
Amperage6.5 Amps
Voltage120V
Line Diameter0.065 inches
Adjustable HandleYes
Edge GuideYes
Telescoping ShaftYes
Rotating HeadYes
Cutting HeightAdjustable
Warranty2 years
TypeString Trimmer
Motor Power6.5 Amp
Cutting Width14 in
Feed TypeAutomatic

Summary

General Safety and Definitions

Safety Guidelines Definitions

Defines DANGER, WARNING, CAUTION, and CAUTION symbols used in the manual.

Essential Safety Precautions

Covers crucial safety measures like eye protection, proper attire, bystander safety, and handling the rotating line.

Edger Specific Safety

Emphasizes precautions for ricochet hazards and keeping bystanders at a safe distance when edging.

Electrical and Cord Safety

Environmental and Operational Hazards

Details risks like accidental starting, forcing the tool, cord abuse, and using in hazardous environments.

Electrical Shock Prevention

Focuses on GFCI protection, using outdoor-rated extension cords, and avoiding water immersion.

Extension Cord Guidelines

Provides guidance on selecting the correct gauge extension cord based on length and amperage.

Assembly and Adjustment

Component Identification

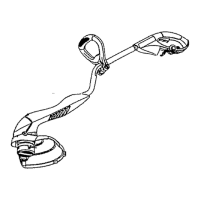
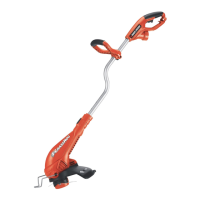
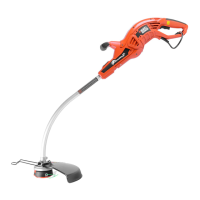
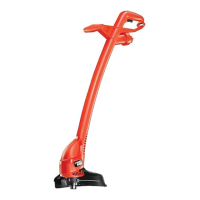
Lists and visually identifies the main parts of the trimmer/edger.

Installing the Guard

Provides step-by-step instructions for attaching the safety guard securely.

Attaching Auxiliary Handle

Details how to attach and adjust the auxiliary handle for comfortable use.

Adjusting Cutting Height

Explains how to adjust the trimmer's overall height for optimal operation.

Operation Instructions

Attaching Extension Cord

Describes how to properly connect an extension cord using the built-in retainer.

Switching On/Off and Edging Conversion

Instructions for operating the power switch, angling the trimmer, and converting to edging mode.

Cutting Line and Line Feeding

Details the correct line diameter and automatic line feeding mechanism.

Spool Replacement and Rewinding

Replacement Accessories

Specifies recommended spool model, line type, and warns against non-recommended accessories.

Replacing the Spool

Step-by-step guide to remove the old spool and install a new one.

Rewinding Spool from Bulk Line

Guides on how to wind bulk line onto a spool correctly and secure it.

Maintenance and Troubleshooting

Maintenance Procedures

Covers cleaning air intake, line care, and maintaining the line cutter blade.

Troubleshooting Common Issues

Provides solutions for problems like slow tool operation and automatic line feed failures.

Service and Warranty Information

Service Center Information

How to locate service centers for repairs or parts and contact information.

Product Warranty Details

Explains the warranty period, coverage, and claim procedures.

Warning Label Replacement

Provides contact information for obtaining replacement warning labels.