ENGLISHENGLISH
| Owner’s Manual
blackstoneproducts/support.com
ASSEMBLY INSTRUCTIONS
Please read all instructions thoroughly before proceeding. Ensure
that all plastic packing material and any transit protection is removed
before assembling.
Find a large, clean area to assemble your unit. Please refer to the parts list and
assembly diagrams as necessary.
! WARNING
• Do not mix old and new
batteries.
• Do not mix alkaline, stan-
dard (carbon-zinc) or
rechargeable (ni-cad, ni-mh,
etc.) batteries.
! WARNING
• Do not mix old and new
batteries.
• Do not mix alkaline, stan-
dard (carbon-zinc) or
rechargeable (ni-cad, ni-mh,
etc.) batteries.
ENGLISH
! WARNING
The manufacturer has made
every effort to eliminate any
sharp edges. However, you
should handle all compo-
nents with care to avoid
accidental injury.
Some parts may contain
sharp edges, especially as
noted in these instructions.
Wear protective gloves if
necessary.
! WARNING
The manufacturer has made
every effort to eliminate any
sharp edges. However, you
should handle all compo-
nents with care to avoid
accidental injury.
Some parts may contain
sharp edges, especially as
noted in these instructions.
Wear protective gloves if
necessary.
! WARNING
This appliance will be hot
during and after use. While
cooking, place unit on
heat-resistant and flame-re-
sistant surfaces to avoid
damage and injury.
! WARNING
This appliance will be hot
during and after use. While
cooking, place unit on
heat-resistant and flame-re-
sistant surfaces to avoid
damage and injury.
! WARNING
The manufacturer has made
every effort to eliminate any
sharp edges. However, you
should handle all compo-
nents with care to avoid
accidental injury.
Some parts may contain
sharp edges, especially as
noted in these instructions.
Wear protective gloves if
necessary.
! CAUTION
Two people are recom-
mended for the assembly of
this product.
! CAUTION
Two people are recom-
mended for the assembly of
this product.
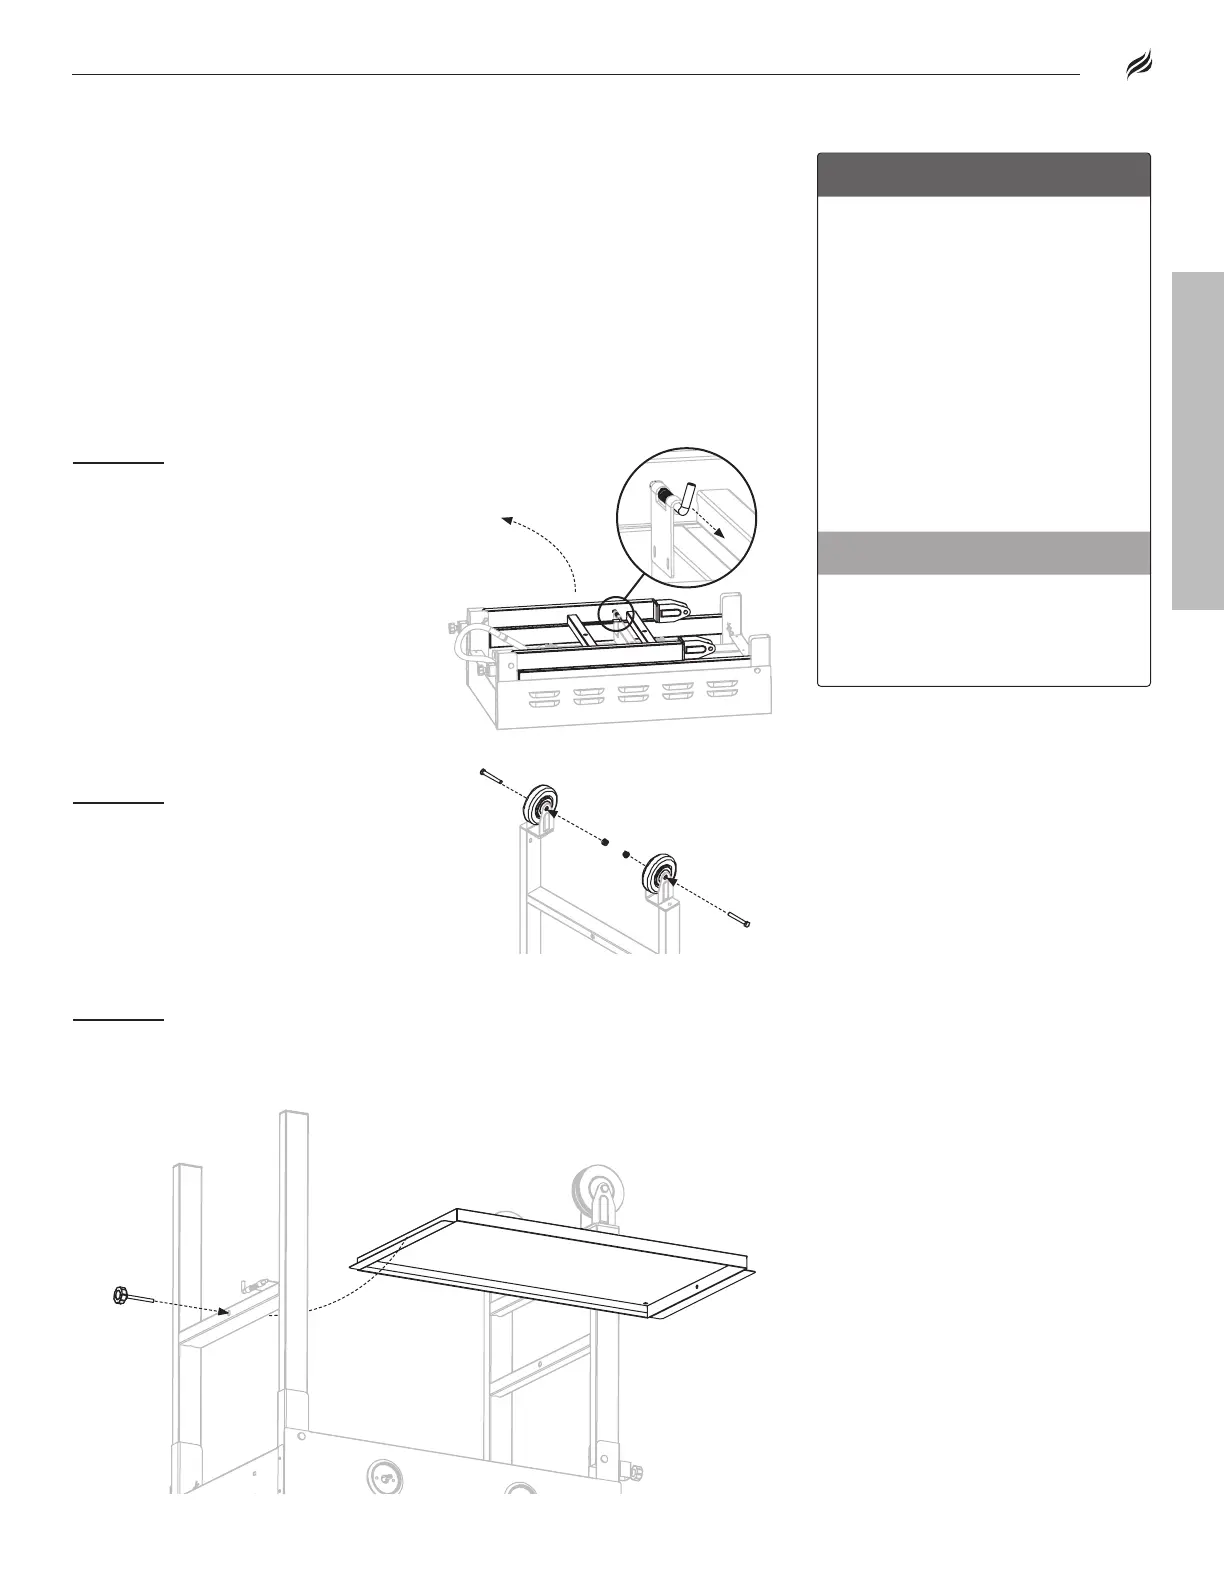
STEP
With the help of
another person, remove the
griddle body from the packaging
and lay it upside down on a smooth,
at surface.
Pull the locking pin to release the
legs and raise them to a vertical
position.
STEP
Place the bottom tray between the griddle legs. Use one (1) large
thumbscrew to attach the bottom tray to the right leg assembly.
STEP
Use the pre-installed
bolts and nuts from the wheels to
attach the two (2) wheels to the le
leg assembly.
Model 1853
05
Assembly Guide
 Loading...