Do you have a question about the Black+Decker NVC115JL and is the answer not in the manual?
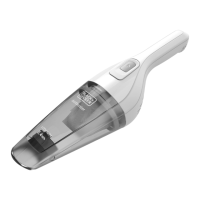
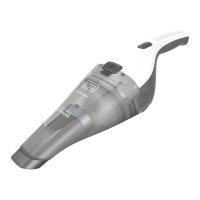
Designed for light dry vacuum cleaning purposes for household use only.
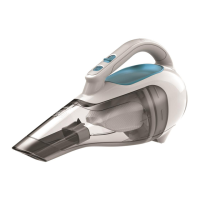
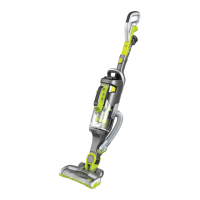
Designed for light wet and dry vacuum cleaning purposes for household use only.
Read all warnings and instructions. Failure to follow may result in electric shock, fire or injury.
Follow basic safety precautions to reduce risk of fire, leaking batteries, personal injury.
Do not pick up liquids or flammable materials, avoid water and heat.
Can be used by children 8+ with supervision; children must not play with the appliance.
Check for damaged or defective parts before use. Do not use if damaged.
Risks from misuse or prolonged use include injury from moving/hot parts or changing accessories.
Do not expose to water/heat, store properly, charge correctly, and dispose of safely.
Use only supplied charger, check voltage, do not expose to water or open.
Ensure mains voltage matches rating plate. Never replace charger unit with a regular plug.
Read manual before use. Tool is double insulated, charging base for indoor use.
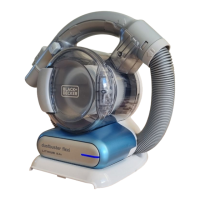
Attach product to wall for convenient storage and charging. Ensure secure mounting.
May be supplied with squeegee, brush, or crevice tools for specific uses.
Insert accessory into appliance front until it clicks securely.
Extend crevice tool until it clicks. Retract by pressing button and sliding back.
Battery must be charged for at least 24 hours before first use. Dry appliance before charging.
Place appliance on base, plug in charger. Leave to charge for at least 21 hours.
Press and hold the on/off switch (1) to turn on. Release to turn off.
For everyday spills of dry material. Never pick up wet applications with these units.
Use for dry spills or everyday liquid spills on hard/absorbent surfaces. Use squeegee for best results.
Clear filters regularly during use to maintain optimal suction force.
Press release button, pull off dust bowl. Remove filter to empty. Reattach bowl until it clicks.
Place foam insert into the wet/dry deflector. Never use for wet applications without it.
Twist and lift pre-filter from filter for better cleaning. Never pick up wet applications with these units.
Wash dust bowls and filters in warm soapy water. Ensure they are dry before refitting.
Replace filters every 6-9 months or when worn/damaged. Available from dealer.
| Brand | Black+Decker |
|---|---|
| Model | NVC115JL |
| Category | Vacuum Cleaner |
| Language | English |