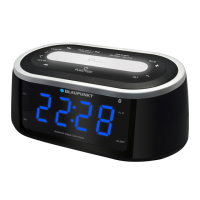
ENGLISH
5
1. Place your unit face down on a flat surface.
2. Slide and remove the battery cover at the bottom of your unit.
3. Insert one fresh CR2032 lithium battery into the battery compartment with the “+” side
facing up as indicated.
4. Replace the battery cover.
If AC power is interrupted, the LED display will off and both the radio and the alarm will not
function. The backup battery will keep the time and all settings of your unit. Make sure a fresh
CR2032 lithium battery is used. A fresh CR2032 battery could backup your clock continuously
for around 1 week.
Time, calendar and snooze setting
1. Press and hold SET, the hour digits will flare. Press or to set the hours. Press and
hold or will accelerate your setting.
2. Press SET again, the minute digits will flare. Press or to set the minutes. Press and
hold or will accelerate your setting.
3. Press SET again, the display will show “24Hr” and flare, press or to select 12Hr 24Hr.
In 12Hr mode, P (PM) LED will appear on the display to indicate afternoon time. There
is no AM indicator.
4. Press SET again, “2016” digits will flare. Press or button to set the year.
5. Press SET again, month digits will flare. Press or button to set the month.
6. Press SET again, date digits will flare. Press or button to set the date.
7. Press SET again, the display will show “05” and flare. Press or to select your snooze
time from 5 to 60 minutes.
8. Press SET again or if no key pressed for approx. 10 seconds to exit the setting mode.
Alarm setting
1. Press and hold AL 1.2, the A1 LED and the hour digits will flare. Press or to set the
Alarm 1's hours. Press and hold or will accelerate your setting.
2. Press AL 1.2 once again, the minute digits will flare. Press or to set the Alarm 1's
minutes. Press and hold or will accelerate your setting.
3. Press AL 1.2 again, the LED display shows “bu”. Press or to select alarm source:
bu = wake-to-buzzer
rd = wake-to-radio
4. Press AL 1.2 again, the “1-7” digits will flare; Press or to select alarm wake up date
between“6-7” or “1-5” or “1-1”.
1-5 = working day (Monday ~Friday)
6-7 = weekend ( Saturday and Sunday)
1-7 = Weekly (Monday to Sunday)
1-1 = single-day alarm. After the alarm wake up, the A1 LED goes off. Press AL 1.2 once
to re-active another single-day alarm of Alarm 1.
5. Following the above steps, press AL 1.2 again, the A2 LED and the hour digits will flare.
Press or to set the Alarm 2's hours. Then repeat above step 2 ~ 4 to set alarm 2.
CR6