Power supply
Using the supplied power cord connect with the AC power jack on the rear
panel of unit, and plug on another terminal with wall-mount socket in order
to get power source.
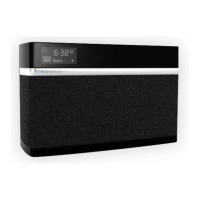
After connect the power successfully, the display will light on and show
“Time is not set” after shown the opening screen “welcome to Digital radio”.
Meanwhile, the time digits “00:00” is flare to prompt you to set the clock
time.
General operation
1. Standby ON/OFF: Press and hold the ( /ENTER) button 3 seconds
to turn the unit on; press and hold the button to standby off the unit,
and the LCD backlight will dime after 1 minute. Press any button can
light on the screen.
2. Play source: Press the MODE button to switch the play mode between
DAB/ FM/ Bluetooth/AUX-IN/USB.
3. Enter to the system main menu: At playing mode
(FM/DAB/AUX/USB/Bluetooth) short press the MENU button; press >
or < button to scroll through the menu list can find the “system”
option; press the ENTER button to confirm the selected option; press
the MENU button can quite the current menu.
4. Language setting: Enter to the “system” menu list; press > or < button
to scroll and check the submenu, press ENTER to select “ language”
item. Then you can enter and select the language options between
Polish/English/German/Italian/Czech by using > or < button; press
ENTER button again to confirm the selection, and press the MENU
button again to quite the operation.
5. Factory reset & SW version: The factory reset and SW version menu is
also under the “ system” menu list, you can reference the language
setting procedure for the detail operation.
6. Clock time setting: Enter to the “ system” menu list, press > or < button
to scroll and select “ time” option; then you will enter to the “set
time/date” interface; press the > or < and ENTER button can adjust
and confirm the time and date setting.
7. Alarm setting: After completed the clock time setting, enter to the”
system” menu list and select “ alarm” submenu for alarm time setting.
Press > or < button to switch “ alarm 1” or “ alarm 2 setup” option. Press
the > or < and ENTER button can adjust and complete the setting of
alarm time(hour and minute)/alarm duration time(15 | 30 | 45 | 60 | 90
)/alarm source(buzzer/DAB/FM/USB)/ alarm active day
(daily/once/weekdays/weekends)/ alarm setting( on/off ). If you
selected alarm on and set up the alarm time successfully, the alarm
icon will show on the display.
HR50DAB
ENGLISH
9
 Loading...
