Page | 8
V14612INSLM
Pressure Testing
Pressure-test the system at a minimum of 35 psi or follow local code requirements.
Keep the water valve secure and under pressure throughout the construction
process. Remember to remove the cassette and turbine in order to allow for
equal distribution of pressure down all 6 lines and store the cassette and turbine
for reinstallation at startup.
3. Preparing the System
Cut cleaning Jet Stub-ups and Clear Debris from System
After inspection, clear the system lines of debris using a combination of air and
water. (see inspection steps below)
1. Verify that the system is holding pressure (minimum of 35 psi), then relieve
system pressure at filter gauge.
2. Cut each stub-up ensuring collars sit at a height to accommodate
approximately ½” of final finish material. Clean off all burs and debris.
3. Insert test plug in each stub up.
4. Attach a blower assembly unit (blower, check valve, air/water supply and
connectors; call Blue Square for assembly instructions) to the blower plate or
directly to the valve.
5. Turn on blower and water supply to fill the lines.
6. Starting at the cleaning head farthest from the valve, remove test plug and
flush the pipe, blocking and releasing pressure several times to ensure a clear
line.
Install Cleaning Collars and Heads
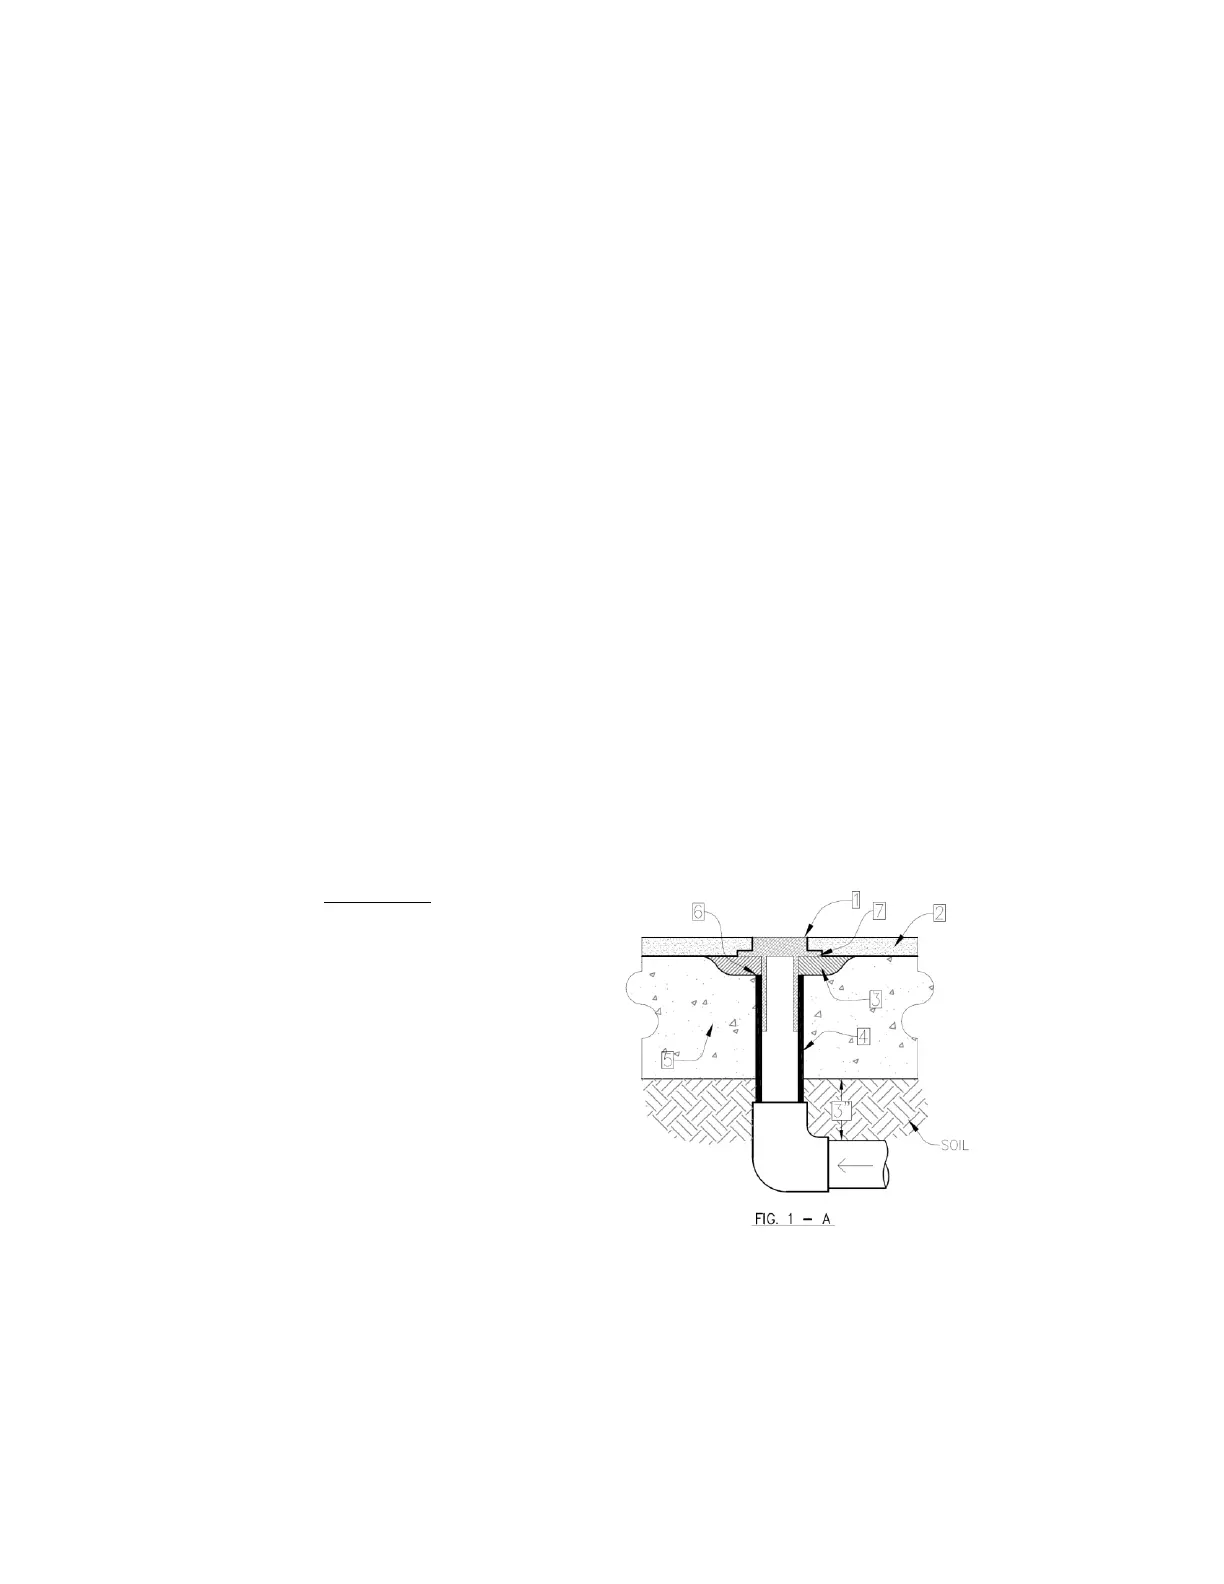
Use inside pipe cutter to cut pipe 1/2" below pool concrete floor.
use Hydraulic cement over and around pipe and up to bottom of flange
(See Fig, 1-A)
Reference:
1. In floor collar
2. Interior pool finish
3. Hydraulic cement
4. 2" P.V.C. Pipe
5. Pool Shotcrete / Gunite
6. Top of Supply pipe 1/2"
below flange
7. Bottom of flange

 Loading...