Do you have a question about the Blue Thumb Elite Skimmer and is the answer not in the manual?
Spray outline for skimmer area and excavate a hole slightly larger than the box.
Position skimmer box so top is 5" above desired pond water level for optimal operation.
Screw PVC elbow into back spinweld to control pond water level.
Insert UniSeal fittings into discharge holes and plug unused hole with slip plug.
Ensure skimmer is level and base is well compacted to prevent future settling.
Use screws to firmly attach the snout, ensuring all pre-drilled holes are used to prevent leaks.
Screw pump discharge assembly to pump and position it in the skimmer's back chamber.
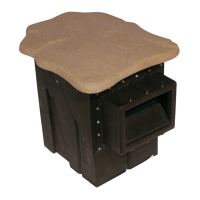
The Blue Thumb Elite Skimmer is a crucial component for maintaining a clean and healthy pond environment, designed to be integrated seamlessly into the pond's edge. Its primary function is to remove surface debris, such as leaves, twigs, and other floating particles, before they sink and decompose, thus reducing the organic load in the pond. This helps to prevent algae growth and maintain clear water, contributing to a healthier ecosystem for fish and plants. The skimmer is strategically positioned at the pond's edge, typically opposite the waterfall, to ensure optimal water circulation and efficient debris collection.
The installation process begins with choosing the ideal location for the skimmer, ensuring it's positioned to effectively draw water from the pond's surface. Once the location is determined, the area is excavated to accommodate the skimmer box. The skimmer should be set at a depth that positions its top approximately 5 inches above the desired pond water level, allowing for a 1-inch clearance below the snout opening for debris to flow in.
An overflow assembly is then installed to manage the pond's water level. This involves screwing a threaded PVC 90-degree elbow into the overflow spinweld from inside the skimmer, and a male adapter from outside. The elbow's angle can be adjusted to control the maximum pond water level. Flexible PVC hose is then glued to the male adapter to direct overflow water to a desired drainage area.
UniSeal rubber fittings are inserted into the pipe discharge holes of the skimmer, allowing for the connection of pond plumbing. If only one discharge line is used, a slip plug is inserted into the unused hole. For added convenience, an optional Blue Thumb Automatic Water Fill Assembly can be installed to automatically maintain the pond's water level. If this option is not used, a plug is installed into the auto-fill spinweld.
Once the skimmer is in place, it is backfilled with soil, ensuring it is level from front to back and side to side. The soil is compacted tightly around the skimmer to prevent settling, but not so much as to distort its sides. During backfilling, it can be helpful to have someone stand inside the skimmer to keep it stable.
The pond liner is then attached to the skimmer. The liner is brought up to the skimmer's face, and liner clips are used to temporarily hold it in position, ensuring it follows the pond's contours. It's important to leave a little slack in the liner where it transitions from the pond ledge to the skimmer face to prevent tension from rockwork or water weight.
Before attaching the skimmer snout, the face of the skimmer and the corresponding liner surface are cleaned. A bead of silicone is applied along the sides and bottom of the skimmer's opening, about an inch from the edge, to create a watertight seal. The liner is then brought back into position, and the silicone bead is gently flattened. Guide nails are pushed through the guide holes and liner from inside the skimmer, creating small holes. The skimmer snout is then placed into position, with its top corner holes sliding over the guide nails. The snout is designed to hinge at the bottom and open into the skimmer.
The installation of the snout continues by removing one guide nail and driving a screw into that hole, then repeating for the second guide nail. Once the snout is held by two screws, the remaining screws are driven into all pre-drilled holes around the snout to prevent water leakage. From inside the skimmer, a utility knife is used to cut out the liner in the snout area, allowing water to flow into the skimmer. Any excess liner extending above the front top edge of the skimmer box can also be trimmed. Finally, an additional bead of silicone is applied along the joint inside the snout where the skimmer, liner, and snout meet, and smoothed with a finger for a complete seal. Black screw caps are then pushed onto the screw tips inside the skimmer box, optionally with a dab of silicone to help them stay in place.
The final steps involve installing the submersible pump (not included). The pre-assembled pump discharge assembly is screwed into the pump, and the pump and assembly are positioned in the back chamber of the skimmer. The flexible pipe is brought into the skimmer through the discharge hole/UniSeal and attached to the discharge assembly. The pump power cord is run over to the power source and positioned out of the skimmer at the cord notch, allowing the Natural Landscape Lid to sit flush.
The Elite Skimmer is designed for continuous operation, drawing water from the pond's surface into the skimmer box. Inside the skimmer, a mechanical media mat and a black mesh skimmer net work in conjunction to filter the water. The skimmer net captures larger debris like leaves and twigs, preventing them from entering the pump chamber. The media mat then removes smaller particles, ensuring that cleaner water flows into the pump chamber. This filtered water is then recirculated back into the pond, ideally via a Blue Thumb Biological Waterfall Filter, which provides further biological filtration. The Natural Landscape Lid, placed on top of the skimmer, helps to disguise the unit within the pond's landscape, maintaining an aesthetically pleasing environment.
Regular maintenance of the Elite Skimmer is essential for its optimal performance and the overall health of the pond. The skimmer net and media mat should be removed and cleaned periodically, typically every 10-14 days, though this frequency can vary depending on the amount of debris entering the pond, the fish load, and feeding regimen. Cleaning is indicated if the water level in the pump chamber is lower than the pond's water level.
For winter maintenance in climates with prolonged freezing periods, the pump should be removed and stored in a bucket of water to prevent freezing and protect its seals. The media mat and net should also be rinsed out and stored for the winter.
Beyond the skimmer, the manual also touches on waterfall box maintenance, recommending an annual cleaning of the filter media in the waterfall box to remove accumulated debris. This should ideally be done when water temperatures are below 50 degrees Fahrenheit, using pond water for rinsing to preserve beneficial bacteria.
Evaporation is a natural process in ponds. If an automatic water fill valve is not installed, the pond's water level will need to be topped off occasionally using a garden hose. If tap water containing chlorine is used and fish are present, Blue Thumb's Purify should be added to the pond to neutralize the chlorine. The water level should be maintained within 3/4" to 1" below the skimmer box opening.
Spring start-up involves reconnecting the pump and reinstalling any media that was removed for winter storage. It is also a good practice to drain the pond and clean out any accumulated debris each spring to ensure a fresh start for the season.
| Suitable for | Swimming Pools |
|---|---|
| Faceplate Width | 12 inches |
| Recommended Flow Rate | 20-40 GPM |
| Weir Door | Yes |
| Net | Yes |
| Material | Plastic |
| Compatibility | Standard pool skimmer openings |
| Included Accessories | Skimmer basket, weir door, net |