OWNER′S MANUAL
9
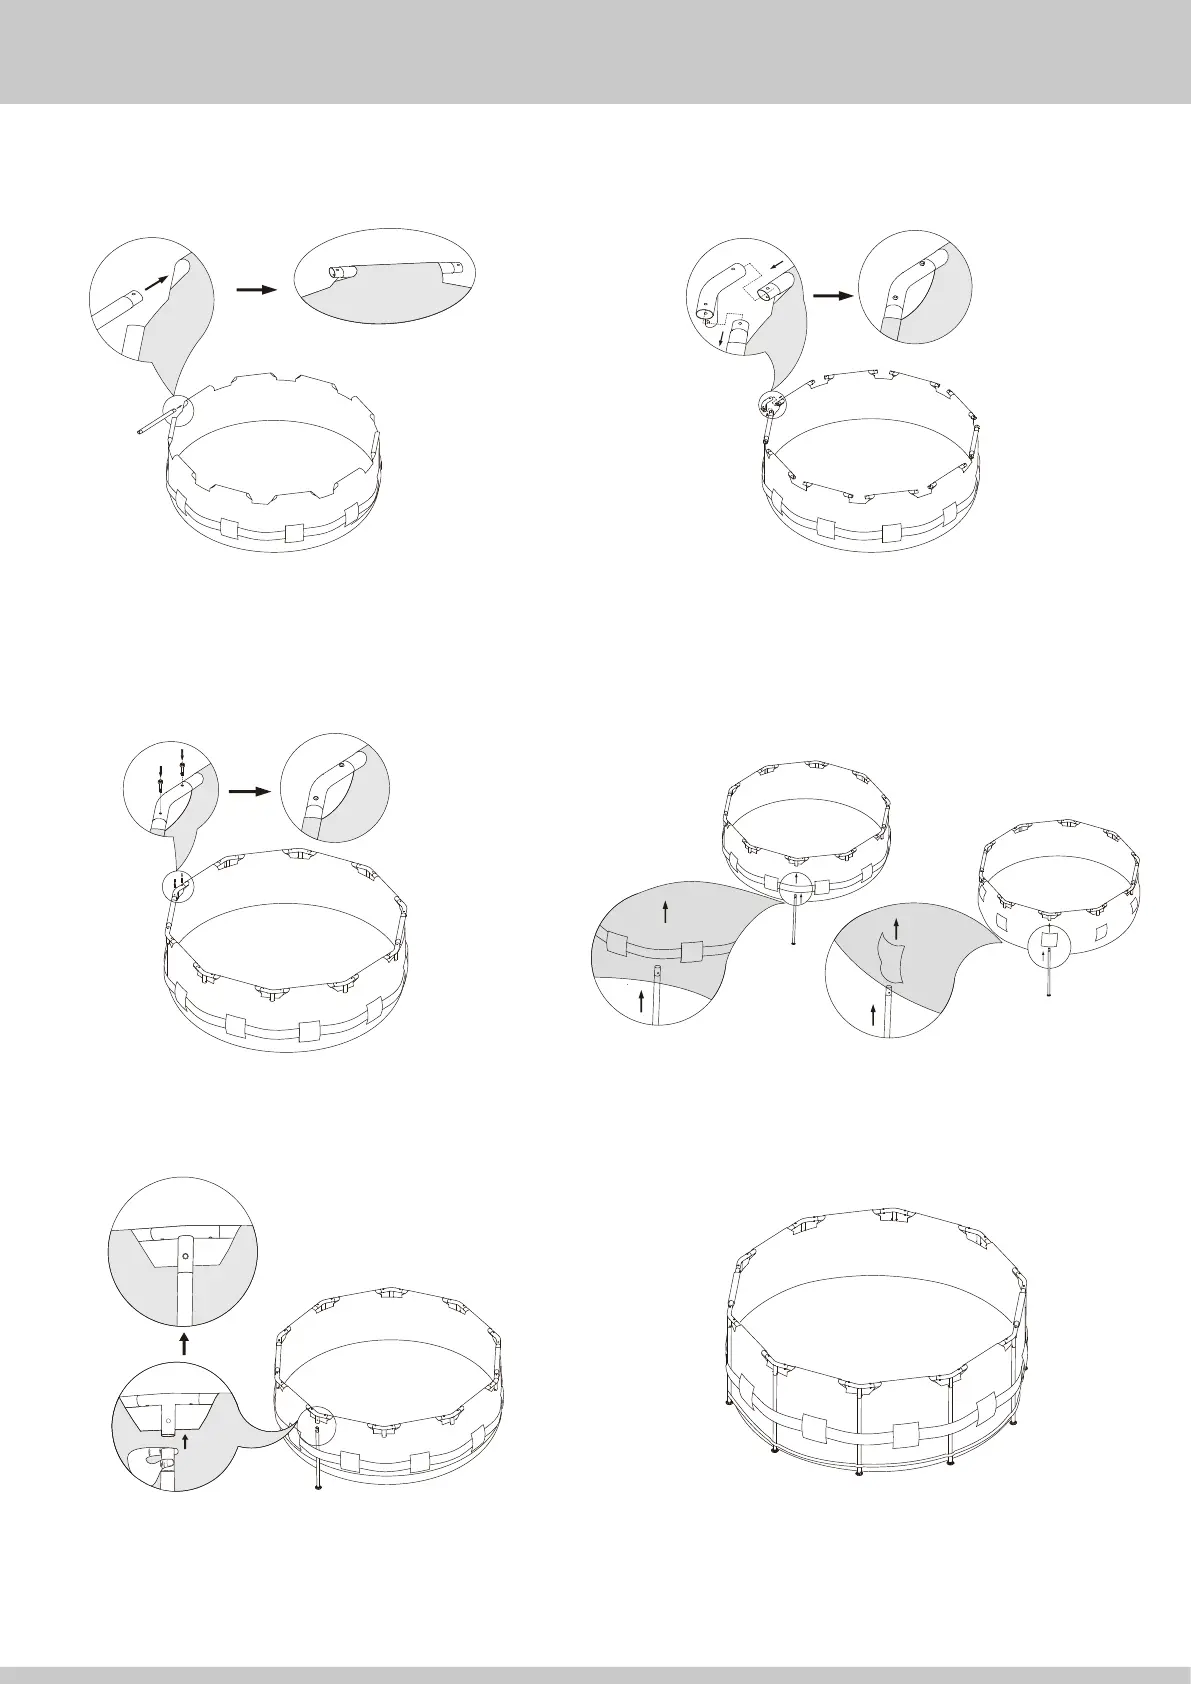
8. Carefully slide the Horizontal Beams 2
into the sleeves of the pool.
9. Connect all of the T-Fittings 4 to the Horizontal Beams 2.
IMPORTANT: DO NOT go on to the next step until all of the
T-Fittings have been connected to all of the Horizontal Beams.
12. Look through the hole in the T-fitting, as you insert the Vertical
Leg rotate it until the buttons align with the holes and pop out,
locking the Vertical Leg in place. Do this for all Vertical Legs.
13. Go around and check that all fittings, legs, and beams are
properly installed and secured in place. Make sure the
drain fitting is plugged securely and the cap is in place.
2
2
10. Insert the Pins 6 down through the top of the T-Fittings
until the Pins snap into place on the lower side of the
T-fitting.
4
4
11. Carefully slide the Vertical Legs 3 up through the belt that runs
around the middle of the pool.
Tips: For smaller pools without a belt, slide the vertical legs up
through the sleeves on the pool wall.
3
3
Note: Each vertical leg has a V-Shaped
Spring Pin 7 pre-installed. There is one
extra included with your pool parts.
6