10
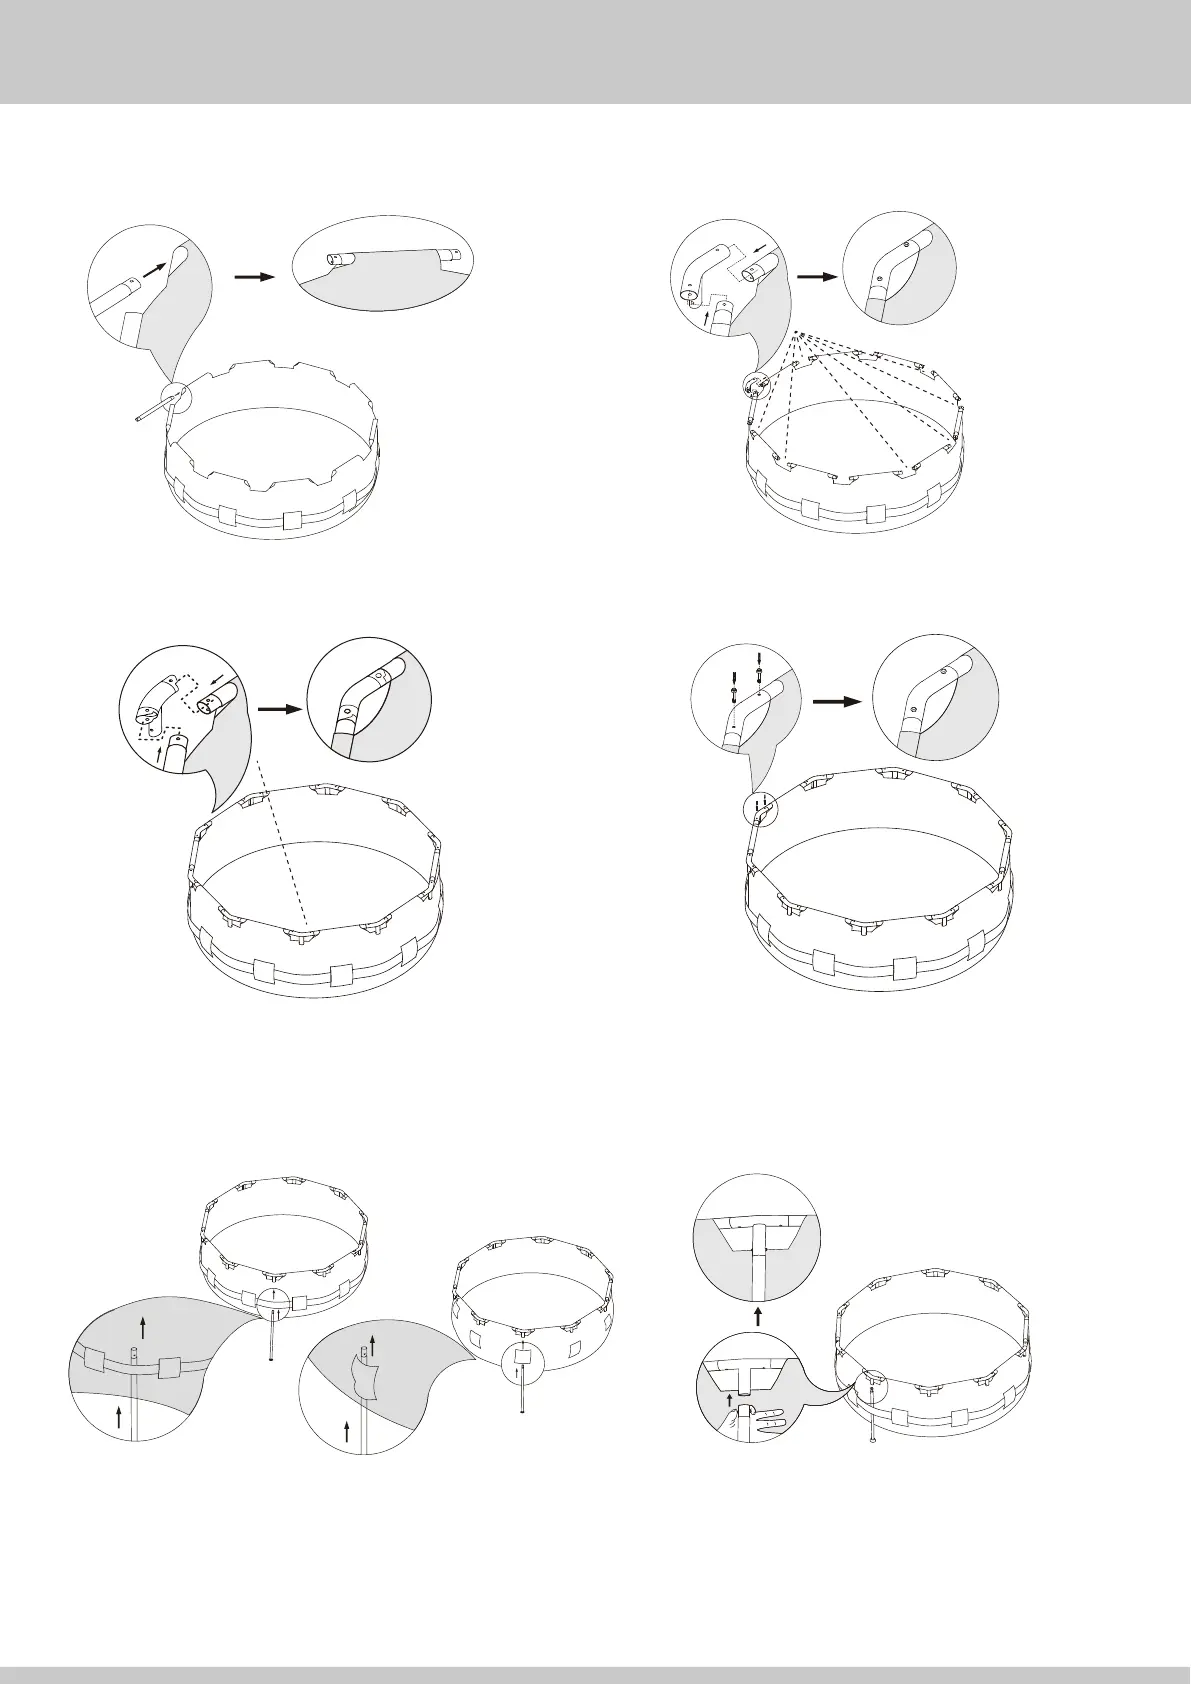
8. Carefully slide the Horizontal Beams 2
into the sleeves of the pool.
9. Connect the T-Fitting 4 to the Horizontal Beam 2.
IMPORTANT: Connect all T-Fittings to all Horizontal Beams.
BUT reserve a space for EZ Link T-Fitting 5.
13. Look through the hole in the T-fitting, as you insert the Vertical
Leg rotate it until the buttons align with the holes and pop out,
locking the Vertical Leg in place. Do this for all Vertical Legs.
2
2
10. Connect the EZ Link T-Fitting 5 to the last remaining
Horizontal Beams 2.
11. Insert the Pins 7 down through the top of the T-Fittings
until the Pins snap into place on the lower side of the T-fitting.
7
12. Carefully slide the Vertical Legs 3 up through the belt that runs
around the middle of the pool.
Tips: For smaller pools without a belt, slide the vertical legs up
through the sleeves on the pool wall.
3
3
Note: Each vertical leg has a V-Shaped
Spring Pin 8 pre-installed. There is one
extra included with your pool parts.
4
4
5