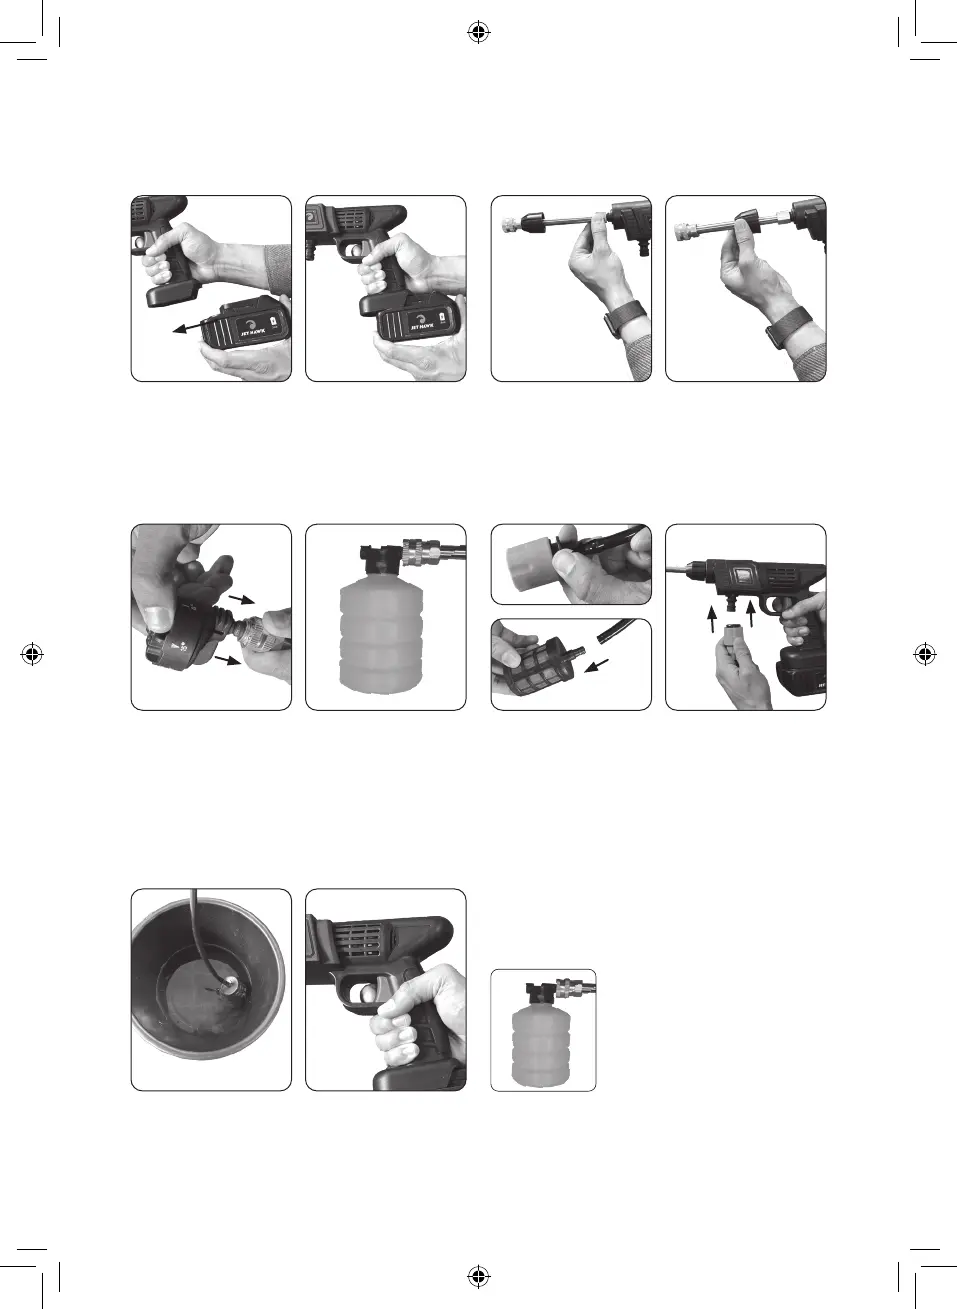
Remove main unit and battery from the box and
insert into the lower section of the main spray unit.
If this is the first usage out of the box, this will need
to be fully charged with the provided main charger.
When fully charged LED light on the charger will
turn from RED to GREEN.
On the opposing end of the extender pipe, now
insert the chosen spray nozzle. There is a spring-
loaded lock mechanism on the extender pipe that
needs to be pulled back and then the nozzle can be
inserted. This should then spring forwards again and
lock in pace. Note: If using the soap bottle, install it
as the spray nozzle. It is not necessary to install the
spray nozzle in the front of the soap bottle.
The unit is now ready to use. Insert the water filter
into a bucket or clean water source, and pull the
trigger, being careful to aim this away from any
human contact or directions of danger. Allow a
few seconds for the water to be siphoned up the
hose and through the unit until a pressured flow of
water is coming out of the nozzle. Begin use.
Note: If any water flow is limited or not responsive,
check water is being extracted and is not being
blocked by either the water filter or a kink within
the hose line.
*To use the soap bottle: unscrew the lid, fill with
your chosen cleaning detergent and screw the lid
back on. Note: detergent may require diluting for
dispensing. See chosen detergent care instructions
for further advise on using in conjunction with a
spray gun.
STEP 1
STEP 3
STEP 5
STEP 2
STEP 4
Screw on the Metal extender pipe to the outlet
of the main unit, ensuring it is tightened securely.
Pace the rubberised cover over the connection
end of the extender pipe.
Once the main unit is assembled, take the 5M hose
pipe and water filter and connect at one end of
the hose. Then, on the opposite end, attach the
hose connector to the hose pipe and ensure both
are securely fixed in position. This can now be
attached to the main unit.
SET UP INSTRUCTIONS
CD174 JET Hawk IM.indd 2CD174 JET Hawk IM.indd 2 15/03/2023 15:1515/03/2023 15:15
 Loading...