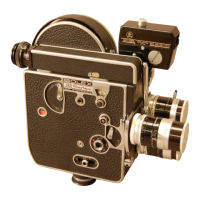
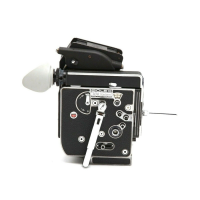
Automatic loading :
a. Introduce the film into the mechanism through opening 30
(Fig. 8).
b. Press button 21 to set the motor in motion.
c. As soon as the film has passed through the lower sprocket
38, stop the mechanism by releasing pressure on button 21.
d. Push up lever 37 so as to bring it back to the horizontal
position (see Fig. 7). This will open the loop guides 31
and 39. Set the motor going once again until the end of
the film emerging from sprocket 38 is of a length of about 8
to 10 inches.
e. Insert the end of the film into the core slit of the take-up
spool, wind the film around the core and place the film
on lower spindle 40.
f. Set the mechanism going for a second or two to make sure
that :
— the loop guides are open,
— the loops keep their shape,
— the film guides and pad are closed, *
— the spools are placed well home on their spindles,
— the film winds onto the lower take-up spool.
g. Replace the lid of the camera and lock this by turning
button 43 in a clockwise direction (-—>F). If any difficulty
is experienced in replacing the lid, do not force it, but
make sure that all parts of the film transport mechanism
are in position, as in Fig. 7.
h. In case of incorrect loading, remove the film, wind it
back on to the top spool (see page 9), and reload more
carefully. If need be, see page 10.
i. To check up at any time whether any film is left in the
gate, proceed as follows :
Move lever 17 to position T (18), switch round the turret
so as to see the window of the gate and set lever 22 on
P (23), thus moving the shutter out of the line of vision.
It will then be seen whether the leader, film or trailer is
still in the gate. If any unexposed film (yellow) is left in
the gate, then only one picture will be fogged.
5
 Loading...