Then turn the catch as far as it will
go in the direction shown by the
arrow, so that it takes up the position
• shown in fig. 13. The viewflnder is now
firmly fixed onto the camera lid.
Fig. 13
To remove the viewfinder, open catch 7 completely ; lift up
back of finder until pin 8 is clear of hole 9 ; then twist the
viewfinder down about a quarter-turn towards the base of
the camera, thus freeing the pivot bar 5 from clamp 6.
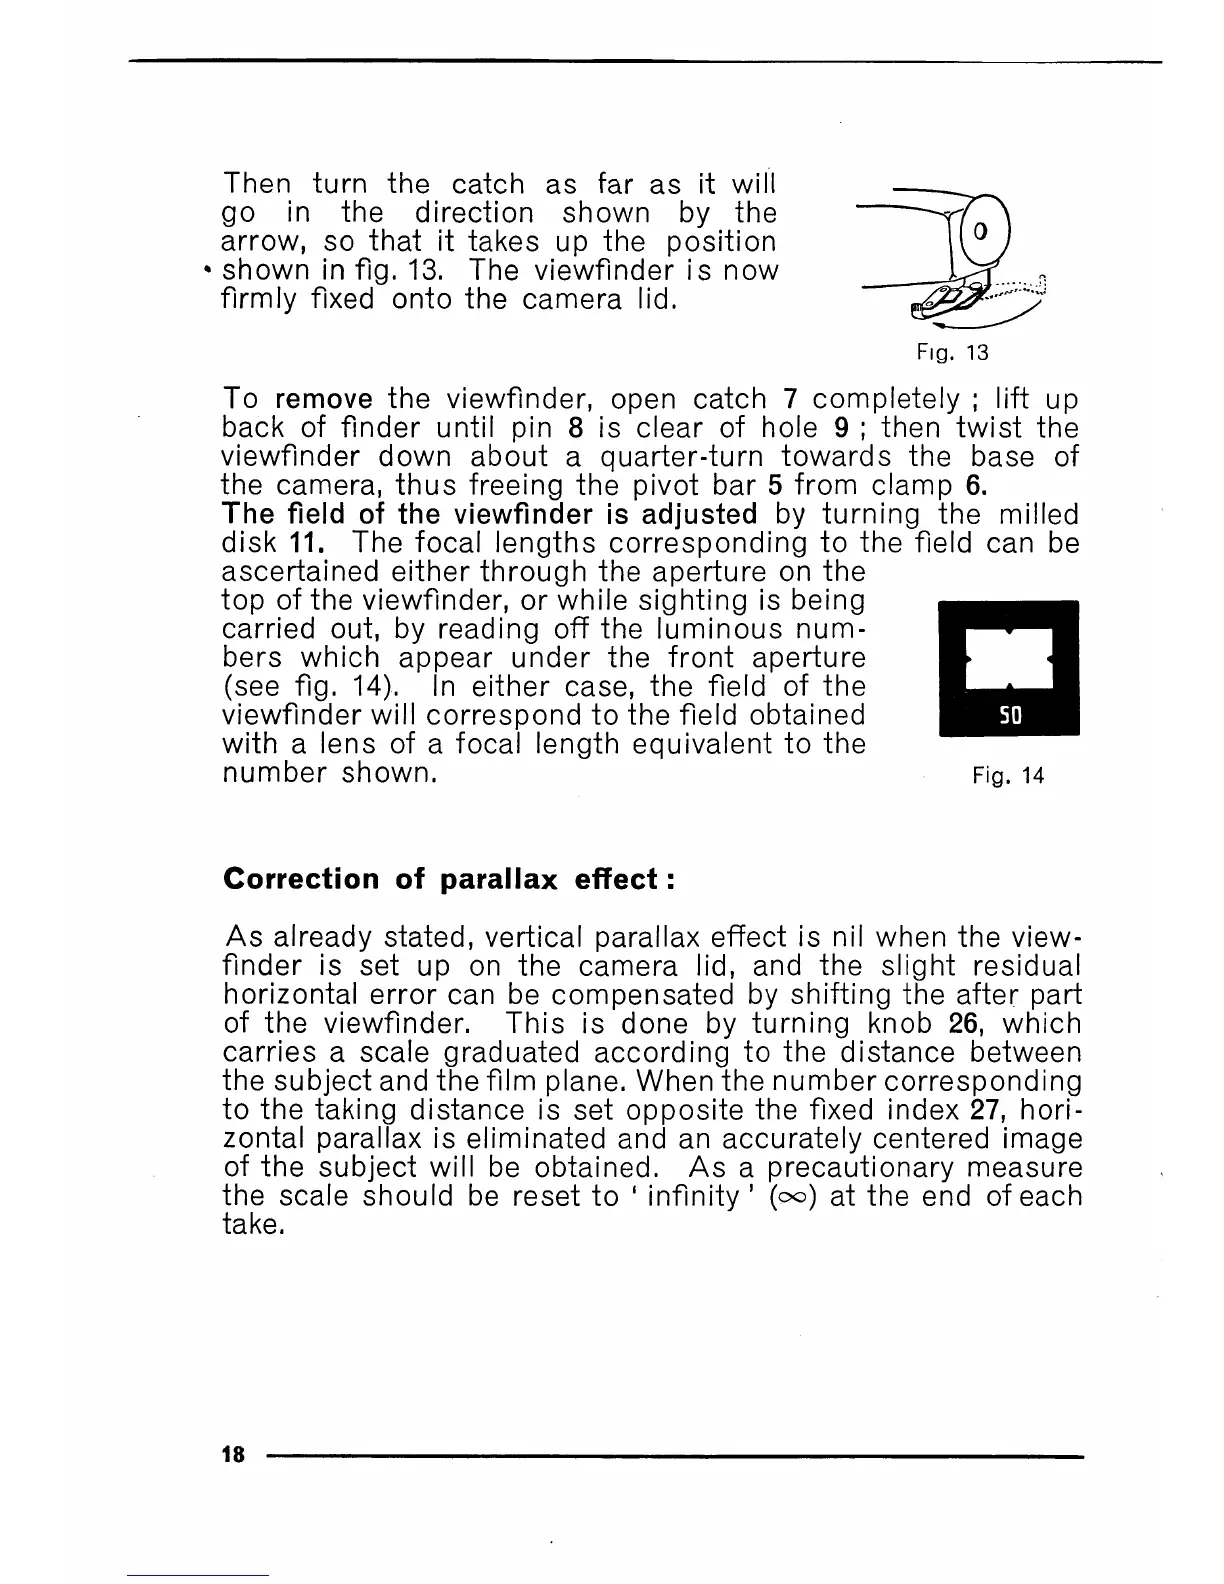
The field of the viewfinder is adjusted by turning the milled
disk 11. The focal lengths corresponding to the field can be
ascertained either through the aperture on the
top of the viewfinder, or while sighting is being
carried out, by reading off the luminous num-
bers which appear under the front aperture
(see fig. 14). In either case, the field of the
viewfinder will correspond to the field obtained
with a lens of a focal length equivalent to the
number shown. Fig. 14
Correction of parallax effect:
As already stated, vertical parallax effect is nil when the view-
finder is set up on the camera lid, and the slight residual
horizontal error can be compensated by shifting the after part
of the viewfinder. This is done by turning knob 26, which
carries a scale graduated according to the distance between
the subject and the film plane. When the number corresponding
to the taking distance is set opposite the fixed index 27, hori-
zontal parallax is eliminated and an accurately centered image
of the subject will be obtained. As a precautionary measure
the scale should be reset to ' infinity' (o©) at the end of each
take.
n
18