20 | INSTALLATION
Product Name6 720 ... ... (YYYY/MM)
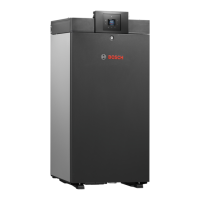
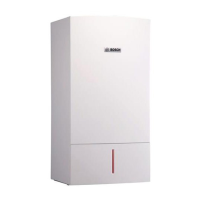
5.2.2 Positioning the appliance
The boiler must be adjusted to be level. This ensures air can escape from
the heat exchanger and condensate drains freely.
▶ Place boiler in its final location
▶ Release the locknuts on the boiler feet
▶ Adjust the boiler feet until the boiler is level vertically and
horizontally, check using a spirit level
▶ Secure in position with the locknuts
Fig. 16 Levelling the boiler
5.3 Mounting the boiler and flue opening
Safety
All relevant safety precautions must be undertaken. Protective clothing,
footwear, gloves and safety goggles must be worn as appropriate.
Running pipes behind the boiler
• The boiler should sit at least 70mm from the rear wall to allow enough
room for access to the pipe work.
• Do not cross a pipe over another.
Fig. 17 Pipe Connections
System boiler:
[1] Heating and DHW flow (1”)
[2] Gas (3/4”)
[3*] System boiler - DHW return (1”)
(only if optional diverter valve kit is fitted)
Regular boiler - Not used
[4] Heating return (1”)
[5] Condensate outlet
NOTICE: Damage caused by insufficient load bearing or
unsuitability of the boiler room floor
▶ Ensure the floor area is suitable for installing a boiler
and can take the “wet weight” of the appliance.
NOTICE: Damaged caused by mechanical strain on the
hydraulic and flue gas connections when adjusting the
position of the appliance.
▶ Do not apply any strain the connections when
adjusting the boiler position
CAUTION: Isolate the mains gas supply before starting
any work and follow all relevant safety precautions.
6720809859-79.1Wo
6720809859-48.1Wo
394
Ø80
Ø125
1
2
3*
4
466
98
130
162
193
900 - 930
C
82
C
L
1
2
3*
4
5
61
78 111
83
59
141253
L
 Loading...