Briefing the user, handing over technical documents
Condens 7000 F – 6720871560 (2019/11)
30
7.16 Checking tightness during operation
NOTICE:
Risk of material damage due to a short circuit!
Prior to checking for leaks, cover areas at risk, e.g. the internal water
pressure sensor and the return temperature sensor in the boiler
return.
Never spray or allow leak detection agent to drip onto cable entries,
plugs or electrical cables.
To prevent corrosion, carefully wipe off the leak detection agent
afterwards.
With the burner operational, use a foaming agent to test all joints
along the entire burner path, such as:
• Test nipple
• Locking screw for gas supply pressure
• Screw fittings (also at the gas connection) etc.
The agent must be approved for gas tightness testing.
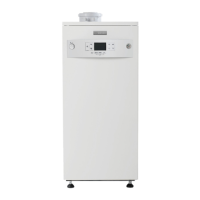
7.17 Installing casing parts
Fig. 32 Installing casing parts
[1] Bottom panel
[2] Front panel at bottom
[3] Front panel at top
[4] Side panels at front
[5] Side panels at rear
First hook the side panels at the rear [5] into the bottom rail at the
bottom, then lift them slightly and hook in at the top.
Using fixing screws, secure the rear side panels [5] to the rear of the
boiler.
First hook the side panels at the front [4] into the bottom rail at the
bottom, then lift them slightly and hook in at the top.
Insert the bottom panel [1].
Hook the bottom boiler front panel [2] into the cutouts at the bottom
of the boiler casing and hook into the side panels.
Insert the upper boiler front panel [3] into the lower boiler front panel
and place against side panels.
Make sure that bolts at the top have engaged in the corresponding
holes.
Turn the unlocking screws on the top of the boiler clockwise using a
suitable tool and lock the front panel [3].
Affix the clear pocket containing the technical documentation to the
side panel of the boiler in a clearly visible location.
8 Briefing the user, handing over technical
documents
WARNING:
Danger to life due to poisoning!
Risk of poisoning due to escaping flue gases when the air supply is
inadequate.
Make sure that a supply of air is available in every operating mode
through corresponding openings to the open air.
Make the user aware of the need for and function of the ventilation
and combustion air apertures.
Make the user familiar with the heating system and the boiler
operation.
Make the user aware that the boiler and control unit must only be
opened by qualified contractors.
Confirm commissioning in the report (Chapter 17.6).
Together with the user and referring to the operating instructions,
perform a shutdown and restart.
Point out the user that frequent refilling of heating water is a sign that
the system is faulty and/or leaking (ensure required water quality
according to the operator's log).
Inform operator about the required water quality and point out where
the heating water must be refilled.
Explain to the customer what to do in an emergency, e.g. a fire,
referring to the operating instructions.
Hand over the technical documents to the user.
9Shutdown
NOTICE:
Frost damage!
The heating system can freeze up when it is not in operation.
Whenever possible, leave the heating system permanently
switched on.
Protect the heating system against frost by draining the heating
system and DHW pipes from the lowest point.
9.1 Shutting down the heating system via the control unit
To shut down the heating system, observe the corresponding
technical documentation for the control unit.
Close off the fuel supply.
9.2 Shutting down the heating system in an emergency
Only in emergencies, shut down the heating system via the fuse/circuit
breaker at the installation location or the heating system emergency stop
switch.
Explain to the operator/user what to do in an emergency, e.g. fire.
Never risk your own life. Your own safety is paramount.
Close off the fuel supply installed on site.
Isolate the heating system from the mains power supply via the
heating system emergency stop switch or the main circuit breaker.

 Loading...