8 | English
1 619 P11 523 | (23.8.13) Bosch Power Tools
Assembly
Before any work on the machine itself, pull the mains
plug.
Auxiliary Handle
Operate your machine only with the auxiliary handle
12
.
Changing the position of the auxiliary handle
(see figure A)
The auxiliary handle 12 can be set to any position for a secure
and low-fatigue working posture.
–GBH2-22:
– Turn the wing bolt for adjustment of the auxiliary handle 13
in anticlockwise direction and set the auxiliary handle 12
to the required position. Then tighten the wing bolt 13
again in clockwise direction.
– GBH 2-22 S | E | RE:
– Turn the bottom part of the auxiliary handle 12 in counter-
clockwise direction and swivel the auxiliary handle 12 to
the desired position. Then retighten the bottom part of the
auxiliary handle 12 by turning in clockwise direction.
Adjusting the Drilling Depth (see figure B)
The required drilling depth
X
can be set with the depth stop
11
.
– Press the button for the depth stop adjustment 10 and in-
sert the depth stop into the auxiliary handle 12.
– The knurled surface of the depth stop 11 must face down-
ward.
– Insert the SDS-plus drilling tool to the stop into the
SDS-plus tool holder 1. Otherwise, the movability of the
SDS-plus drilling tool can lead to incorrect adjustment of
the drilling depth.
– Pull out the depth stop until the distance between the tip of
the drill bit and the tip of the depth stop correspond with
the desired drilling depth X.
Selecting Drill Chucks and Tools
For hammer drilling and chiselling (chiselling only with
MV 200 accessory), SDS-plus tools are required that are in-
serted in the SDS-plus drill chuck.
For drilling without impact in wood, metal, ceramic and plas-
tic as well as for screwdriving and thread cutting, tools with-
out SDS-plus are used (e.g., drills with cylindrical shank). For
these tools, a keyless chuck or a key type drill chuck are re-
quired.
Changing the Key Type Drill Chuck
To work with tools without SDS-plus (e.g., drills with cylindri-
cal shank), a suitable drill chuck must be mounted (key type
drill chuck or keyless chuck, accessories).
Mounting the Key Type Drill Chuck (see figure C)
– Screw the SDS-plus adapter shank 16 into a key type drill
chuck 15. Secure the key type drill chuck 15 with the se-
curing screw 14. Please observe that the securing
screw has a left-hand thread.
Inserting the Key Type Drill Chuck (see figure C)
– Clean the shank end of the adapter shank and apply a light
coat of grease.
– Insert the key type drill chuck with the adapter shank into
the tool holder with a turning motion until it automatically
locks.
– Check the locking effect by pulling the key type drill chuck.
Removing the Key Type Drill Chuck
– Push the locking sleeve 3 toward the rear and pull out the
key type drill chuck 15.
Changing the Tool
The dust protection cap 2 largely prevents the entry of drilling
dust into the tool holder during operation. When inserting the
tool, take care that the dust protection cap 2 is not damaged.
Impact rate
min
-1
0–4400 4400 0 –4400 0 –4400
Impact energy per stroke
J2.22.2 2.2 2.2
Speed
min
-1
0–1000 1000 0 –1000 0 –1000
Tool holder
SDS-plus SDS-plus SDS-plus SDS-plus
Spindle collar diameter
mm 43
(Euro-Norm)
43
(Euro-Norm)
43
(Euro-Norm)
43
(Euro-Norm)
Hammer Drilling
Drilling
–
Drilling diameter, max.:
–Concrete
– Brickwork (with core bit)
– Steel
– Wood
mm
mm
mm
mm
22
68
–
–
22
68
13
30
22
68
13
30
22
68
13
30
Weight according to EPTA-Procedure
01/2003
kg 2.3 2.3 2.3 2.3
Protection class
/II /II /II /II
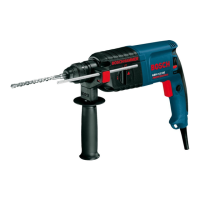
Rotary Hammer GBH 2-22
Professional
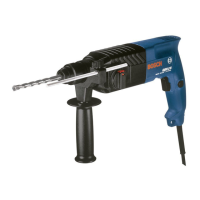
GBH 2-22 S
Professional
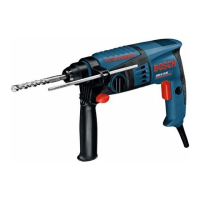
GBH 2-22 E
Professional
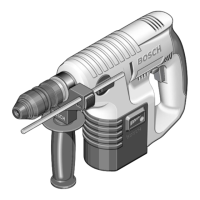
GBH 2-22 RE
Professional
The values given are valid for a nominal voltage [U] of 230 V. For different voltages and models for specific countries, these values can vary.
OBJ_BUCH-795-004.book Page 8 Friday, August 23, 2013 12:16 PM

 Loading...
