10 | English
1 609 92A 43E | (31.7.17) Bosch Power Tools
Assembly
Measuring tool power supply
The measuring tool can either be operated with commercially
available batteries or with a Bosch lithium-ion battery pack.
Operation with Battery Pack
Note: Use of battery packs not suitable for the measuring tool
can lead to malfunctions of or cause damage to the measuring
tool.
Note: The battery pack is supplied partially charged. To en-
sure full capacity of the battery pack, completely charge the
battery pack in the battery charger before using for the first
time.
Use only the chargers listed in the technical data. Only
these battery chargers are matched to the lithium-ion
battery of your measuring tool.
The lithium-ion battery pack can be charged at any time with-
out reducing its service life. Interrupting the charging proce-
dure does not damage the battery pack.
The “Electronic Cell Protection (ECP)” protects the lithium-
ion battery pack against deep discharging. When the battery
pack is discharged, the measuring tool is switched off by a
protective circuit.
Do not switch the measuring tool back on after it has
been switched off by the protective circuit. The battery
pack can be damaged.
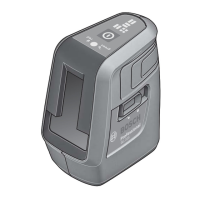
To insert the charged battery pack 14, slide it into the battery
port until you feel it engage.
To remove the battery pack 14, press the unlocking buttons
12 and pull the battery pack out of the battery port 9. Do not
use force to do this.
Operation with Batteries
Alkali-manganese batteries are recommended for the meas-
uring tool.
The batteries are inserted into the battery adapter.
The non-rechargeable battery adapter is intended only
for use in designated Bosch measuring tools and must
not be used with power tools.
To insert the batteries, slide the cover 10 of the battery
adapter into the battery port 9. Place the batteries in the
cover as shown in the illustration on the sealing cap 13. Slide
the sealing cap over the cover until you feel it click into place.
To remove the batteries 11 press the unlocking
buttons 12 of the sealing cap 13 and pull off the
sealing cap. Make sure that the batteries do not fall
out. To do so, hold the measuring tool with the bat-
tery port 9 facing upward. Remove the batteries.
To remove the inside cover 10 from the battery
port 9, reach into the cover and pull it out of the measuring
tool by applying light pressure to the side wall.
Always replace all batteries at the same time. Only use
batteries from one brand and with the identical capacity.
Remove the batteries from the measuring tool when
not using it for extended periods. When storing for
extended periods, the batteries can corrode and self-
discharge.
Battery Status Indicator
The battery status indicator 2 shows the charge condition of
the battery pack or batteries:
If the battery pack or the batteries are running low, the laser
lines will gradually become dimmer.
Immediately replace a fault battery pack or empty batteries.
Recommended batteries
GBA 10,8V ...
GBA 12V ...
except for GBA 12V 4,0 Ah
Recommended chargers
AL 11.. CV
GAL 12.. CV
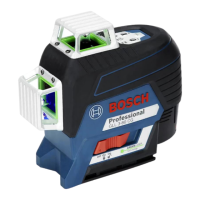
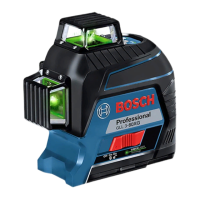
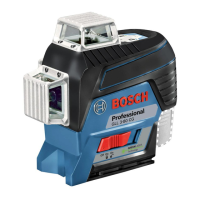
Line laser GLL 3-80 CG
1) The working range can be decreased by unfavourable environmental conditions (e.g. direct sun irradiation).
2) Shorter operating times in Bluetooth® operation and/or in conjunction with RM 3.
3) For Bluetooth
® low energy devices, establishing a connection may not be possible, depending on model and operating system. Bluetooth® devices
must support the SPP profile.
4) The signal range may vary greatly depending on external conditions, including the receiving device used. The Bluetooth
® range may be significantly
weaker inside closed rooms and through metallic barriers (e.g. walls, shelving units, cases, etc.).
5) limited performance at temperatures <0 °C
Technical data determined with battery from delivery scope.
The measuring tool can be clearly identified with the serial number 18 on the type plate.
LED Charge Condition
Continuous lighting, green 100–75 %
Continuous lighting, yellow 75–35 %
Continuous lighting, red 35–10 %
No light – Battery pack defective
– Batteries empty
OBJ_BUCH-3304-001.book Page 10 Monday, July 31, 2017 1:09 PM
 Loading...