20 | English
2 609 140 620 | (14.7.11) Bosch Power Tools
Deleting Measured Values
Briefly pressing button 1 deletes the last individual measuring value determined
in all measuring functions. Briefly pressing the button repeatedly deletes the in-
dividual measured values in reverse order.
Memory Functions
When switching off the measuring tool, the value in the memory is retained.
Storing/Adding Measured Values
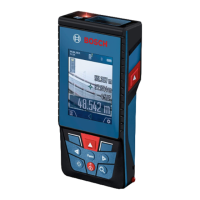
Push the memory add button 4 in order to store the
current measured value – a length, area or volume
value, depending on the current measuring function.
As soon as a value has been stored, “M” is indicated
in the display and the “+” behind it briefly flashes.
If a value is already stored in the memory, the new val-
ue is added to the memory contents, however, only
when the measures of unit correspond.
As an example, when an area value is in the memory and the current measured
value is a volume value, the addition cannot take place. “Error” briefly flashes in
the display.
Subtracting Measured Values
Push the memory subtraction button 3 in order to subtract the current measured
value from the memory value. As soon as a value has been subtracted, “M” is in-
dicated in the display and the “–” behind it briefly flashes.
If a value is already stored in the memory, the new measured value can be sub-
tracted only when the measures of unit correspond (see “Storing/Adding Meas-
ured Values”).
Displaying the Stored Value
Push the memory retrieve button 11 in order to dis-
play the value stored in the memory. “M=” is indicat-
ed in the display. When the memory contents “M=” is
indicated in the display, it can be doubled by pushing
the memory add button 4 or set to zero by pushing
the memory subtract button 3.
Deleting the Memory
To delete the memory contents, first push the memory retrieve button 11, so
that “M=” is indicated in the display. Then briefly press button 1; “M” is no long-
er indicated in the display.
Working Advice
General Information
The reception lens 17 and the laser beam outlet 16 must not be covered when
taking a measurement.
The measuring tool must not be moved while taking a measurement (with the ex-
ception of the continuous measurement function). Therefore, place the measur-
ing tool, as far as this is possible, against or on the measuring points.
Measurement takes place at the centre of the laser beam, even when target sur-
faces are sighted at an incline.
Influence Effects on the Measuring Range
The measuring range depends upon the light conditions and the reflection prop-
erties of the target surface. For improved visibility of the laser beam when work-
ing outdoors and when the sunlight is intense, use the laser viewing glasses 19
(accessory) and the laser target plate 20 (accessory), or shade off the target sur-
face.
OBJ_DOKU-27422-001.fm Page 20 Thursday, July 14, 2011 11:09 AM

 Loading...