20 | English
Application tool Material Application
plastics, fibreglass, plas-
terboard, porous concrete
HCS plunge cut
saw blade for wood
Softwood, dowels, pins,
furniture elements
Fast, deep separating cuts and plunge cuts;
including sawing close to edges in corners and in difficult-
to-reach areas;
example: Deep plunge cut in softwood for installing a vent-
ilation grille
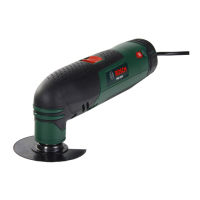
Fitting/changing the application tool (AutoClic)
(see figuresA–B)
Remove the application tool if one has already been fitted.
To do so, open the AutoClic lever(1) all the way. The applic-
ation tool/accessory will be ejected.
Place the required application tool (e.g. plunge cut saw
blade(9)) on a level surface so that the depressed centre is
face down (see figure on the graphics page; you should be
able to read the text on the application tool from above).
Turn the application tool to a position which is convenient
for the job at hand. Press the power tool onto the application
tool at the required angle until it audibly engages.
u Check that the application tool is seated securely. Ap-
plication tools that are attached incorrectly or are not se-
curely fixed in place may come loose during operation,
thereby putting you at risk.
Fitting and Adjusting the Depth Stop
The depth stop (12) can be used when working with seg-
ment saw blades.
Remove the application tool if one has already been fitted.
Slide the depth stop (12) over the tool holder (8) and onto
the collar of the power tool as far as it will go, with the la-
belled side facing upwards.
The depth stop is intended for the following cutting depths:
– With segment saw blades ACZ85.. with a diameter of
85mm: Cutting depths 8mm, 10mm, 12mm and
14mm (information on the depth stop in a larger font size
and without brackets).
– With segment saw blades ACZ100.. with a diameter of
100mm: Cutting depths 14mm, 16mm, 18mm and
20mm (information on the depth stop in a smaller font
size and in brackets).
Insert the appropriate segment saw blade for the desired
cutting depth. Slide the depth stop (12) from the tool holder
(8) in the direction of the application tool until you can ro-
tate it freely. Rotate the depth stop (12) so that the desired
cutting depth is above the section of the saw blade that will
be used to saw. Slide the depth stop (12) onto the collar of
the power tool once again as far as it will go.
Remove the depth stop (12) for all other cutting depths and
for working with other application tools. To do this, remove
the application tool and pull the depth stop away from the
collar.
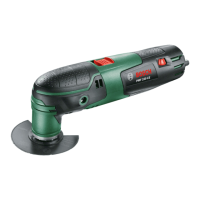
Fitting the Auxiliary Handle (accessory)
The low-vibration auxiliary handle enables the tool to be
used safely and more comfortably.
Screw the auxiliary handle into the thread (5) on the left or
right of the machine head depending on how you are work-
ing.
u Do not continue to use the power tool if the auxiliary
handle is damaged. Do not make any alterations to the
auxiliary handle.
Choosing the Sanding Sheet
Different sanding sheets are available, depending on the material you are working with and the required surface removal rate:
Sanding sheet Material Application Grit
Red quality
– All wood and wood-
based materials (e.g.
hardwood, softwood,
chipboard, construction
boards)
– Metal materials
For pre-sanding, e.g. of rough and uneven beams and
boards
Coarse 40
60
For surface sanding and levelling of slight irregularities Medium 80
100
120
For finish-sanding and fine sanding of wood Fine 180
240
320
400
White quality
– Paint
– Varnish
– Filler
– Bodyfiller
For sanding down paint Coarse 40
60
For sanding undercoats (e.g. removing brushstrokes,
paint drips and paint runs)
Medium 80
100
120
1 609 92A 84H | (08.07.2022) Bosch Power Tools
 Loading...