-10-
!#$#$##
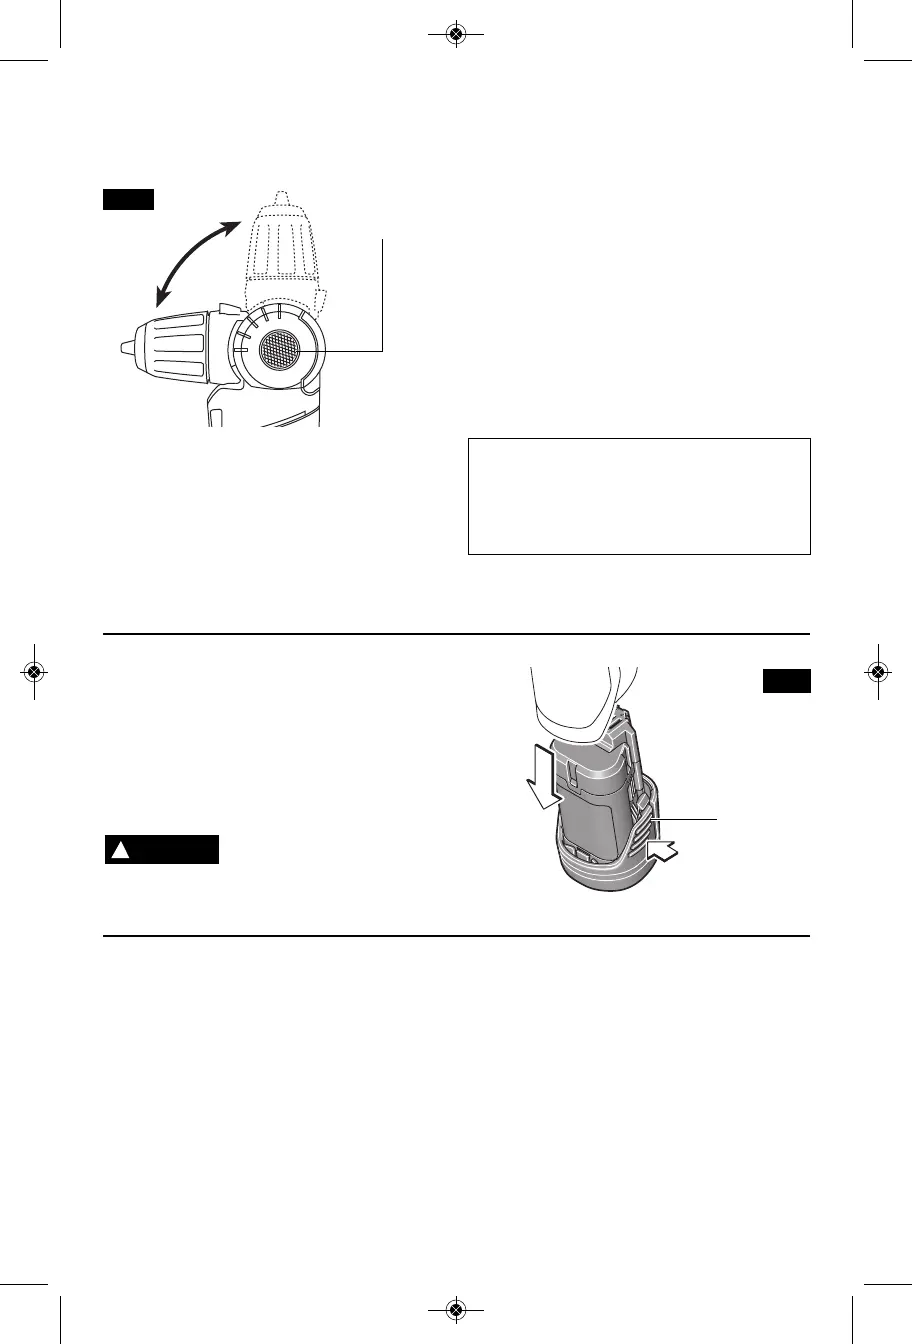
Your tool also features a 5 position articulating
head. To adjust, depress articulation button
a
nd move head to desired position (Fig. 4).
!
When the trigger switch is released it
activates the brake to stop the chuck quickly.
This is especially useful in the repetitive
driving and removal of screws.
$#D
Your tool is equipped with an automatic locking
system. This feature will lock the bit holder in
one position when the trigger switch is
released. This will allow you to tighten or loosen
a nut or screw by rotating the tool by hand with
the switch off. This is convenient when higher
turning torque is needed.
$#&!#
Your tool is also equipped with a light that turns
on automatically when the switch is activated,
for better visibility when drilling/driving (Fig. 1).
##!(!#
#!#"
Your tool is equipped with charge condition
indicator lights (Fig. 1). The indicator lights
shows the charge condition of the battery for a
few second when the On/Off trigger is pressed
halfway or fully.
"!#!"
##!(
Release battery pack from tool by pressing on
both sides of the battery release tabs and pull
downward (Fig. 5).
To insert battery, align battery and slide
battery pack into tool until it locks into position.
Do not force.
/ +*==.;B ;.5.*<. =*+< *;.
,;*,4.- 8; 8=1.;@2<.
-*6*0.- -8 78= 27<.;= 27=8 =885 Battery
can fall out during operation.
*9*,2=B
Continuous lighting 3 x green > 2/3
Continuous lighting 2 x green > 1/3
Continuous lighting 1 x green < 1/3
Flashing light 1 x green reserve
!
WARNING
BATTERY
RELEASE
TABS
FIG. 5
!##!#"
1. The charger was designed to fast charge
the battery only when the battery
temperature is between 32˚F (0˚C) and
113˚F (45˚C). If the battery pack is too hot or
too cold, the charger will not fast charge the
battery. (This may happen if the battery pack
is hot from heavy use). When the battery
temperature returns to between 32˚F (0˚C)
and 113˚F (45˚C), the charger will
automatically begin charging.
2. A substantial drop in operating time per
charge may mean that the battery pack is
nearing the end of its life and should be
replaced.
3. Remember to unplug charger during
storage period.
4. If battery does not charge properly:
a. Check for voltage at outlet by plugging
in some other electrical device.
FIG. 4
ARTICULATION
BUTTON
BM 2610012115 03-11:BM 2610012115 02-11 2/23/11 11:10 AM Page 10