RE 64025-B/2021-08-12, Bosch Rexroth AG
Installation | Control blocks for mobile applications 33/54
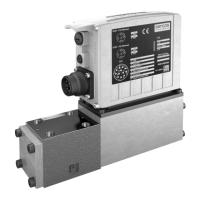
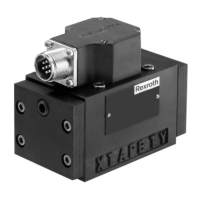
7�5�9 Connecting the control block electrically
NOTICE
Negative effect onfunction due toincorrect plug-in connections!
Only the plug-in connections specified inthe datasheet/offer drawing may
beused forelectrical connection.
Observe the installation specifications ofthe manufacturer ofthe plug-in
connection.
Before commissioning, check tosee whether the voltage inthe power supply
matches the parameters inthe offer drawing and whether the total current
tobe expected isless than orthe same asthe load capacity ofthe power
supply.
Do not connect live plug-in connections. The assembly process may only
berepeated 10times.
The machine manufacturer is responsible for rating the electric control.
Electrically controlled control blocks must be connected in accordance with the
electrical circuit diagram of the machine.
For control blocks with electrical control and/or mounted sensors, please comply
with the parameters given in the datasheet and the offer drawing, e.g.:
• Permissible voltage range
• Permissible current
• Correct pin assignment
Exact parameters onthe correct assignment ofthe connector, the type
ofprotection and the appropriate mating connector can also befound inthe
datasheetand the offer drawing. The mating connector isnot included inthe
scope ofdelivery.
To connect the control block to the machine's electronics:
1� Switch the plug-in connections on the control block to a deenergized state.
2� Before establishing the connection, check the connector and all seals
fordamage.
3� Connect the control block electrically (12 or 24V).
If necessary, you can change the position of the connector by turning the solenoid
(coil). This isindependent oftheconnector version.
To do this, proceed asfollows:
1� Undo the mounting nut(1) of the solenoid using a suitable tool. To do this,
turn themounting nut(1) one turn counter-clockwise.
2� Turn thesolenoid body(2) tothe desired position.
3� Re-tighten themounting nut. Tightening torque ofthemounting nut: 4
+1Nm.
Procedure
Changing connector
position
1
2
 Loading...