English • 9Installation Guide • FreeSpace 3 Loudspeaker System
PRO.BOSE.COM
Installation
Mounting the Loudspeaker
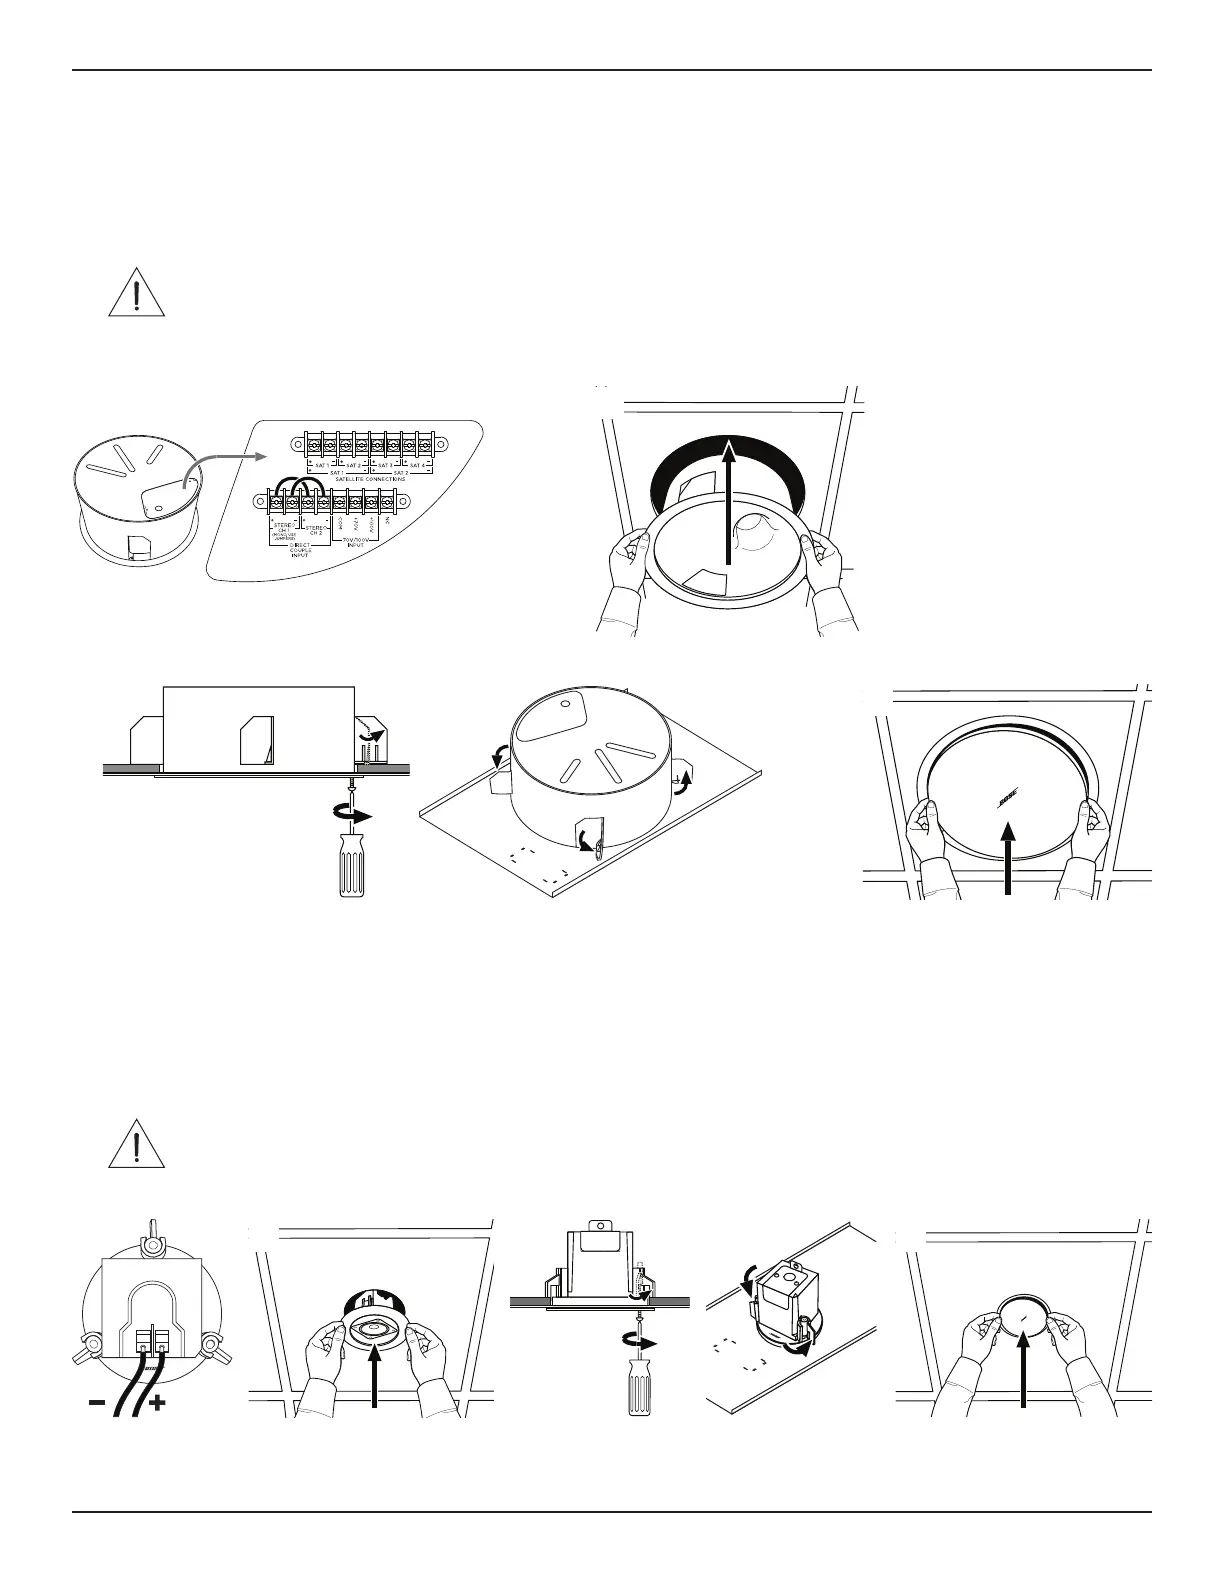
Series II Acoustimass Bass Module
1. Make sure all loudspeaker wiring connections are complete. For wiring information, see Wiring the Loudspeaker (Page6).
2. Insert the loudspeaker through the hole and into the tile bridge or rough-in pan. Continue to hold the loudspeaker in place.
3. Tighten the anchor arm screws to secure the loudspeaker. If using a power drill, set to a low torque setting. Make sure all of the
anchors are tightened before loosening your grip on the loudspeaker.
WARNING: Over-tightening the screws may result in damage to the anchor attachment point or the ceiling, which could lead
to a falling hazard.
4. Using both hands, position the grille against the loudspeaker. Gently push the grille against the loudspeaker to secure it. You can
rotate the logo when the grille is secured.
Flush-mount Satellites
1. Make sure all loudspeaker wiring connections are complete. For wiring information, see Wiring the Loudspeaker (Page6).
2. Insert the loudspeaker through the hole and into the tile bridge or rough-in pan. Continue to hold the loudspeaker in place.
3. Tighten the anchor arm screws to secure the loudspeaker. If using a power drill, set to a low torque setting. Make sure all of the
anchors are tightened before loosening your grip on the loudspeaker.
WARNING: Over-tightening the screws may result in damage to the anchor attachment point or the ceiling, which could lead
to a falling hazard.
4. Using both hands, position the grille against the loudspeaker. Gently push the grille against the loudspeaker to secure it.
q
e
w
r
q ew r