English • 7Installation Guide • EdgeMax EM90/EM180
PRO.BOSE.COM
Installation
Cutting the Ceiling
1. Use the template to trace a hole onto
the ceiling.
2. Cut a hole into the ceiling.
q w
Preparing Hard Ceiling (Existing Construction)
Installing the Tile Bridge
1. Insert the assembled tile bridge through the hole and place the tile bridge
across the ceiling grid or ceiling furring. If necessary, adjust the tile bridge
so the rails rest on the ceiling grid or ceiling furring.
q
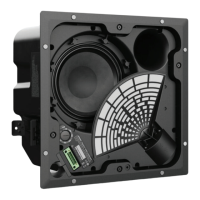
Mounting the Loudspeaker
1. Pass the audio wire through the wire opening (next to wiring terminal).
2. Insert the loudspeaker through the hole and into the tile bridge. Make sure the anchors engage on the tile bridge
before loosening your grip on the loudspeaker.
3. Remove the connector, wire the connector, and reinsert the connector into the loudspeaker. For wiring information, see
Wiring the Loudspeaker on page4.
4. Tighten the anchor arm screws to secure the loudspeaker. If using a power drill, set to a low torque setting.
WARNING: Over-tightening the screws may result in damage to the anchor attachment point or the ceiling,
which could lead to a falling hazard.
5. Discard the phase guide protector.
q
e
w
r
Wire
opening
 Loading...