Placing
your
media
center
J
Note:
Now
is
a
good
time
to
find the serial number on the bottom
of
the media center, before
you proceed. Copy that number onto your warranty card
and
in
the space provided on
page
2
of
this guide.
Select a location for the media center, keeping
in
mind the following guidelines:
• Do not block the front
of
the media center. Make sure you allow enough room to lift up the
front cover and open the CD tray
of
the CD/DVD player. Also, position the media center so
that you can clearly view the display window
to
the right
of
the CD tray cover. See Figure 6
for a description
of
the front
of
the media center.
• Place the media center close enough
to
other sound sources
(TV
and
VCR)
to
allow for easy
cable connections. If you need additional audio and/or video cables
to
connect all
of
your
components, see your dealer or call
Bose®
customer service. Refer
to
the Bose address list
included with your system.
• Place the media center within 30 feet
(9.1
m)
of
the Acoustimass® module (the length
of
the
audio input cable).
J
Note:
For convenience, until your system
is
completely installed
and
tested, keep the media
center where you have easy access
to
its rear connection panel.
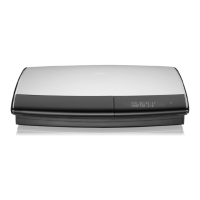
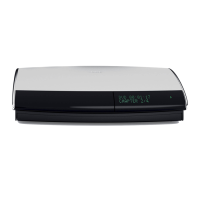
Figure
6
Front features
of
media
center
Front
door
- Make sure you have
enough room to lift up this door.
Display
window
- Make sure you can view
this information while using your system.
Disc
tray-
Make sure nothing blocks this tray as it slides
open for you to insert a disc.
Connecting
the
speakers
to
the
Acoustimass®
module
J
Note:
Before you start making system connections, make sure that the media center, the
Acoustimass module,
and
any
additional equipment are not connected
to
AC
power.
J
Note:
To
lengthen the speaker cables, use heavy-duty RCA extension cables, or splice
in
18-
gauge or thicker cord (connecting +
to
+
and
-
to
-).
To
purchase extension cables, see your
dealer or electronics store,
or
call
BostJ>
customer service. Refer
to
the Bose address list
included with your system.
In
Figure
7,
the wire marked with a red collar is positive
(+)
and the plain one is negative (-).
These wires match the positive (red) and negative (black) terminals on the back
of
each
speaker.
J
Note:
The
surround speaker cables are joined together for your convenience, providing an
easy-to-use cable for connecting the surround speakers.
To
run the cables
in
different direc-
tions from the Acoustimass module, simply pull apart the cables
as needed.
10

 Loading...