37
FUNCTIONAL TEST PROCEDURES
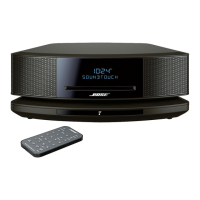
4. Micro USB Port Functional Test
4.1 Figure 40. Using a micro USB to standard
USB cable, insert the micro USB end of the
cable into the SoundTouch
®
10 connector
labeled SETUP A (micro USB).
4.2 Plug the other end of the cable into a USB
port on a computer. Ensure that cable is prop-
erly seated.
4.3 Open your device manger and look un-
der Network Adapters. You should see the
“SoundTouch™ System” as an adapter.
Directions: On your computer, click on Start
and navigate to Run. In the window that
opens, enter “mmc devmgmt.msc”. The device
manager will open. In the device manager,
expand the network adapters, you should see
the “SoundTouch™ System” as an adapter.
Figure 41.
Figure 41. Network Adapter Location
Steps
LED LED Response LED Color
1 Wi-FI LED Blink Amber
2 Wi-FI LED Blink White
3 Wi-FI LED Solid White
4 Bluetooth LED Blink Blue
5 Bluetooth LED Blink White
6 Bluetooth LED Solid White
7 AUX LED Blink White
8 AUX LED Solid White
9 Shelby LED Blink Amber
10 Shelby LED Blink White
11 Shelby LED Solid White
Wi-FI
Bluetooth
AUX
Shelby
Figure 39. LED’s Indicators Location
Figure 40. Micro USB Connection
LED Test. ( Continued )
Note: A zip le with the automated commands
“Soundtouch 10 LEDtest.vbs” is available for
download on the Bose product’s repair infor-
mation page.
3.5 Run the ledtest.vbs by double clicking it
and observed the LEDs light up sequences by
referring to the table below. At the end of the
test, all LEDs should be white only.

 Loading...