31
DISASSEMBLY PROCEDURE
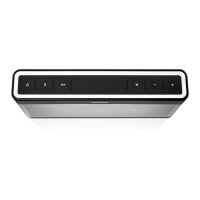
5. Button PCB Removal
5.1 Perform procedure 4 rst.
5.2 Remove the four screws securing the
button PCB to the top cap. Slightly lift up the
foam to expose to the two screws furthest from
the grille. Figure 11.
6. Display Assembly Removal
6.1 Perform procedure 4 rst.
6.2 Remove the six screws securing the display
assembly to the grille. Lift out the display
assembly. Figure 12.
! Important Note: Take ESD precautions when
connecting or disconnecting the OLED display.
Refer to page 4 for ESD precautions.
! Important Note: The display assembly
must be replaced with the display assembly
listed in the main part list. There are different
OLEDs that need to match the display PCB.
The display assembly listed in the main part list
uses a matched OLED and display PCB.
7. Wi-Fi Module Removal
7.1 Perform procedure 4 rst.
7.2 Remove the FFC from J902 and J802.
Figure 13.
7.3 Remove the two screws securing the Wi-
Fi Module to the matrix and lift out the Wi-Fi
Module. Figure 14.
7.4 Remove the FFC from J901. Press on
J801’s two connector release tabs and carefully
pull out the FFC. Figure 14.
Figure 11. Button PCB Removal
Figure 12. Display Assembly Removal
Figure 13. Wi-Fi Module Removal
Figure 14. Wi-Fi Module, Cables

 Loading...