Boxx Atom Receiver Operations
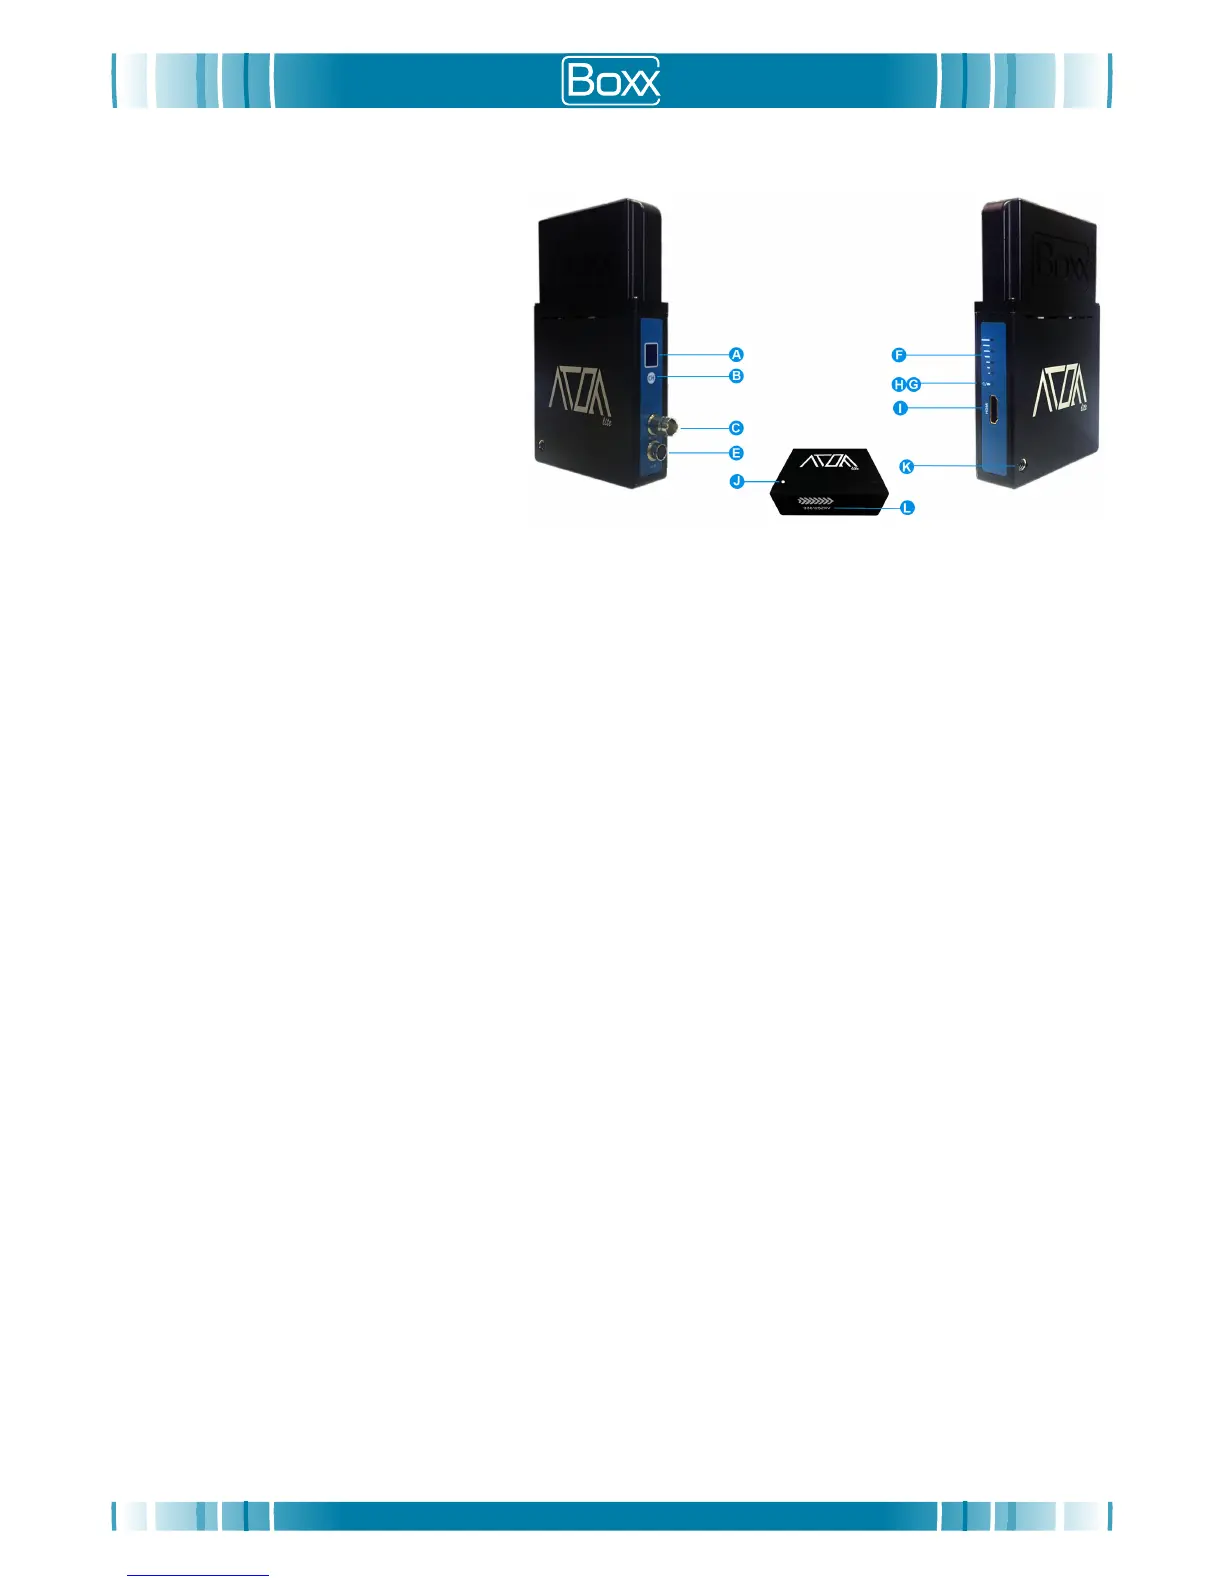
A. Channel LCD Window
B. Channel Selection Button
C. 3G HD-SDI Video/Audio Output
E. 4-pin Hirose 7-36V DC Power Input
F. Signal Strength Indicator LED
G. Video Status Indicator LED
H. Power Status Indicator LED
I. HDMI Video/Audio Output
J. Fan Speed Control Pot
K. 1/4” Threaded Mount
L. Unit Serial Number
Boxx Atom Receiver Setup
Power Supply
1. Using the CBL111 cable supplied with the Boxx Atom Receiver, insert the 4-pin Hirose plug on the cable into the
4-pin Hirose socket on the Boxx Atom Receiver (Fig 2-E)
.
2. Connect the 4-pin XLR plug of the CBL111 cable to the PS1205 4-pin XLR socket; making sure that the mains plug
is also connected via the figure-8 connector on the PS1205 power supply.
3. The Boxx Atom Receiver will automatically turn on once power has been supplied to a unit and the last channel
used will be displayed on the Channel LCD Window (Fig 2-A).
Notes:
The CBL103 cable can also be used to connect the receiver to a power source using the Anton 2-pin D-tap connector.
Video/Audio
1. Using the CBL101 cable supplied with the Boxx Atom
Receiver, connect one side of the cable to the 3G HD-SDI
BNC Video/Audio Output socket (Fig 2-C) on the Boxx Atom Lite Receiver.
Alternatively connect an HDMI cable (not supplied with the Boxx Atom
Receiver) to the HDMI Input socket
(Fig 2-J) on the Boxx Atom Receiver.
Do not use both the HD-SDI BNC Input socket and HDMI Input sockets at the same time.
2. Connect the other end of the CBL101 (or HDMI) cable to the corresponding HD-SDI/HDMI video/audio input socket
on the monitor or recording device.
Warranty
The system is sold with a limited warranty of 12 months (Warranty term
) by Boxx TV Ltd (Manufacturer). Specific
advice, repairs and replacement options are available to the original purchaser in the event the Atom system fails to
conform to this warranty. The Manufacturer shall not be responsible for product damages caused by natural disasters,
fire, static discharge, misuse, abuse, neglect, improper handling, unauthorized repair, alteration or accident. The
Manufacturer shall not be liable for any special, incidental or consequential damages, even if informed of the
possibility thereof in advance. You must inform your place of purchase within 28 days of detecting a defect in material
or workmanship not conforming to the specifications (see Specifications section of this guide) of the Atom system.
During the Warranty term, the Manufacturer will, at its discretion and without extra charge, as your exclusive remedy,
repair or replace the products that do not comply with this warranty; or failing this, will reimburse the purchase price of
the system. This amount will be based on length of ownership and may be reduced in accordance with general
accounting principles.
Repairs Under Warranty
A receipt of purchase, or any other proof of purchase, bearing the date of purchase and the product serial number
must be presented for all warranty repairs. The Manufacturer reserves the right to refuse free-of-charge warranty
service if the requested documentation cannot be presented or if the information is incomplete or incompatible with the
Reseller’s records. Repair, at the Manufacturer’s option, includes replacement of boards or parts with new or
functionally equivalent reconditioned parts or boards. The Manufacturer does not warrant the installation, maintenance
or service of the system, parts or accessories.
User Guide: Boxx Atom System V1.1 -
April 2017
Fig 2
 Loading...