27
Travel lock
• Activation: By pressing the on/off switch (5) for
3 seconds the shaver is locked. This is confirmed
by a beep sound and the lock symbol
in the
display. Afterwards the display turns off.
• Deactivation: By pressing the on/off switch for
3 seconds the shaver is unlocked again.
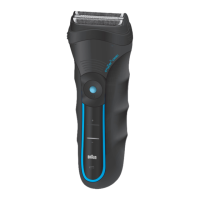
Manual cleaning of the shaver
(see fig. C/D)
The shaver is suitable for cleaning under running tap
water
. Detach the shaver ifr
om the power supply
befor
e cleaning it in water
.
• Switch the shaver on and rinse the shaver head
under hot running water until all residues have
been removed. You may use liquid soap without
abrasive substances. Rinse off all foam and let the
shaver run for a few more seconds.
• Next, switch off the shaver, remove the Foil &
Cutter cassette and let it dry.
• If you regularly clean the shaver under water, then
once a week apply a drop of light machine oil on
top of the Foil & Cutter cassette.
Alternatively, you may clean the shaver using a brush:
• Switch off the shaver. Remove the Foil & Cutter
cassette (1) and tap it out on a flat surface. Using
a brush, clean the inner area of the pivoting head.
Do not clean the cassette with the brush as this
may damage it!
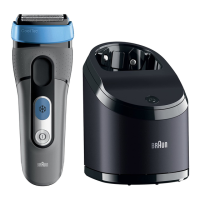
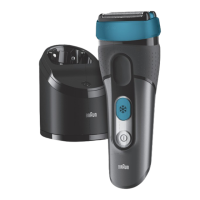
Clean&Charge station
(models CT6cc/CT5cc/CT4cc/CT3cc/CT2cc)
The Clean&Charge station has been developed for
cleaning, char
ging, lubricating, disinfecting and
storing your Br
aun shaver
.
13
Station power socket
14 Lift button for cartridge exchange
15 Station-to-shaver contacts
16a Level indicator
16b Status light
17 Start button
18 Cleaning cartridge
Installing the Clean&Charge station (see fig. E)
• Remove the protection foil from the Clean&Charge
station display.
• Press the lift button (14) at the rear side of the
Clean&Charge station to lift up the housing.
• Hold the cleaning cartridge (18) down on a flat,
stable surface (e.g. table).
• Carefully remove the lid from the cartridge.
• Slide the cartridge from the rear side into the base
of the station until it snaps into place.
• Slowly close the housing by pushing it down until it
locks.
• Using the special cord set (10), connect the
station power socket (13) to an electrical outlet.
Charging the shaver in the Clean&Charge station
Insert the shaver head down into the Clean&Charge
station.
Important: The shaver needs to be dry and free
from any foam or soap residue!
The contacts (7) on the back of the shaver need to
align with the contacts (15) in the Clean&Charge
station. Push the shaver in the correct position.
A beep sound confirms that the shaver sits properly
in the station. The Clean&Charge station will
automatically charge the shaver.
Cleaning the shaver
When the cleaning indicator
lights up in the shaver
display, insert the shaver into the Clean&Charge
station, upside down and with the front showing.
Start automatic cleaning
Start the cleaning process by pressing the start
button (17). If the status light (16b) does not shine
(Clean&Charge station switches to stand-by after
about 10 minutes), press the start button twice.
Otherwise cleaning will not start.
For best shaving results, we recommend
cleaning after each shave.
The cleaning program consists of several cycles,
where cleaning fluid is flushed through the shaver
head. The cleaning time takes 3 minutes. During this
time the status light of the Clean&Charge station
blinks.
Leave the shaver in the station for drying. It takes
several hours until remaining moisture evaporates
depending on the climatic conditions. Afterwards
the shaver is ready for use.
After completing the cleaning and charging session,
the indicators of the Clean&Charge station turn off.
Removing the shaver from the Clean&Charge
station (see fig. F)
Hold the Clean&Charge station with one hand and
tilt the shaver slightly to the front to release it.
Cleaning Cartridge / Replacement (see fig. G)
When the level indicator
lights up permanently
red, the remaining fluid in the cartridge is sufficient
for about 3 more cycles. When the level indicator
blinks red, the cartridge needs to be replaced
(about every 3–4 weeks when used daily).
After having pressed the lift button (14) to open the
housing, wait for a few seconds before removing the
used cartridge to avoid any dripping. Before
90633644_CoolTec_Japan.indd 2790633644_CoolTec_Japan.indd 27 17.09.15 13:1017.09.15 13:10
CSS APPROVED Effective Date 29Sep2015 GMT - Printed 24Nov2015 Page 27 of 32
 Loading...