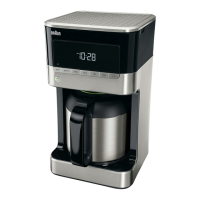
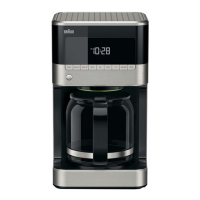
10
The AUTO ON time can be set for any
time, day or night. “PM” is displayed on
the LED for nighttime program times.
1. Place the lever in position “Coffee” or
“Drip Stop”.
2. Press AUTO ON for a minimum of 2
seconds.
3. The time of day in the display starts
flashing.
4. Press and hold SET to scroll through
the hours. Release it once the desi-
red hour is displayed.
5. To set the minutes, press AUTO ON.
The minutes in the display starts
flashing.
6. Press and hold SET to scroll through
the minutes. Release it once the
desired minutes is displayed.
7. Press AUTO ON to save the desired
time.
8. The set auto on time disappears after
a few seconds and the time of day
shows on the display.
EN Setting the AUTO ON
Time
FR Setting the AUTO ON
Time
ES Setting the AUTO ON
Time
EN Before programming, always switch
the coee maker on.
NOTE: The coffee maker features
a 60-second power loss back-up
system that remembers all program-
med information, including time of
day and auto on time in the event of a
power interruption.
FR Before programming, always switch
the coee maker on.
NOTE: The coffee maker features
a 60-second power loss back-up
system that remembers all program-
med information, including time of
day and auto on time in the event of a
power interruption.
ES Before programming, always switch
the coee maker on.
NOTE: The coffee maker features
a 60-second power loss back-up
system that remembers all program-
med information, including time of
day and auto on time in the event of a
power interruption.
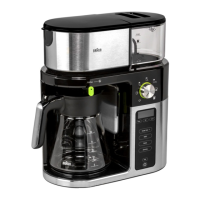
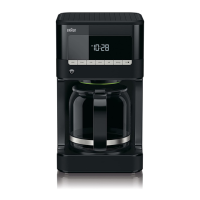
EN Programming
the Coffee Maker
FR Programming
the Coffee Maker
ES Programming
the Coffee Maker
This function can only be activated if the
AUTO ON time and the time of the day
have been set.
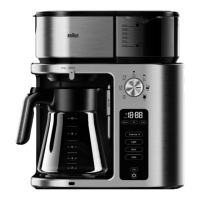
• Place the lever (E) in position “Coffee”
and select the beverage size (F).
• Place the carafe or your empty cup
underneath the brew basket outlet.
For smaller cups use the Single-serve
cup holder.
• Press AUTO ON and select the desired
taste. AUTO ON turns per manently on.
The coffee maker will start to brew at
the preset auto on time.
• The preset AUTO ON time and the
selected taste disappears after a few
seconds.
• To switch off the function, press AUTO
ON again: AUTO ON will disappear.
This function can only be activated if the
AUTO ON time and the time of the day
have been set.
• Place the lever (E) in position “Coffee”
and select the beverage size (F).
• Place the carafe or your empty cup
underneath the brew basket outlet.
For smaller cups use the Single-serve
cup holder.
• Press AUTO ON and select the desired
taste. AUTO ON turns per manently on.
The coffee maker will start to brew at
the preset auto on time.
• The preset AUTO ON time and the
selected taste disappears after a few
seconds.
• To switch off the function, press AUTO
ON again: AUTO ON will disappear.
EN Activate the AUTO ON
Time
FR Activate the AUTO ON
Time
ES Activate the AUTO ON
Time
BRAUN_UI_KF9050_BK_-_KF9070_SI_V09.indd 10 21.02.19 15:15
 Loading...