32
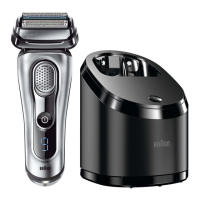
Using the C&C
Important: The shaver needs to be dry and free from any foam or soap residue!
Insert the shaver in the C&C upside down, with the front showing and released head
lock (3).
The contacts (7) on the back of the shaver need to align with the contacts (15) in the
C&C. Push the shaver in the correct position. A beep sound confirms that the shaver
sits properly in the C&C.
The C&C analyzes the hygiene status. The status is shown by the cleaning program
indicators (16c) in the C&C display (16).
Charging the shaver in the C&C
Charging will start automatically when the shaver has been placed in properly.
Cleaning the shaver in the C&C
When the cleaning indicator (5c) lights up in the shaver display, insert the shaver into
the C&C, as described above.
Cleaning programs
short economical cleaning
normal level of cleaning
high intensive cleaning
Start automatic cleaning
Start the cleaning process by pressing the start button (17). If status light (16b) does
not shine (C&C switches to stand-by after ca. 10 minutes), press start button twice.
Otherwise cleaning will not start. For best shaving results, we recommend cleaning
after each shave.
Each cleaning program consists of several cycles, where cleaning fluid is flushed
through the shaver head. Depending on your Clean&Charge Station model and/or
program selected, the cleaning time takes up to 3 minutes. During this time the status
light blinks. Leave the shaver in the station for drying. It takes several hours until
remaining moisture evaporates depending on the climatic conditions.
After completing the cleaning and charging procedure, all indicators turn off.
Removing the shaver from the C&C
Hold the C&C with one hand and tilt the shaver slightly to the front to release it.
90725907_Series_5-2_w&d_Japan.indd 3290725907_Series_5-2_w&d_Japan.indd 32 13.06.19 14:2213.06.19 14:22
Business Use - P&G AUTHORIZED POA-00139891 Rev 001 Effective Date 2019-06-19 Printed 2022-12-14 Page 32 of 40
 Loading...
