15
indicated in the battery compartment.
3. Close the compartment with the cover.
AC Adapter installation
NOTE!
Please make sure your household voltage match with the
voltage supported by the AC/DC adapter (power input: 110-
240V), or it will damage your clock and adaptor
1. Insert the USB-A plug of the power cord into the USB
socket of the AC/DC adapter.
2. Insert the USB Micro-B plug of the power cord into the
USB power socket of the alarm clock.
3. Plug the power connector into the wall socket.
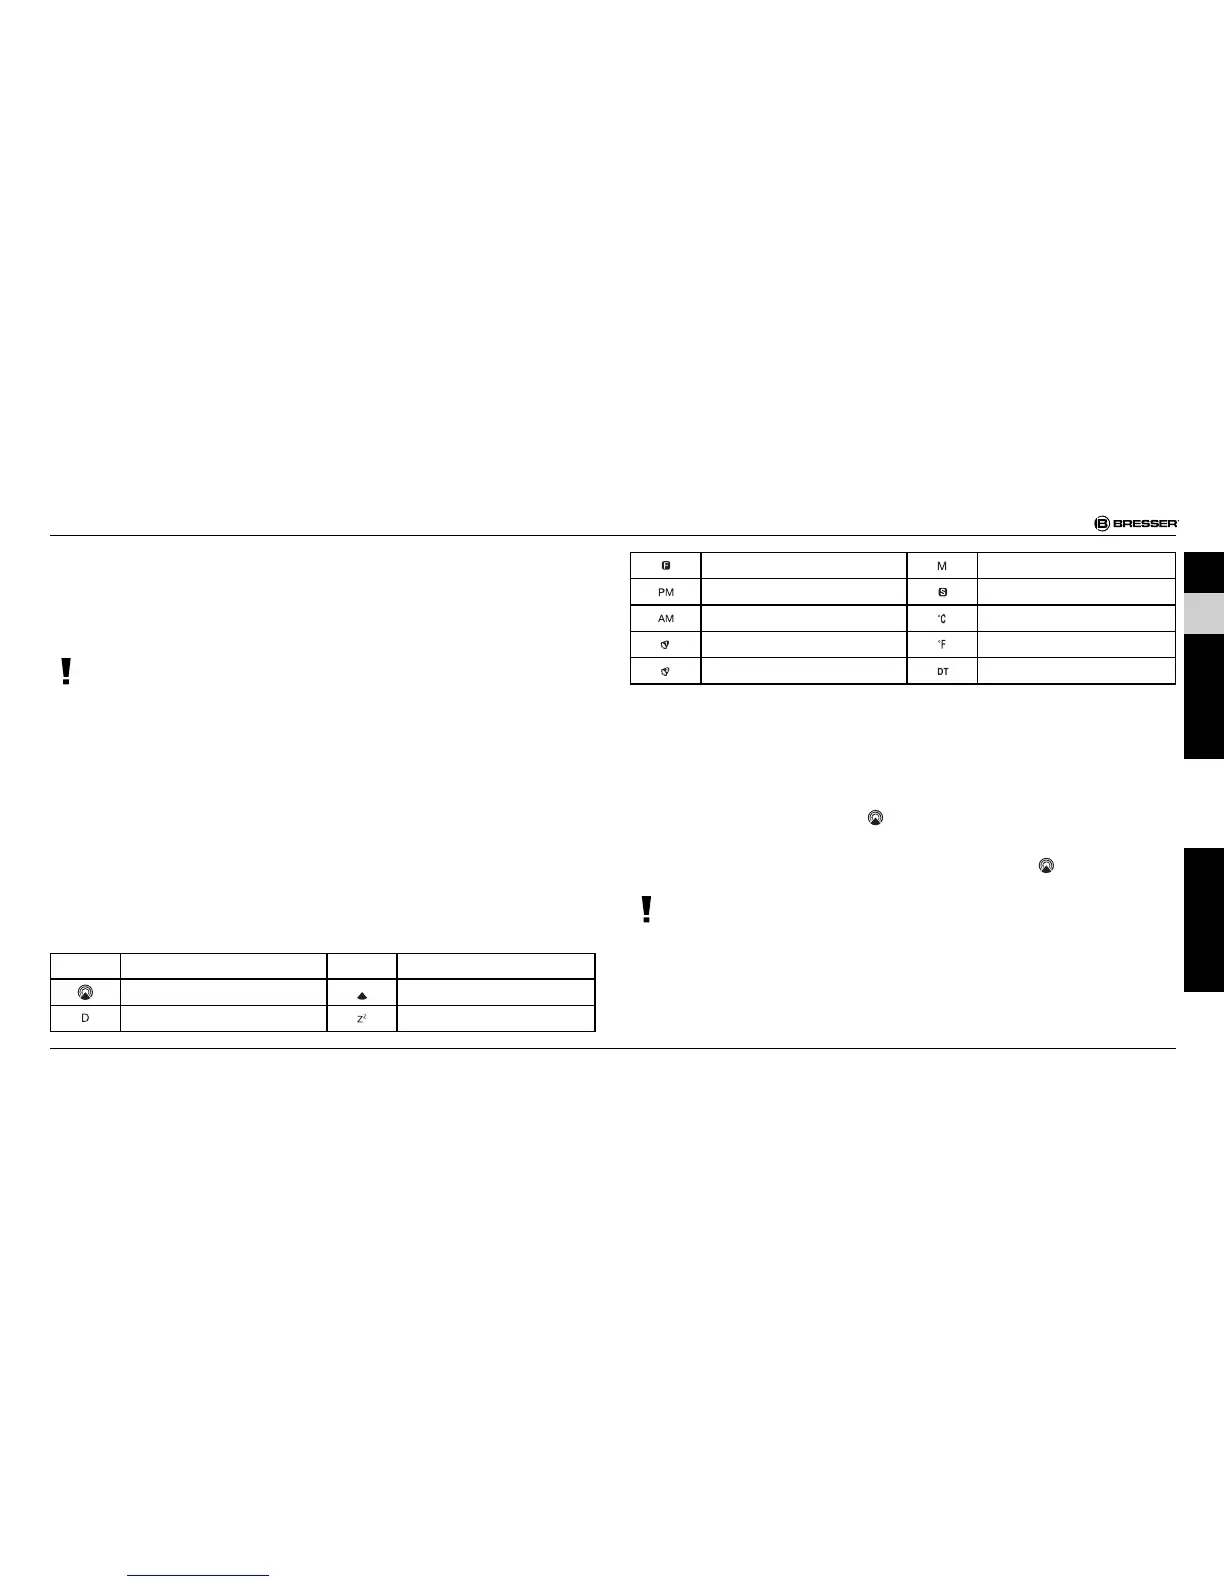
SYMBOL EXPLANATION
Symbol Description Symbol Description
Radio signal Radio signal weakly
Date Repeat alarm indication
Foreign time indication Month
PM (12 hr display only) Summer time indication
AM (12 hr display only)) Degree Celsiuss
Alarm 1 Degree Fahrenheit
Alarm 2 Dual time
TURNING ON THE DEVICE
1. After the batteries are installed, the LCD will turn on. The
clock will automatically search the radio signal**. It takes
about 3-5 minutes to finish this process. During the search
process the signal icon
is blinking.
2. If the radio signal is received, the date & time will be set
automatically with radio control signal icon
turns on.
NOTE!
Besides, you can force the clock to receive the signal by
pressing WAVE/°C/°F for 3 seconds. It will take 3-5 minutes
to receive the radio signal.
3. If the clock fails to receive the time signal, the radio control
DE
GB
FR
IT
ES
Garantie / Warranty
 Loading...